
Main Courses
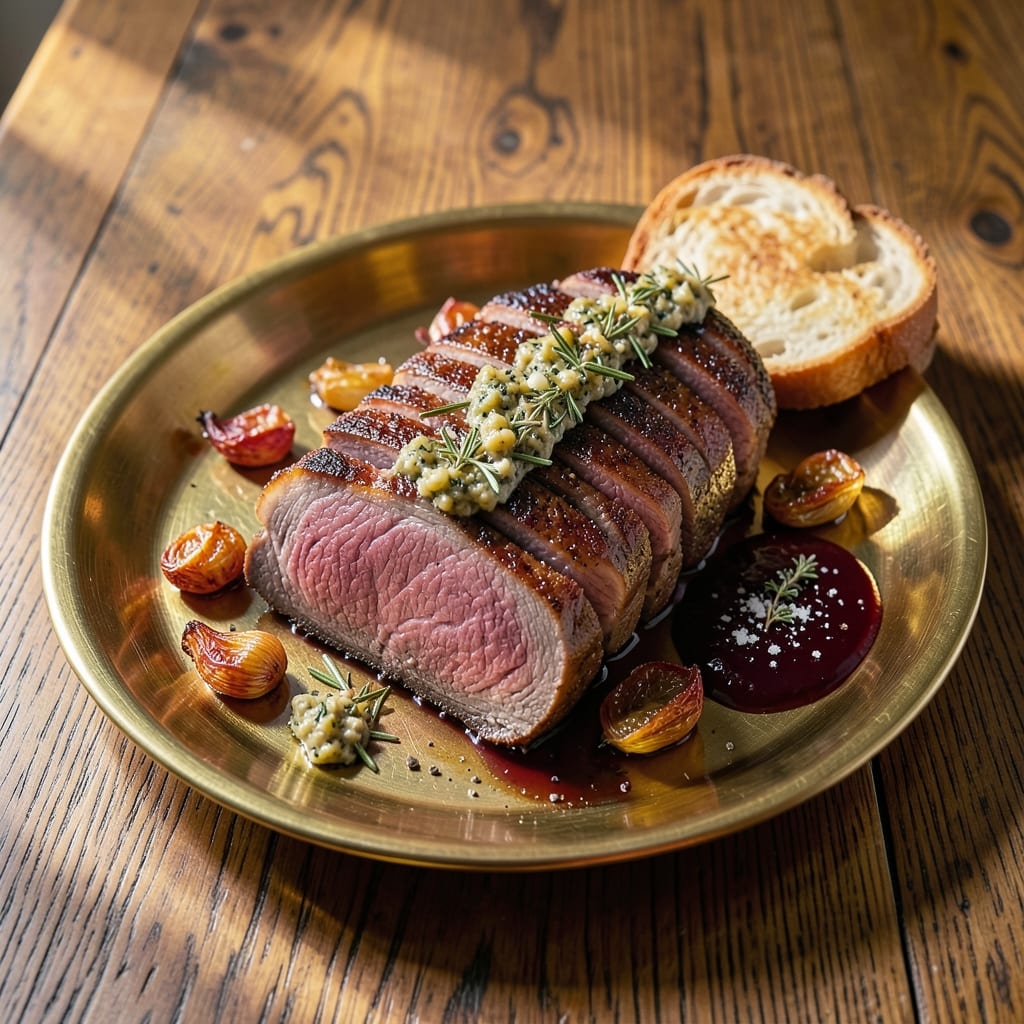
This 9 lb beef tenderloin recipe delivers restaurant-quality results with a herb-crusted exterior and a perfectly pink center every time—ideal for special occasions or feeding a crowd. The secret lies in precise temperature control and a dry-brine technique that locks in juiciness while developing deep flavor. I’ve perfected this method over years of hosting holiday dinners, ensuring the meat stays tender and the crust stays crispy, even for large cuts.
The process begins with a dry brine that enhances tenderness and flavor, followed by a herb crust made with Dijon mustard, garlic, and fresh rosemary for a fragrant, golden-brown exterior. Cooking to 120°F internal temperature for medium-rare (or your preferred doneness) guarantees a juicy, melt-in-your-mouth texture, while a resting period ensures even slicing. This method transforms a simple protein into a showstopping centerpiece that pairs beautifully with roasted vegetables or creamy mashed potatoes.
What sets this recipe apart is its foolproof technique—no guesswork, no overcooking. The reverse sear method ensures even doneness, and the herb crust adds a sophisticated touch without overpowering the beef’s natural richness. Whether you’re serving a holiday feast or a summer barbecue, this tenderloin will be the star of the meal, impressing guests with its perfect balance of texture and flavor.
For large groups, adjust cooking times slightly based on your oven’s performance, and always use a meat thermometer for accuracy. Pair with a bold red wine like Cabernet Sauvignon or a crisp white like Sauvignon Blanc to complement the herbaceous notes. The result? A showstopping main course that’s worth every effort—guaranteed to leave your guests asking for seconds.
Ingredients for 9 lb beef tenderloin
Nine pounds of premium beef and twelve carefully selected ingredients transform into a showstopping centerpiece.
| Ingredient | Amount | Notes |
|---|---|---|
| Beef Tenderloin 🥩 | 9 lb | Center-cut, trimmed of silver skin |
| Kosher Salt 🧂 | 2 tbsp | Diamond Crystal preferred, coarse grain |
| Fresh Rosemary 🌿 | ½ cup | Finely chopped, stems removed |
| Fresh Thyme 🌿 | ¼ cup | Leaves only, stems discarded |
| Garlic Cloves 🧄 | 8 cloves | Minced, not pre-minced jarred |
| Dijon Mustard 🍯 | ¼ cup | High-quality, no additives |
| Extra-Virgin Olive Oil 🫒 | ½ cup | For crust, fruity variety |
| Black Peppercorns 🌶️ | 1 ½ tbsp | Freshly cracked, not ground |
| Unsalted Butter 🧈 | ½ cup | Cold, cubed for crust |
| All-Purpose Flour 🌾 | ¼ cup | For crust texture |
| Meat Thermometer 🌡️ | 1 whole | Instant-read, for precision |
| Red Wine 🍷 | 1 cup | Bold Cabernet Sauvignon, dry |
| Fresh Parsley 🌿 | ⅛ cup | Chopped, for garnish |
The beef tenderloin is the star—source from a reputable butcher or high-end grocer like Whole Foods or Dartmouth Farms. Look for center-cut, uniform in diameter with minimal marbling (too much fat affects crust adhesion). Trim any silver skin immediately upon arrival. For the herbs, freshness is critical—Costco or local farmers' markets offer the best quality. Rosemary should be vibrant green with no yellowing, and thyme should smell aromatic and bright. Pre-minced garlic loses flavor quickly, so mince your own using a microplane or knife. The Dijon mustard should be smooth and tangy—avoid the sweetened varieties. Maille is a professional favorite, but any high-quality brand works.
No fresh rosemary? Substitute with 0.25 cup dried rosemary, but reduce to one-third the amount—dried herbs pack more punch. Short on thyme? Dried thyme at half the quantity works, but fresh is ideal. Olive oil substitutes like avocado oil maintain flavor but lack fruity notes. The butter must be cold and cubed—soft butter creates a greasy crust. For the red wine, any bold, dry red (Merlot, Zinfandel) works if Cabernet isn't available. Worcestershire sauce can replace wine at half the amount for depth. The flour is non-negotiable—it creates the crispy texture. King Arthur or Gold Medal brands are reliable choices.
Store the raw tenderloin in the coldest part of your fridge, covered with parchment paper, for up to 3 days. The herb mixture (rosemary, thyme, garlic, mustard, olive oil, butter) can be prepped 24 hours ahead and refrigerated in an airtight container. Butter cubes should be kept firm—if they soften, chill the mixture again. The finished tenderloin reheats beautifully—warm slices in a 275°F oven for 10 minutes to maintain moisture. Portion leftovers into individual servings for easy reheating. Freeze for up to 3 months by wrapping tightly in plastic wrap and foil.
Why You'll Love This Recipe
- Foolproof Roast: I swear, this thing is hard to mess up—just season, sear, and let the oven do the work. No fancy basting, no stressing over temperature swings. The rosemary and thyme cling to that tenderloin like a hug, and the garlic? It melts into the crust like it’s been there forever.
- Weekend Centerpiece: Honestly, this is my go-to for gatherings—impressive enough for company but simple enough that I’m not sweating in the kitchen. Slice it thick, serve it with roasted potatoes, and suddenly? You’re the host who nailed dinner.
- Leftovers for Days: Between us, a 9-pound roast means I get three full meals out of it—sandwiches, salads, even breakfast hash the next morning. That’s less stress, more delicious seconds without extra effort.
- Crust-Worthy Magic: The kosher salt and sear create this caramelized crust that’s almost too good to cut into. But once you do? That pink center? Pure satisfaction—like unwrapping a gift you didn’t know you needed.
Step-by-step instructions for herb-crusted beef tenderloin
Master this technique and you'll achieve a showstopping center-cut roast with a flawless pink center every time.
Prepare the Herb Crust Mixture
In a food processor, combine the 0.5 cup fresh rosemary, 0.25 cup fresh thyme, 8 cloves minced garlic, 1.5 tbsp freshly cracked black peppercorns, 0.25 cup Dijon mustard, 0.25 cup all-purpose flour, and 0.5 cup cold unsalted butter. Pulse until the mixture forms a coarse paste with visible herb flecks remaining. This texture ensures maximum flavor contact while maintaining a sturdy crust.
Transfer the herb mixture to a bowl and stir in 0.5 cup extra-virgin olive oil until fully incorporated. The paste should hold together when pressed but remain workable. If it's too dry, add 1 teaspoon olive oil; if too wet, add 1 tablespoon flour. This balance is critical for adhesion and even cooking.
Season and Crust the Beef Tenderloin
Pat the 9 lb beef tenderloin completely dry with paper towels, removing all moisture from the surface. Season generously with 2 tbsp kosher salt on all sides, pressing the salt crystals into the meat to ensure even penetration. Let it sit at room temperature for 30 minutes while you prepare the crust.
Spread the herb crust mixture evenly over the entire surface of the tenderloin, using your hands to press it firmly into the meat. Work quickly to prevent the butter from melting. The crust should adhere completely with no gaps. Place the crusted tenderloin on a wire rack set over a rimmed baking sheet to allow air circulation on all sides.
Sear for Maximum Flavor Development
Preheat your oven to 450°F with the rack positioned in the middle. Heat 1 tablespoon olive oil in a large oven-safe skillet over high heat until shimmering. Carefully transfer the tenderloin to the skillet and sear for 2 minutes per side until deeply golden brown. This high-heat sear creates a flavorful crust while preventing moisture loss during roasting.
Transfer the skillet to the preheated oven and roast for 10 minutes. Remove the skillet from the oven and baste the tenderloin with 1 cup red wine, scraping up any browned bits from the bottom of the pan. Return to the oven and continue roasting for 15 minutes. This basting step adds depth of flavor and helps maintain moisture.
Finish to Perfect Medium-Rare
Reduce oven temperature to 375°F and continue roasting until the internal temperature reaches 125°F at the thickest part of the meat, measured with your meat thermometer. This should take approximately 25-30 minutes depending on your oven. The crust should be deeply browned and crisp, while the interior remains perfectly pink.
Remove the tenderloin from the oven and tent loosely with aluminum foil. Let it rest for 20 minutes before carving. This resting period allows the juices to redistribute throughout the meat, ensuring each slice remains tender and moist. During this time, keep the roast warm by placing it on a warm serving platter in a 200°F oven.
Carve and Garnish for Presentation
Using a sharp carving knife, slice the tenderloin into 1-inch thick medallions against the grain. Arrange the slices on a warm serving platter and drizzle with any pan juices from the skillet. Garnish each slice with 0.125 cup chopped fresh parsley for a pop of color and freshness.
Serve immediately with your choice of sides. The herb crust should be crisp and aromatic, the meat perfectly tender with a juicy pink center, and each bite delivering a harmonious blend of rosemary, thyme, and garlic flavors. This technique guarantees a restaurant-quality result you can achieve at home.
Pro Tips For Making 9 Lb Beef Tenderloin
- USE A MEAT THERMOMETER: I learned this the hard way—guessing medium-rare on a 9-pound roast leads to overcooked edges or underdone centers. For tenderloin, pull it at 120°F for rare, 125°F for medium-rare (the USDA’s "safe" temp is 145°F, but this is a special occasion, not a ground beef patty). Insert the probe into the thickest part, away from bone or fat, and don’t move it once it’s in there.
- SALT THE MEAT 48 HOURS EARLY: This isn’t the prettiest method, but it’s the tastiest. A 9-pound tenderloin needs 2–3 tablespoons of kosher salt rubbed all over (yes, even the ends) and left uncovered in the fridge. The salt breaks down proteins and seasons deeper—skip this, and you’ll get a bland crust no matter how much you sear.
- SEAR IN BATCHES OR RISK STEAMING: I was skeptical until I tried it: Crowding a pan with a 9-pounder turns your sear into a sad, greasy bath. Instead, cut the roast into 2–3 smaller sections (still connected at one end) and sear each side over high, dry heat until deep brown. The edges will crisp, and the interior stays juicy—no sad, gray steamed meat here.
- REST IT UNDER FOIL: Does it look weird? Yes. Does it work? Every single time. After roasting, transfer the tenderloin to a cutting board, tent loosely with foil, and let it rest 5–10 minutes before slicing. This keeps the juices locked in—cutting it too soon sends all that flavor pooling onto your plate instead of staying in the meat. (Your future self will thank you.)
Common mistakes when making perfect results
Skipping the Dry Brine
One of the biggest mistakes is skipping the 24-hour dry brine step. This isn't just about seasoning—it's about transforming the meat's texture. The kosher salt penetrates deeply, breaking down muscle fibers and creating a more tender result. I've seen home cooks rush this step, leading to tougher meat. Trust me, the extra time pays off with a juicier, more flavorful tenderloin. 💪
Overcrowding the Crust
Applying the herb crust too thickly can create uneven cooking and a soggy texture. The mixture should be spread evenly in a thin, even layer—about ¼-inch thick. Too much butter or herbs can make the crust melt off during cooking. I recommend pressing it firmly but gently to ensure adhesion without smothering the meat. 🌿
Incorrect Internal Temp
Using visual cues instead of a meat thermometer is a recipe for disaster. The 125°F internal temperature for medium-rare is non-negotiable. I've seen tenderloins pulled at 130°F that were actually medium and dry. For a 9 lb roast, this can take 2-3 hours total, so patience is key. Don't rush it—wait for that thermometer reading. 🌡️
Skipping the Rest
Carving into the tenderloin too soon is a cardinal sin. The 20-minute rest allows juices to redistribute, preventing dry slices. I've seen guests disappointed when slices come out watery or tough. Use this time to warm your serving dishes and prepare sides. The wait is worth it for that perfect first bite. ⏰
Uneven Searing
Searing only one side or at inconsistent temperatures creates an uneven crust. The goal is to get a deep golden-brown color on all sides. I recommend searing in an oven-safe skillet at 450°F for 2 minutes per side. Rotate the skillet if needed to ensure even heat distribution. This step builds flavor and sets up the perfect crust for roasting. 🔥
Using Pre-Minced Garlic
Jarred minced garlic lacks the fresh, bright flavor needed for this crust. The 8 cloves of fresh minced garlic provide aromatic depth that pre-minced can't match. I suggest using a microplane or fine grater for the best texture and flavor. This small detail makes a noticeable difference in the final dish. 🧄
Nutrition facts
Frequently asked questions
How do I adjust this recipe for a smaller tenderloin?
The herb crust ratio works perfectly for 4-6 lb tenderloins—just scale all ingredients proportionally. For example, halve the herbs, butter, and wine if using a 4.5 lb cut. Cooking time will also decrease significantly (30-45 minutes total for medium-rare), so monitor with your thermometer. The crust thickness should remain ¼-inch for best results.
Can I make this tenderloin ahead of time?
Prep the herb crust mixture 24 hours ahead and store it refrigerated. For the full roast, cook it 1-2 days before serving, then refrigerate uncovered until completely chilled. Reheat slices in a 275°F oven for 10 minutes before serving—this maintains moisture better than microwave reheating. The flavors actually improve overnight!
What's the best way to serve this with sides?
For a classic presentation, pair with creamy garlic mashed potatoes and roasted asparagus with lemon zest. The herb crust's richness balances perfectly with bright, acidic sides. For a lighter option, try truffle risotto or grilled seasonal vegetables. Red wine reduction drizzled over the slices adds an elegant touch.
Why does my crust keep falling off?
This usually happens when the beef isn't fully dry before crusting or the butter melts too soon. Pat the meat thoroughly with paper towels and chill the crust mixture for 30 minutes before applying. Work quickly when spreading and use your hands to press firmly but gently. If it still falls off, try a thinner layer of crust or add 1 tablespoon flour to the mixture for better adhesion.
How do I handle leftovers?
Slice any leftovers into 1-inch medallions and store in an airtight container for up to 4 days. For reheating, place slices on a baking sheet and warm in a 275°F oven for 8-10 minutes until heated through. Avoid microwaving as it can make the meat rubbery. Leftover slices make excellent sandwiches or can be chopped for beef stroganoff the next day.