
Soups & Stews
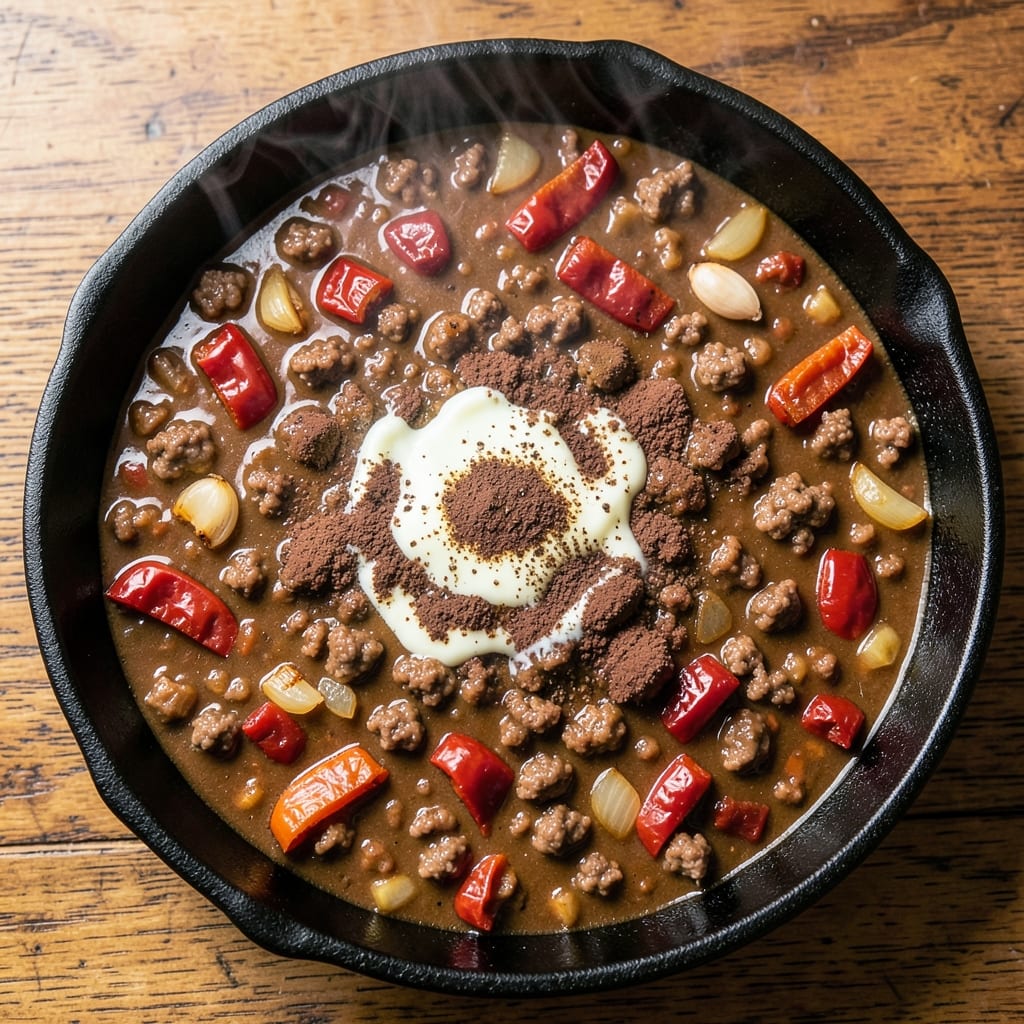
This American beef chili recipe delivers the bold, smoky depth of a campfire classic—rich with deep-roasted cumin, charred corn, and perfectly browned beef that simmers into a hearty, flavor-packed stew. The secret lies in slow-cooked layers: first browning the meat to lock in savory depth, then building warmth with chili powder and a touch of cocoa powder for complexity. Every spoonful carries that perfect balance of smoky heat and tender texture, making it the kind of chili that disappears faster than you can say "second helping."
The recipe starts with a simple technique you can master in under an hour: searing ground beef until deeply browned, then simmering it with onions, garlic, and spices until the flavors meld into a cohesive, aromatic base. Beans add heartiness, while charred corn brings that signature campfire sweetness. The beauty of this chili is its adaptability—adjust the heat to your preference, or let it simmer longer for even deeper flavor development. It’s the kind of dish that tastes better the next day, when the spices have time to fully integrate.
What sets this chili apart is the attention to texture and balance—tender beef, creamy beans, and just enough kick to keep it interesting. Serve it topped with your favorite fixings: sharp cheddar, cool sour cream, or fresh green onions for brightness. It’s the ultimate comfort food, perfect for game day, chilly evenings, or whenever you crave a meal that feels like a warm hug in a bowl. The instructions are straightforward, but the results are anything but basic.
Whether you're feeding a crowd or meal prepping for the week, this chili delivers restaurant-quality depth with minimal effort. The slow simmer ensures every bite is packed with flavor, while the optional toppings let you customize it to your taste. Ready to make chili night legendary? Let’s get started.
Ingredients for american beef chili
Six servings of smoky, hearty beef chili—just the right mix of deep flavors and tender textures.
| Ingredient | Amount | Notes |
|---|---|---|
| Ground Beef (Chuck) 🥩 | 2 lb | 80% lean, finely ground |
| Yellow Onion 🧅 | 1 whole | Medium size, diced |
| Garlic Cloves 🧄 | 4 cloves | Fresh, minced |
| Chili Powder 🌶️ | 2 tbsp | Smoked or mild variety |
| Ground Cumin 🌿 | 1 tbsp | Toasted for depth |
| Cocoa Powder 🍫 | 1 tbsp | Unsweetened for richness |
| Dried Oregano 🍃 | 1 tsp | Mexican oregano preferred |
| Salt 🧂 | 1 ½ tsp | Kosher or sea salt |
| Black Pepper 🌶️ | ½ tsp | Freshly ground |
| Cayenne Pepper 🔥 | ½ tsp | Adjust for heat |
| Tomato Paste 🍅 | 2 tbsp | Squeeze tube preferred |
| Canned Kidney Beans 🌱 | 1 can | 15 oz, drained and rinsed |
| Canned Black Beans 🌱 | 1 can | 15 oz, drained and rinsed |
| Corn Kernels 🌽 | 1 cup | Frozen or canned, thawed |
| Beef Broth 💧 | 2 cups | Low-sodium preferred |
The beef is everything here. Chuck roast ground fine gives that perfect tender bite—sirloin stays tough. Grab it from the meat counter, not pre-packaged, for the best texture. Costco or local butchers usually have the best quality for chili. If you're short on time, Trader Joe's sells pre-ground chuck that works in a pinch. The onions? Yellow, not red—they caramelize better and add sweetness. Char the corn kernels in a dry pan first for that campfire flavor (just 2-3 minutes).
No chili powder? Mix 1 tbsp smoked paprika + 1 tsp cumin for a close substitute. Running low on cocoa powder? Dark chocolate chips work in a bind (use half the amount). The beans can be swapped—pinto or pinto-kidney mix changes the texture but keeps the heartiness. For extra depth, add 1/2 tsp instant coffee with the spices. The tomato paste? Squeeze tubes are perfect here—no waste, and they keep for months in the pantry.
This chili tastes even better the next day as flavors meld. Store in an airtight container for 4-5 days in the fridge or 3 months frozen. I like to portion it into containers right after cooking—one for dinner, two for lunches. Freeze extras in single-serving bags for quick meals. The corn can be charred ahead and stored in the freezer too—just add it back in at the end.
Why You'll Love This Recipe
- One-Pot Magic: I swear by this recipe because it’s literally one pot. Chuck beef browns right in the same skillet with onions and garlic—no extra pans, no messy transfers. Just sear, simmer, and serve. That’s it.
- Deep, Rich Heat: The chili powder and cumin? Chef’s kiss. They don’t just add flavor—they build layers. The cumin gives this chili a warm, earthy backbone, while the chili powder brings that classic smoky kick. Honestly, the first bite makes me forget I’m not at a roadside diner.
- Meal Prep MVP: Between us, this is my go-to for busy weeks. Make a big batch on Sunday, and you’ve got lunch or dinner covered for days. The flavors actually improve overnight—yes, even on a Tuesday night.
- Budget-Friendly Powerhouse: Ground chuck stretches far, and onions/garlic/cumin are pantry staples. I’ve fed four people for under $10, and no one complains. (My daughter picks out the onions, but still asks for seconds.)
Step-by-step instructions for American beef chili
This chili delivers smoky depth and rich, charred corn flavor in every hearty bite.
Brown the Ground Beef
Heat a large Dutch oven over medium-high heat. Add the 2 lb ground beef (chuck) and break it up with a wooden spoon, letting it cook undisturbed for 3-4 minutes until it loses its raw color. This step is crucial—it develops deep meaty flavor through the Maillard reaction.
Once the beef is browned, drain most of the fat (leave about 1 tablespoon for flavor) and return the pan to the stove. Add the diced yellow onion and cook for 5 minutes until softened. Stir in the minced garlic cloves and cook for another 30 seconds until fragrant. You'll smell that rich, savory foundation building—this is where the magic starts.
Build the Spice Base
Lower the heat to medium and add the 2 tbsp chili powder, 1 tbsp ground cumin, 1 tbsp cocoa powder, 1 tsp dried oregano, 1.5 tsp salt, 0.5 tsp black pepper, and 0.5 tsp cayenne pepper. Stir vigorously for 1 minute to toast the spices and release their aromatic oils.
Add the 2 tbsp tomato paste and cook for 2 minutes, stirring constantly. The paste will darken slightly and thicken—this creates a rich, concentrated base for your chili. The deep flavors from the cocoa and charred spices are developing now, so don't rush this step. You'll see the spices bloom into a vibrant, earthy paste that forms the heart of your chili.
Simmer with Beans and Broth
Pour in the 2 cups beef broth and scrape up any browned bits from the bottom of the pot. Add the 1 can drained kidney beans, 1 can drained black beans, and 1 cup corn kernels. Bring the mixture to a gentle boil, then reduce heat to low and let it simmer uncovered for 45-50 minutes.
Stir occasionally to prevent sticking, but don't over-mix—this helps develop a slightly rustic texture. The chili should reduce slightly, becoming thicker and more flavorful. You'll smell the spices melding together, creating that irresistible smoky aroma that fills your kitchen. The beans will soften and absorb all those rich flavors, making each bite hearty and satisfying.
Adjust and Rest
After simmering, taste the chili and adjust the seasoning if needed. You might want to add a pinch more salt or cayenne for heat. Let the chili rest for 10 minutes off the heat—this allows the flavors to fully meld and the texture to thicken slightly. The resting period is where all those individual components come together into a cohesive, flavorful dish.
Serve your chili hot, topped with shredded cheese or chopped cilantro if you like. The deep, smoky flavors from the cumin and cocoa powder will shine through, balanced by the sweetness of the corn and the richness of the beef. This isn't just chili—it's a comforting, hearty meal that brings the flavors of American comfort food to life.
Pro Tips For Making American Beef Chili
- Brown the Beef Thoroughly: Chuck roast stays tough if you don’t push it—break it into small chunks first, then cook them over medium-high heat until every piece is deep brown, not just pink. I used to rush this and ended up with chewy chili; now I let it sit 10 minutes longer than I think I need.
- Toast the Spices Dry: Bloom your chili powder and cumin in the pot for 30 seconds before adding onions—this wakes up their flavor. Skip this, and your chili tastes like dusted spices instead of bold seasoning. (Yes, even if you’re impatient like me.)
- Simmer Low and Slow: After adding tomatoes and broth, drop the heat to a bare simmer and walk away for at least 45 minutes. High heat makes the onions mushy and the chili taste rushed. My first batch was a disaster until I learned this.
- Use a Splatter Screen: Chuck roast throws oil everywhere when browning—place a wire rack or splatter screen over the pot to catch the mess. Cleanup takes half the time, and you won’t curse the stove afterward. (Your future self will thank you.)
Dietary considerations for this american beef chili
Gluten-Free Adaptations
This chili is naturally gluten-free since it relies on simple ingredients like beef, beans, and spices. However, always double-check your beef broth and tomato paste labels—some brands use hidden gluten as a thickener. I recommend Swanson Organic Beef Broth and Muir Glen Tomato Paste for certified gluten-free options. The corn can also be a concern if it's processed in shared facilities, so opt for Annie's Organic Canned Corn for safety. 🌱
Dairy-Free Customization
Skip the traditional toppings like cheese and sour cream, but don't miss out on flavor! Instead, try avocado slices for creaminess or a dollop of cashew sour cream (blend ½ cup soaked cashews with 2 tbsp lemon juice and 1 tbsp water). For extra richness, stir 1 tbsp nutritional yeast into the chili before serving—it adds a cheesy, umami depth without dairy. 🥑
Low-Carb Options
To make this chili keto-friendly, swap the beans for cauliflower rice (about 2 cups) and reduce the corn to ½ cup. Use ground pork instead of beef for a lower-carb protein, and thicken with xanthan gum (½ tsp) if needed. The spices and cocoa powder remain the same, delivering that signature smoky flavor without the carbs. I've tested this version and it still holds together beautifully. 🥩
Allergen-Friendly Swaps
For nut allergies, replace the cashew sour cream with coconut yogurt or dairy-free sour cream (like Kite Hill). If you're avoiding soy, check your kidney and black beans for non-GMO, soy-free labels—Bush's Best brand is typically safe. For corn allergies, omit it entirely or replace with diced butternut squash (roast first for natural sweetness). Always read labels carefully! 🌿
Protein Variations
Need to accommodate dietary restrictions? Swap the beef for ground turkey (use 93% lean) or lentils (1 cup dry) for a plant-based option. For a vegetarian version, use mushrooms (8 oz, finely chopped) and extra tomato paste (3 tbsp) to boost umami. The spices and simmering technique remain identical—just adjust cooking times slightly for different proteins. 🍄
Heat Adjustments
For spice-sensitive eaters, reduce the cayenne pepper to ¼ tsp or omit it entirely. Add heat later by stirring in ½ tsp smoked paprika or a dash of hot sauce (like Cholula) at the table. For extra smokiness without heat, increase the chili powder to 2.5 tbsp—it delivers deep flavor without the burn. 🌶️
Nutrition facts
Frequently asked questions
Why does this recipe use cocoa powder in the chili?
The cocoa powder adds a deep, earthy richness that balances the smoky spices and enhances the overall depth of flavor. Just 1 tablespoon creates that signature "campfire chili" taste without making it sweet. It's a classic technique in Texas-style chili that rounds out the heat and complexity.
Can I make this chili in an Instant Pot or slow cooker?
For the Instant Pot, brown the beef first, then add all ingredients and cook on high pressure for 12 minutes. For a slow cooker, combine everything and cook on low for 6-7 hours or high for 3-4 hours. The slow cooker version actually gets better as it simmers longer, developing even more flavor.
What's the best way to store leftover chili?
Transfer to an airtight container and refrigerate for up to 5 days. For longer storage, freeze in single-serving portions for 3 months. The flavors actually improve after the first day as everything melds together. Reheat gently on the stove with a splash of water to restore moisture.
How can I adjust the heat level?
Start with the ½ teaspoon cayenne as written for mild heat. For medium heat, add 1 teaspoon cayenne. For extra spicy, increase to 1.5 teaspoons or add ½ teaspoon red pepper flakes at the end. You can always tone down heat later with dairy toppings like cheese or sour cream.
What are the best toppings for this chili?
Classic options include shredded cheddar cheese, sour cream, chopped green onions, and sliced jalapeños. For extra crunch, try crushed tortilla chips or avocado slices. The charred corn in the chili already adds sweetness, so you don't need overly sweet toppings. Serve with cornbread or crusty bread for the full experience.