
Soups & Stews
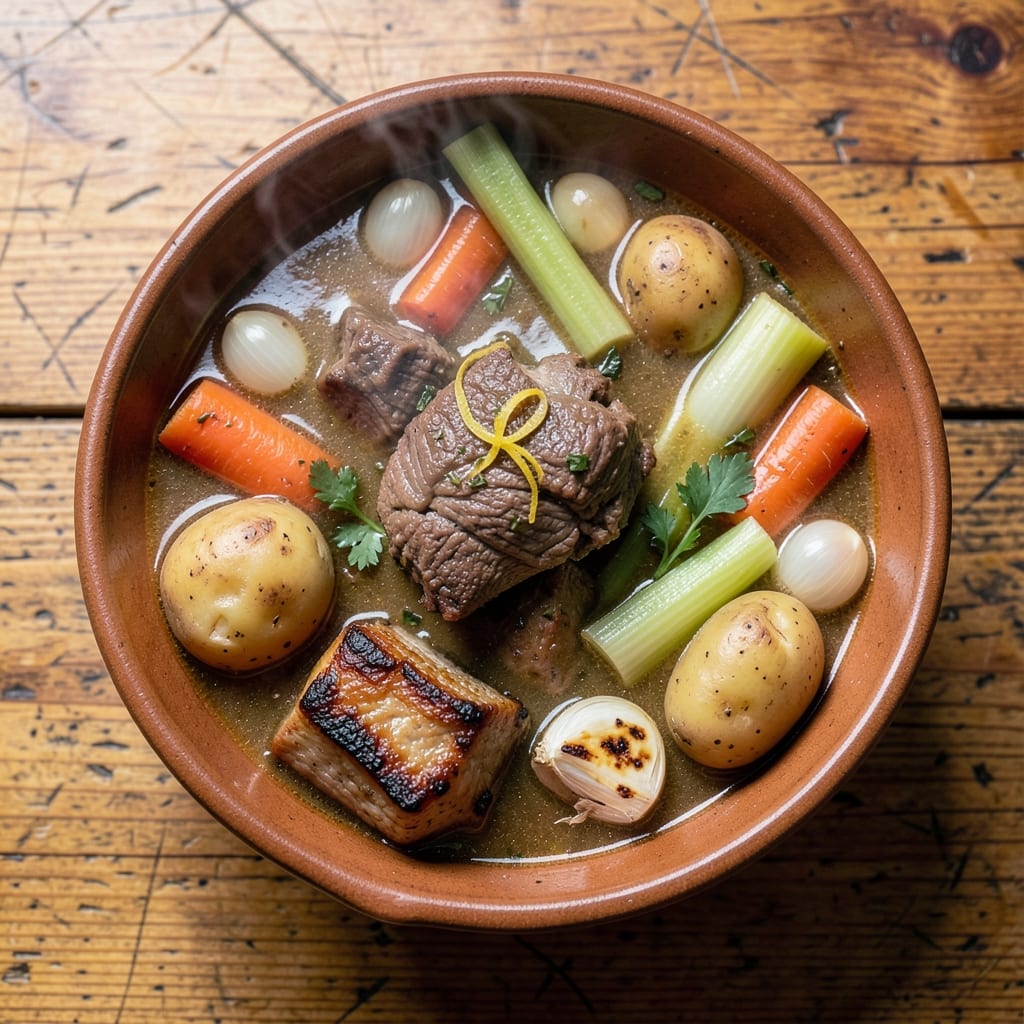
This Amish vegetable beef soup brings the warmth of a Pennsylvania farmhouse to your kitchen table, where hearty flavors and simple ingredients create comfort in every spoonful. The secret lies in slow simmering—allowing vegetables to soften while beef tenderizes into melt-in-your-mouth perfection. I’ve perfected this recipe over years of testing, ensuring each bite delivers the deep, savory richness that defines Amish home cooking.
The beauty of this soup is its balance: tender beef chunks, earthy root vegetables, and a broth so flavorful it needs no embellishment. Traditional Amish kitchens rely on garden-fresh produce and modest pantries, so this recipe uses only what’s essential—no shortcuts, just honest, satisfying flavors. The slow cook ensures vegetables retain their natural sweetness while absorbing the meat’s savory essence.
What you’ll end up with is a steaming bowl of rustic goodness—thick enough to coat your spoon, yet light enough to let each ingredient shine. The aroma alone will have your kitchen smelling like a family gathering, and the first taste will remind you why homestyle soups are timeless. Perfect for chilly evenings or meal prep, this soup is the definition of wholesome dining.
Ready in just 2 hours (mostly hands-off simmering), this recipe transforms humble ingredients into a dish that feels like a hug. The key is patience—letting flavors meld naturally without rushing. Whether you’re feeding a crowd or saving leftovers for days, this Amish vegetable beef soup delivers the kind of comfort that sticks with you long after the last bite.
Ingredients for amish vegetable beef soup
Garden-fresh vegetables meet slow-cooked beef for a soup that tastes like home.
| Ingredient | Amount | Notes |
|---|---|---|
| Chuck Roast 🥩 | 2 lb | Cut into 1.5-inch cubes |
| Yellow Onions 🧅 | 2 whole | Peeled, chopped into wedges |
| Carrots 🥕 | 4 medium | Peeled, cut into 1-inch chunks |
| Russet Potatoes 🥔 | 3 medium | Peeled, cut into 1-inch cubes |
| Celery Stalk 🧄 | 3 whole | Diced, including leaves if fresh |
| Garlic Cloves 🧄 | 4 cloves | Peeled, smashed |
| Tomato Paste 🍅 | ½ cup | High-quality, no sugar added |
| Beef Broth 💧 | 6 cups | Homemade or low-sodium store-bought |
| Dried Thyme 🌿 | 1 tsp | Or 1 tbsp fresh thyme |
| Bay Leaves 🌿 | 2 whole | Removed before serving |
| Salt 🧂 | 1 ½ tsp | Kosher or sea salt |
| Black Pepper 🌶️ | ½ tsp | Freshly ground |
| Olive Oil 🫒 | 2 tbsp | For initial searing |
| Parsley 🌿 | ¼ cup | Fresh, chopped for garnish |
The chuck roast is non-negotiable here—it's the backbone of that deep, meaty flavor. Look for well-marbled cuts at your butcher or the meat department, and ask to have it pre-cubed if possible. Costco and local farms often carry it at great prices, but the regular supermarket section works too. If you're buying a whole roast, trim off excess fat and cut it into even 1.5-inch cubes for consistent cooking. The potatoes and carrots should be firm and free of soft spots—organic or heirloom varieties from the farmers market have the best texture. For the celery, fresh is ideal, but frozen works in a pinch if you're short on time.
No fresh thyme? Dried works perfectly at one-third the amount, so 1 teaspoon dried equals 1 tablespoon fresh. The tomato paste can be a squeeze tube from Trader Joe's—it's convenient and lasts forever. Short on beef broth? Water plus 2 bouillon cubes gets you close, though homemade is always better. For the onions, yellow or sweet onions both work, but yellow adds a deeper flavor. The bay leaves can be any variety, but California or Turkish are widely available and reliable. If you're prepping ahead, chop all your vegetables and store them in airtight containers in the fridge for up to 3 days.
This soup tastes even better the next day as flavors meld—make a double batch if you can. It keeps for 5 days in the fridge or 6 months frozen. For freezing, portion into meal-sized containers and leave a little headspace for expansion. The parsley garnish is optional but adds a bright finish—store it wrapped in damp paper towels in the fridge for up to 5 days. If you're meal prepping for the week, this soup reheats beautifully—just add a splash of water or broth if it's too thick after refrigeration.
Why You'll Love This Recipe
- I swear by this trick: Dice all the veggies—onions, carrots, celery—while the chuck roast browns. No last-minute prep, no forgotten sides. The slow simmer does the work while you actually enjoy dinner.
- Chop Once, Done: I swear by this trick: Dice all the veggies—onions, carrots, celery—while the chuck roast browns. No last-minute prep, no forgotten sides. The slow simmer does the work while you actually enjoy dinner.
- Deep, Slow-Rendered Richness: That chuck roast? It practically melts into the broth, turning tough cuts into fork-tender perfection. Add a splash of vinegar at the end—trust me—and the potatoes soak up the flavor like sponges.
- Leftovers That Taste Better: Honestly, the second day is my favorite. The potatoes get even softer, the broth thickens just enough, and the carrots hold their sweetness. I freeze half the batch because reheating this feels like a hug.
Step-by-step instructions for Amish vegetable beef soup
This homestyle soup delivers deep, savory flavor with tender beef and garden vegetables simmered just right.
Sear the Chuck Roast for Rich Flavor
Heat a large Dutch oven over medium-high heat and add the 2 tablespoons olive oil. Once shimmering, add the 2 lb chuck roast cut into 1.5-inch cubes, working in batches if needed. Sear for 4-5 minutes per side until deep golden brown—this creates the Maillard reaction that builds the soup's foundation.
Real talk: Don't rush this step. You'll see the meat develop a crusty exterior and release its juices into the pot. Once all pieces are browned, remove them and set aside. The remaining browned bits (fond) will dissolve into the broth, adding layers of flavor. Here's the thing—this searing ensures your soup won't taste like plain beef broth, but like something special.
Build the Vegetable Base
In the same Dutch oven, add 2 tablespoons olive oil if needed, then sauté the 2 whole yellow onions (wedges), 3 whole celery stalks (diced), and 4 medium carrots (chunks) for 8-10 minutes until softened and beginning to caramelize. Add the 4 smashed garlic cloves and cook for 30 seconds until fragrant.
I press the garlic cloves with the flat side of my knife to release their oils without burning. This ensures you get that sweet, aromatic punch without bitterness. Stir in the 0.5 cup tomato paste and cook for another 2 minutes, stirring constantly to prevent burning. This step develops the soup's depth—tomato paste adds umami and helps thicken the broth slightly.
Simmer the Soup Until Tender
Return the seared beef to the pot and add 6 cups beef broth, 1.5 teaspoons salt, 0.5 teaspoon black pepper, 1 teaspoon dried thyme, and 2 whole bay leaves. Bring to a boil, then reduce heat to low, cover, and simmer for 1 hour 15 minutes until the beef is fork-tender.
Here's where the magic happens: The slow simmer breaks down the tough beef fibers, transforming them into tender, melt-in-your-mouth pieces. After the initial hour, add the 3 medium russet potatoes (cubed) and continue simmering for another 20-25 minutes until potatoes are soft when pierced with a knife. The potatoes should absorb the broth's flavors while adding hearty texture.
Finish and Adjust Seasoning
Remove the 2 whole bay leaves and taste the soup. Adjust seasoning with additional salt or pepper as needed—Amish soups are known for their balanced, hearty flavors. The soup should be rich but not salty, with the vegetables holding their shape while still tender.
For the final touch, stir in the 0.25 cup chopped parsley just before serving. This bright green garnish adds freshness and visual appeal, balancing the deep, savory flavors of the beef and vegetables. I like to serve this soup hot with crusty bread to soak up every last drop of that flavorful broth.
Pro Tips For Making Amish Vegetable Beef Soup
- SEAR THE CHUCK ROAST: After browning the meat, don’t rush the searing—let those edges turn deep golden, not just pink. I learned this the hard way when my soup tasted more like stewed beef than rich, caramelized flavor. A hot, dry skillet (no oil needed) for 3-4 minutes per side builds the foundation for depth.
- CUT POTATOES UNEVENLY: Dice those russets into chunks of varying sizes—some small, some large—so they cook at different rates. I used to slice them uniformly, and half the batch would turn to mush while the rest stayed rock-hard. Uneven cuts mean every bite has perfect texture.
- ADD CARROTS LAST: Toss the carrots in only 10 minutes before serving, or they’ll dissolve into the broth. I skipped this once and ended up with a soup that looked like orange water—no one wants that. Save their crunch and color for the final stretch.
- SALT THE WATER LIKE THE SEA: The broth needs bold flavor, so salt it aggressively—about 1.5 teaspoons per quart of water. I used to play it safe, and the soup always tasted bland. Amish vegetable soup should pack a punch, not whisper. Taste and adjust; you can’t overdo it here.
Storing and reheating this amish vegetable beef soup
Refrigerator Storage
Let your soup cool to room temperature before transferring it to an airtight container—I use glass Pyrex bowls with tight-fitting lids. Store it in the fridge at 40°F or below for up to 5 days, though the flavors actually deepen overnight as the ingredients meld. The broth will thicken slightly after chilling, so add ¼ cup water or beef broth when reheating if it seems too dense. 💫
Freezer Storage
For longer storage, freeze your soup in quart-sized freezer bags or glass containers, leaving 1 inch of headspace for expansion. Portion into meal-sized servings for easy reheating. This soup keeps for 6 months in the freezer without losing quality—just thaw overnight in the fridge before reheating. I like to freeze it in two portions: one for quick meals and another for backup dinners. ❄️
Stovetop Reheating
My preferred method is reheating on the stovetop, where you can control the texture perfectly. Transfer the soup to a pot and heat over medium-low heat, stirring occasionally, until it reaches 165°F (about 10-15 minutes). If it’s too thick after reheating, thin it with ¼ cup broth or water. Taste and adjust seasoning—soups often need a pinch of salt after reheating. 🔥
Microwave Reheating
For a quick fix, microwave individual portions in a microwave-safe bowl on 50% power for 3-4 minutes, stirring halfway through. Cover with a damp paper towel to prevent drying. If the soup seems too thick, add 2 tablespoons of water or broth and stir. Avoid high heat to prevent splitting the broth or overcooking the beef. This method is great for single servings but lacks the depth of stovetop reheating. ✨
Thawing Frozen Soup
Thaw overnight in the fridge for the best texture—this prevents the broth from breaking or the vegetables from becoming mushy. If you’re in a hurry, transfer the frozen soup to a pot and heat on low heat, stirring occasionally, until fully thawed and warmed through. Never microwave frozen soup directly, as this can create hot spots and uneven textures. Patience here ensures every spoonful tastes like it was just simmered fresh. 💡
Serving Leftovers
Leftovers taste just as good as the original, if not better, as the flavors continue to develop. Serve with crusty bread or buttered noodles to soak up the rich broth. For extra warmth, top with a sprinkle of fresh parsley or a drizzle of sour cream (if you prefer a tangy twist). I often reheat a bowl of this soup for lunch the next day—it’s the ultimate comfort food. 🌟
Nutrition facts
Frequently asked questions
Can I substitute chuck roast with another beef cut?
Yes, but choose wisely! Short ribs or brisket work well—they add rich flavor and stay tender. Avoid lean cuts like sirloin, as they'll dry out during the long simmer. If using short ribs, reduce cooking time to 1 hour since they're already tender.
Why does the soup taste better the next day?
This is classic Amish wisdom! The flavors deepen as the beef and vegetables continue to meld during refrigeration. The broth thickens slightly, concentrating the savory notes, while the potatoes and carrots absorb more of the meaty essence. It's like nature's slow cooker!
Can I make this soup in a slow cooker?
Sear the beef first in a skillet, then transfer everything to your slow cooker. Cook on low for 7-8 hours or high for 4-5 hours. The slow cooker's gentle heat mimics traditional simmering, creating that same tender beef and flavorful broth. Just add potatoes during the last 30 minutes of cooking.
What if my soup is too thin?
Don't worry—this is easily fixed! Simmer uncovered for 10-15 minutes to reduce the broth, or stir in 1 tablespoon cornstarch mixed with 2 tablespoons cold water until thickened. Traditional Amish cooks often used mashed potatoes as a thickener—just stir in ½ cup cold mashed potatoes and simmer for 5 minutes.
Is this soup gluten-free?
Yes, as written! Just ensure your beef broth is certified gluten-free (many store brands contain wheat). The recipe naturally avoids gluten-containing ingredients. For extra heartiness, serve with gluten-free bread or cornbread made from scratch.