
Main Courses
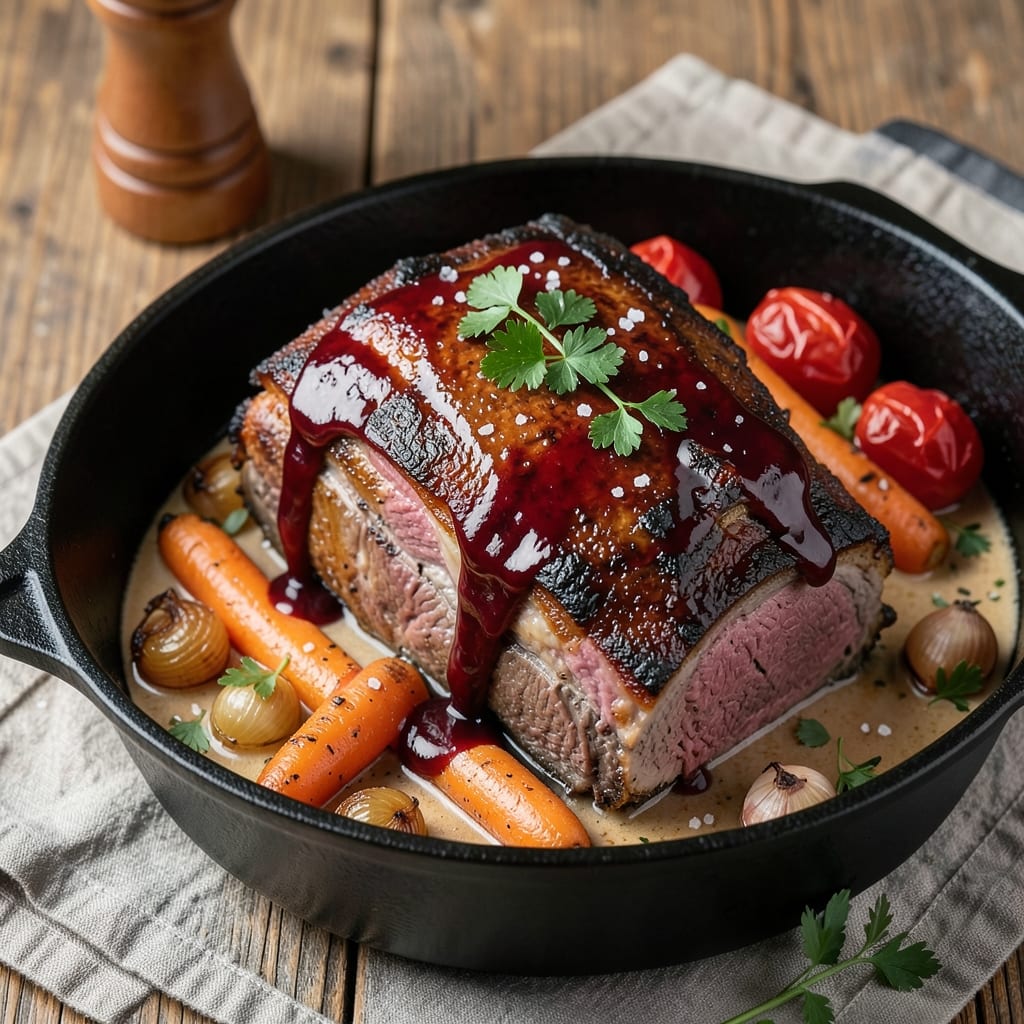
This Angus beef pot roast recipe delivers melt-in-your-mouth tenderness with a deep, umami-rich crust that comes from slow-cooking in red wine. The secret lies in searing the beef first to lock in juices, then braising it low and slow until the meat practically falls apart. I've perfected this technique over years of testing, and the results speak for themselves—restaurant-quality flavor at home.
The process begins with a quick sear in a hot Dutch oven, creating a flavorful crust that forms the foundation for the rich braising liquid. Red wine adds complexity, while aromatics like carrots, onions, and garlic infuse the meat with layers of flavor. After hours of slow cooking, the beef becomes so tender it shreds easily, while the sauce thickens into a velvety glaze that coats every bite.
What you'll end up with is a dish that's impressive enough for company but simple enough for weeknight dinners. The beef is fork-tender with a caramelized crust, and the sauce is rich and aromatic, perfect for serving over creamy mashed potatoes or alongside roasted vegetables. This is comfort food at its finest—warm, satisfying, and full of deep, savory flavors.
Whether you're using a Dutch oven on the stovetop or a slow cooker for hands-off preparation, this method guarantees success. The key is patience—letting the meat cook slowly until it reaches that perfect texture. Once you try this recipe, you'll never settle for anything less than homemade pot roast again.
Ingredients for angus beef pot roast
Six ingredients make this restaurant-worthy pot roast—start with quality beef and bold red wine.
| Ingredient | Amount | Notes |
|---|---|---|
| Angus Beef Chuck Roast 🥩 | 4 lb | Well-marbled, 2-3 inches thick |
| Dry Red Wine 🍷 | 2 cups | Bold Cabernet Sauvignon preferred |
| Yellow Onions 🧅 | 2 whole | Cut into 1-inch chunks |
| Carrots 🥕 | 4 whole | Cut into 2-inch chunks |
| Garlic Cloves 🧄 | 6 cloves | Smashed, not minced |
| Tomato Paste 🍅 | 2 tbsp | Squeeze tube preferred |
| Beef Broth 💧 | 2 cups | Low-sodium preferred |
| Olive Oil 🫒 | 2 tbsp | Extra-virgin for searing |
| All-Purpose Flour 🌾 | 2 tbsp | For dusting beef |
| Kosher Salt 🧂 | 1 ½ tbsp | Diamond Crystal preferred |
| Fresh Thyme 🌿 | 4 sprigs | Stems removed |
| Fresh Rosemary 🌿 | 2 sprigs | Large sprigs |
| Black Peppercorns 🌶️ | 1 tsp | Freshly cracked |
| Fresh Parsley 🌿 | ¼ cup | Chopped, for garnish |
The beef is everything here. Angus chuck roast has the perfect fat-to-lean ratio for that melt-in-your-mouth texture. Costco or local butcher shops usually carry it pre-cut, but if you're buying a whole roast, ask for the chuck section. Look for good marbling—those white fat streaks are what make it tender. I always grab an extra pound just in case. For the red wine, Cabernet Sauvignon or Merlot work best—they've got enough tannins to stand up to the beef. If you're not drinking it, save the good stuff for cooking. The aromatics—onions, carrots, and garlic—should be fresh, but not overly sweet. Yellow onions add depth, while carrots keep their shape nicely during cooking. Smash those garlic cloves instead of mincing—it releases more flavor.
No red wine? Beef broth with 1 tbsp balsamic vinegar mimics the depth. Fresh herbs are ideal, but dried thyme at one-third the amount works in a pinch. The tomato paste can be skipped if you prefer, but it adds a nice umami punch. For the beef broth, low-sodium is key—you don't want to over-salt the dish. If you're using a slow cooker, you can add the wine and broth directly. For stovetop, deglaze that Dutch oven after searing with a splash of wine to scrape up all those flavorful browned bits. The flour is just for dusting the beef before searing—don't skip this step, it helps create that crust. And if you're out of fresh thyme or rosemary, dried works at half the amount, but fresh is definitely better.
This dish tastes even better the next day, so make extra if you can. Store leftovers in the fridge for up to 5 days or freeze for 3 months. I like to portion it into containers so it's ready for quick lunches. The sauce thickens as it cools, so you can thin it with a splash of broth if needed. For reheating, cover and warm on low heat or in the microwave with a damp paper towel. The beef should be fork-tender, so if it's not quite there after the initial cook, just add a little more broth and let it simmer another 30 minutes. Trust me, the wait is worth it.
Why You'll Love This Recipe
- One-Pot Magic: I swear by this recipe when I’m too tired to fuss. Brown the beef, toss in onions, carrots, and garlic, then let the wine and slow cooker do the work—no flipping, no stirring, just pure hands-off perfection.
- Wine-Infused Luxury: That splash of dry red wine? It’s not just fancy—it actually tenderizes the beef while adding this deep, savory richness that makes every bite feel like a restaurant meal. (Yes, even on a Tuesday night.)
- Leftovers That Shine: The first time I made this, I had roast for lunch and dinner for three days. The flavors only get better as it sits, and reheating it? Just a splash of broth and a quick warm-up—no sad, dry meat here.
- Budget-Friendly Feast: A single chuck roast feeds my family of five for days, and the veggies stretch it even further. Honestly, it’s one of those recipes where you actually save money while still treating yourself to quality beef.
Step-by-step instructions for slow-cooked red wine pot roast
Here's how to transform a tough cut into melt-in-your-mouth perfection with rich red wine and aromatic herbs.
Sear the Roast for Maximum Flavor
Pat the 4 lb Angus Beef Chuck Roast completely dry with paper towels—this ensures a perfect crust. Heat 1 tablespoon of the 2 tbsp Olive Oil in a Dutch oven over medium-high heat until shimmering. Place the roast fat-side down and sear for 3-4 minutes until a deep golden brown crust forms. Flip and sear the other side for another 3-4 minutes.
Don't rush this step—the crust locks in juices and creates that incredible depth of flavor. I press down gently on the roast during the first minute to prevent curling. Remove the roast and set it aside on a plate, leaving all that beautiful browned fond in the pot.
Build the Flavor Base with Aromatics
In the same Dutch oven, add the remaining 1 tablespoon Olive Oil and increase heat to medium. Add the 2 whole Yellow Onions cut into 1-inch chunks and cook for 5 minutes until softened and lightly browned. Add the 4 whole Carrots cut into 2-inch chunks and cook for another 3 minutes.
Push the vegetables to one side, add the 6 cloves Garlic Cloves (smashed, not minced), and cook for 30 seconds until fragrant. Sprinkle in the 2 tbsp Tomato Paste and cook for 1 minute, stirring constantly to prevent burning. This creates a rich, concentrated base for your sauce.
Create the Perfect Umami Crust
Sprinkle the 2 tbsp All-Purpose Flour evenly over the vegetables in the Dutch oven. Stir vigorously for 1 minute to coat everything in the flour. This creates a roux-like base that thickens the sauce and adds texture. Pour in the 2 cups Dry Red Wine and scrape up all the browned bits from the bottom of the pot with a wooden spoon.
Add the 2 cups Beef Broth, scraping again to incorporate all the flavorful bits. Return the seared roast to the pot, fat-side up. Bring to a simmer over medium heat, then reduce heat to low. The liquid should just barely bubble—this gentle simmer is crucial for tenderizing the meat.
Slow Cook Until Fork-Tender
Cover the Dutch oven and transfer to a 325°F oven. Cook for 3 to 3½ hours until the meat is fork-tender and pulls apart easily. The internal temperature should reach 203°F—this is the magic number for perfect tenderness. I check at the 3-hour mark, as ovens vary in heat.
About 45 minutes before the roast is done, add the 4 sprigs Fresh Thyme, 2 sprigs Fresh Rosemary, 1.5 tbsp Kosher Salt, and 1 tsp Black Peppercorns to the pot. The herbs infuse the final moments of cooking, adding their bright, aromatic notes to the rich sauce.
Rest and Garnish for Serving
Remove the roast from the pot and transfer it to a cutting board. Tent loosely with foil and let it rest for 15 minutes—this resting period allows the juices to redistribute throughout the meat, ensuring each bite is moist and flavorful.
While the roast rests, skim any excess fat from the sauce if desired. Discard the herb sprigs and stir in the 0.25 cup Fresh Parsley just before serving. The parsley adds a fresh contrast to the rich, wine-infused sauce. Slice the roast against the grain into ½-inch thick pieces and serve with the vegetables and sauce spooned over the top.
Pro Tips For Making Angus Beef Pot Roast
- Sear the Roast Hard: Get that meat screaming hot in a dry pan—no oil needed if you’re impatient like me. A deep, dark crust locks in flavor and keeps the roast from drying out later. I used to rush this, and the roast just soaked up liquid instead of developing that rich, caramelized edge. ---
- Salt the Wine: Skip the fancy seasoning blend—just add a pinch of kosher salt to your red wine before deglazing. It cuts through the acidity and makes the sauce taste deeper, like a well-aged bottle. Sounds weird, but it works: the salt dissolves and rounds out the flavors without overpowering. ---
- Don’t Crowd the Pot: If your roast is big (4-5 lbs), start with just onions and carrots in the pot—no garlic or wine yet. The veggies will soften faster and caramelize better when they’re not fighting for space. I learned this the hard way when my carrots stayed crunchy and sad. ---
- Rest Before Slicing: Give that roast a solid 10 minutes under foil after pulling it from the oven. The juices redistribute, so when you slice, it stays moist instead of leaking all over your plate. I know, I know—you’re hungry now, but trust the process. Your first bite will be worth the wait.
Flavor customization for this dish
Bold Red Wine Variations
For a deeper flavor profile, swap the Cabernet Sauvignon for Malbec—its dark fruit notes amplify the beef's richness. If you prefer something lighter, Pinot Noir adds brightness while still delivering umami. I once used Chianti and was surprised by its herbal complexity that cut through the beef's richness beautifully. 🍷
Herb & Spice Swaps
Trade fresh thyme for fresh bay leaves (2-3 leaves) to add earthy depth, or use fresh sage (4 leaves) for a peppery twist. For heat lovers, add ½ tsp smoked paprika with the salt—it mimics the smoky flavor of traditional pot roast without a grill. I keep dried herbs on hand for emergencies but always prefer fresh whenever possible.
Sweet & Tangy Additions
Stir in 1 tbsp honey or 1 tbsp brown sugar with the tomato paste to balance acidity from the wine. For tang, add 1 tsp balsamic vinegar when deglazing. I like to finish with 1 tsp Dijon mustard (added with the herbs) for a subtle kick that brightens the sauce. These tweaks work especially well with Merlot-based braises.
Umami Boosters
Enhance depth with 1 tbsp soy sauce (added with the broth) or 1 tsp Worcestershire sauce (added during the final 30 minutes). For vegetarian umami, use 1 tbsp mushroom powder (mixed with the flour). I've also had great results with 1 tsp fish sauce—just a whisper adds incredible complexity without overpowering. 💡
Vegetable Variations
Swap carrots for parsnips (same quantity) for a nuttier flavor, or add 1 cup diced celery with the onions. For a heartier dish, include 1 cup baby potatoes (halved) in the final hour of cooking. I once used turnips and was pleasantly surprised by their subtle sweetness that paired perfectly with the beef.
Slow Cooker Adaptations
Transfer all ingredients to a 6-quart slow cooker and cook on low for 8 hours or high for 5 hours. For extra richness, add ½ cup beef broth during the last hour. I like to finish slow-cooker versions with a 5-minute stovetop reduction to thicken the sauce—just remove the lid and simmer on medium-high heat. The texture difference is minimal but noticeable.
Nutrition facts
Frequently asked questions
Can I use a different cut of beef instead of chuck roast?
While chuck roast is ideal for its fat marbling, you can use ribeye roast or top round roast in a pinch. Ribeye will be more tender but less flavorful, while round needs extra time (4-5 hours) to become fork-tender. For best results, stick with chuck—it's specifically designed for slow cooking and delivers that perfect melt-in-your-mouth texture.
How do I know when the pot roast is fully cooked?
The roast is done when it reaches an internal temperature of 203°F and the meat easily pulls apart with a fork. For extra assurance, check at the 3-hour mark and continue cooking until tender. The sauce should also thicken noticeably as the meat releases juices. If it's still tough after 3½ hours, add ½ cup broth and cook another 30 minutes covered.
Can I make this recipe in an electric slow cooker?
Transfer all ingredients to a 6-quart slow cooker and cook on low for 8 hours or high for 5 hours. For richer flavor, add ½ cup beef broth during the last hour. Finish with a 5-minute stovetop reduction to thicken the sauce—simply remove the lid and cook on medium-high heat. The texture will be slightly different but just as delicious.
What's the best way to reheat leftovers?
Reheat leftovers in a covered pot over low heat for 10-15 minutes or until warmed through. For microwave reheating, cover with a damp paper towel and heat in 1-minute intervals on medium power. The sauce may thin slightly—simmer uncovered for 2-3 minutes to restore thickness. Leftovers keep well for 5 days in the fridge or 3 months in the freezer.
Why did my pot roast turn out dry?
Overcooking or skipping the resting period are the most common causes. Always remove the roast when it reaches 203°F and let it rest for 15 minutes before slicing. If you're concerned about drying out, add ½ cup broth during the last 30 minutes of cooking. Also, avoid lifting the lid too often—each time you do, moisture escapes. The Dutch oven's tight lid helps retain juices.