
Breakfast & Brunch
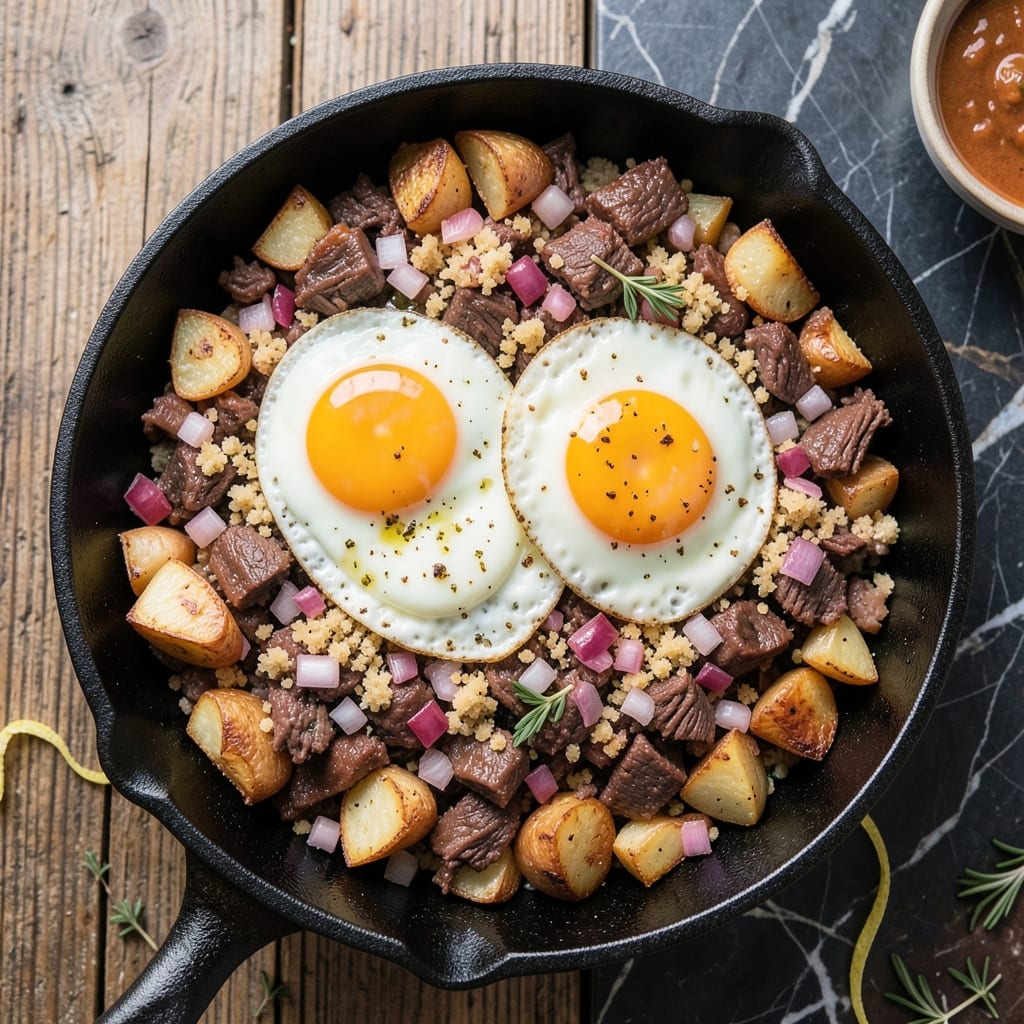
This baked corned beef hash and eggs recipe delivers a crispy potato crust that transforms a classic breakfast into a hearty, restaurant-worthy meal. The secret lies in layering diced potatoes with leftover corned beef, onions, and spices, then baking until golden and crispy—no frying required. I developed this method after years of perfecting the balance between tender hash and crispy edges, ensuring every bite delivers satisfying texture and rich flavor.
What sets this dish apart is the foolproof technique that works with either leftover corned beef or fresh cuts, making it perfect for brunch or a late-night dinner. The potatoes form a sturdy crust that holds together beautifully, while the eggs cooked on top add a velvety contrast. The result is a dish that's fast to prepare (ready in under 30 minutes) but feels like a gourmet creation—ideal for feeding a crowd or treating yourself to a special breakfast.
The magic happens in the oven, where the potatoes caramelize into a crispy, golden crust while the corned beef stays tender and flavorful. Topped with perfectly fried or poached eggs, this dish becomes a symphony of textures and tastes—crunchy, creamy, and savory all at once. Serve with a side of toast or fresh herbs for a complete meal that feels indulgent yet simple to make.
This recipe is particularly satisfying when using high-quality corned beef and fresh potatoes, but even store-bought ingredients deliver impressive results. The beauty of this dish lies in its versatility—it works equally well for a weekend brunch or a quick weeknight dinner when you're craving something hearty. Let's get cooking!
Ingredients for baked corned beef hash and eggs
Crispy potatoes, tender corned beef, and velvety eggs create this restaurant-style breakfast masterpiece.
| Ingredient | Amount | Notes |
|---|---|---|
| Russet Potatoes 🥔 | 3 lb | Diced into 1/2-inch cubes, peeled |
| Corned Beef 🥩 | 1 ½ lb | Diced, leftover or fresh |
| Yellow Onions 🧅 | 2 whole | Diced into 1/4-inch pieces |
| Large Eggs 🥚 | 4 whole | Freshly fried or poached |
| All-Purpose Flour 🌾 | ½ cup | For breadcrumb coating |
| Panko Breadcrumbs 🍞 | ½ cup | For extra crispiness |
| Unsalted Butter 🧈 | 4 tbsp | Melted for binding |
| Garlic Cloves 🧄 | 4 cloves | Minced for seasoning |
| Dijon Mustard 🍯 | 1 tbsp | For depth of flavor |
| Kosher Salt 🧂 | 1 ½ tsp | Diamond Crystal preferred |
| Ground Black Pepper 🌶️ | ½ tsp | Freshly ground |
| Fresh Parsley 🌿 | ¼ cup | Chopped for garnish |
| Heavy Cream 🥛 | ¼ cup | Optional for sauce |
The potatoes are the backbone of this dish—Russet potatoes with their high starch content create that perfect crispy crust. Buy them fresh from the produce section, not those pre-washed bags that sit for weeks. For the corned beef, high-quality deli cuts from brands like Hormel or Hebrew National deliver the best flavor. If using leftovers, pat them dry thoroughly before dicing to prevent a soggy hash. The onions should be yellow onions—their sweetness balances the saltiness of the corned beef. I always double-check the expiration date on the corned beef, as older cuts can make the hash taste bland.
No corned beef? Smoked sausage or diced ham works in a pinch, though the flavor profile changes. Substituting fresh parsley with dried is fine at one-third the amount, but fresh is ideal for garnish. For the eggs, farm-fresh eggs from local markets make a noticeable difference in texture. The heavy cream is optional but adds richness to the sauce—half-and-half works too. If you're watching calories, skip it entirely. The Dijon mustard is non-negotiable for that tangy depth, but if you're out, yellow mustard at double the amount gets you close. The breadcrumbs should be Panko-style for maximum crispiness—regular breadcrumbs turn mushy.
Store prepped ingredients separately in airtight containers for up to 3 days in the fridge. The corned beef and potatoes can be baked ahead and reheated for 2-3 days without losing crispiness. For the eggs, cook them fresh when serving to maintain that perfect runny yolk. This dish reheats beautifully in a 350°F oven for 10 minutes, making it ideal for meal prep. The leftovers keep well for 4 days in the fridge, though the texture becomes slightly softer with each reheat. Portion into individual servings for easy grab-and-go breakfasts during the week.
Why You'll Love This Recipe
- One-Pan Magic: I swear by this recipe because it’s literally one pan—no chopping boards, no extra dishes. Just toss diced potatoes, leftover corned beef, and onions on a sheet, bake until golden, then top with fried eggs. The cleanup? Three minutes. The mess? Almost none.
- Salty-Savory Crunch: That crispy potato edge? Chef’s kiss. The corned beef adds this deep, briny richness that makes every bite feel like a hug, while the onions caramelize just enough to hit the spot. Honestly, the flavor is so bold it turns a regular Tuesday into a "I deserve this" moment.
- Lunch or Dinner: Between us, this dish works anytime. Pack it in a thermos for a hearty lunch, serve it family-style for a Sunday supper, or even repurpose it into breakfast hash the next morning. My college-aged kids eat it straight from the pan—no complaints, just seconds.
- Budget Breakfast: Leftover corned beef? Now it’s a gift. Instead of throwing it away, I dice it up and bake it into hash—turning yesterday’s dinner into tomorrow’s meal. Eggs are cheap, potatoes are cheap, and you’re left with a filling, crave-worthy dish that costs next to nothing. Win.
Step-by-step instructions for baked corned beef hash and eggs
Transform simple ingredients into a hearty breakfast with crispy edges and rich flavors.
Prepare the Potato-Corned Beef Base
Preheat your oven to 400°F and line a large baking dish with parchment paper. In a large bowl, combine the 3 lb diced Russet potatoes, 1.5 lb diced corned beef, and 2 diced yellow onions. This combination forms the foundation of your hash, where each ingredient plays a crucial role in texture and flavor.
Drizzle the mixture with 2 tablespoons melted unsalted butter (reserve the remaining 2 tablespoons for later) and toss gently to coat evenly. Season with 1 teaspoon kosher salt, 0.25 teaspoon ground black pepper, and 1 teaspoon Dijon mustard. The mustard adds depth that complements the corned beef beautifully. Spread the mixture evenly in the prepared baking dish, pressing down lightly to create a compact base.
Create the Crispy Breadcrumb Topping
In a separate bowl, whisk together the 0.5 cup all-purpose flour, 0.5 cup panko breadcrumbs, 0.5 teaspoon kosher salt, and 0.25 teaspoon ground black pepper. This mixture will form the crispy crust that sets this dish apart from traditional hash. Melt the remaining 2 tablespoons unsalted butter and mix it into the dry ingredients until the panko looks evenly coated and slightly clumpy.
Sprinkle the breadcrumb mixture evenly over the potato-corned beef base in the baking dish. Press down gently with your fingers to ensure good contact between the topping and the base. This step is crucial for creating that coveted crispy crust while keeping the interior tender. Bake for 30 minutes, until the edges begin to turn golden brown and the top feels firm to the touch.
Add Garlic and Final Bake
Remove the baking dish from the oven and sprinkle the 4 minced garlic cloves evenly over the surface. The garlic will infuse its aromatic flavor into the crispy topping as it bakes. Return the dish to the oven and bake for an additional 15-20 minutes, until the top is deep golden brown and the internal temperature of the potatoes reaches 200°F when measured with an instant-read thermometer.
During this final baking stage, the garlic will caramelize slightly, adding another layer of complexity to the dish. The potatoes should be tender and the corned beef fully heated through. Remove from the oven and let the hash rest for 5 minutes before serving—this allows the flavors to meld and makes it easier to slice cleanly.
Fry the Eggs and Assemble
While the hash rests, fry the 4 large eggs in a separate skillet with 1 tablespoon unsalted butter over medium-low heat until the whites are set but the yolks remain runny. This gentle cooking method ensures the perfect egg consistency for topping your hash. Alternatively, you can poach the eggs for a lighter presentation.
To serve, slice the hash into wedges and place on warmed plates. Top each serving with a fried or poached egg and drizzle with any pan juices from the skillet. Garnish with 0.25 cup chopped fresh parsley and, if desired, a splash of 0.25 cup heavy cream for added richness. The contrast of the crispy hash with the creamy eggs creates a satisfying breakfast experience that's both comforting and elegant.
Pro Tips For Making Baked Corned Beef Hash And Eggs
- CRISP THE POTATOES FIRST: I learned this the hard way—skipping this step means soggy hash. Par-cook the potatoes in a skillet with a splash of water until tender, then drain completely before mixing with corned beef. The residual starch will turn to glue if you don’t dry them thoroughly, and nobody wants mushy potatoes in their hash.
- USE COLD CORNED BEEF: Sounds counterintuitive, but pulling the corned beef straight from the fridge and slicing it cold keeps it from falling apart when you dice it. Let it sit out for just 10 minutes before cooking—enough to take the chill off, but not enough to make it greasy. Trust me, your hash will hold together better.
- SALT THE POTATOES WHILE COOKING: Don’t wait until the end to season the potatoes. Sprinkle them with salt as soon as they hit the pan (about ½ teaspoon per pound) while they’re par-cooking. This helps break down the starches early, giving you that crispy edge later when everything bakes. (Yes, even if you’re impatient like me.)
- MAKE THE EGGS LAST: Bake the hash without the eggs until the very end—even if the recipe says otherwise. The residual heat from the hot hash will cook the eggs perfectly when you add them in the final 3-4 minutes. This keeps the yolks runny and the whites just set, not rubbery. I skip this when I’m lazy, but the dish is noticeably better when I don’t.
Storing and reheating this recipe
Refrigerator Storage
Store your baked corned beef hash in an airtight container for up to 4 days in the refrigerator. The crispy topping stays best when kept in a single layer—press parchment paper directly on top before sealing. I like using glass Pyrex containers because they reheat evenly and keep the hash from drying out. For the eggs, cook them fresh when serving to maintain that perfect runny yolk. 🥔
Freezer Prep Tips
For longer storage, freeze individual portions wrapped tightly in plastic wrap followed by a foil layer to prevent freezer burn. This hash freezes beautifully for up to 3 months—just thaw overnight in the fridge before reheating. I recommend freezing the hash without the eggs to maintain texture. When ready to eat, simply reheat and top with freshly fried eggs. ❄️
Oven Reheating
My favorite method is reheating in a 350°F oven for 10-15 minutes until warmed through. Cover loosely with foil to prevent over-browning while keeping the crispy edges intact. For extra moisture, add 1 tablespoon water or beef broth to the dish before reheating. The internal temperature should reach 165°F for safe serving. 🔥
Microwave Shortcut
For quick reheating, use the microwave on 50% power in 1-minute intervals, stirring between each interval. Add a damp paper towel to the dish to retain moisture. Be careful—the microwave can make the topping soggy if overdone. This method works best for single servings when you're in a hurry. 💫
Egg Handling
Cook eggs fresh when serving for the best texture, but if reheating leftovers, place them in a microwave-safe bowl with a splash of water and cover with a damp paper towel. Heat for 30 seconds to warm through gently. The contrast of warm hash with a slightly reheated egg still tastes amazing. 🥚
Garnish Refresh
After reheating, always add fresh garnishes like chopped parsley or a drizzle of heavy cream to brighten flavors. The crispy topping benefits from a quick broiler finish for 2-3 minutes if you want to restore its crunch. This step makes reheated hash taste almost as good as fresh! ✨
Nutrition facts
Frequently asked questions
Can I make this recipe with store-bought hash browns instead of diced potatoes?
Yes, but with a few adjustments! Use 4 cups frozen hash browns (thawed and drained) instead of fresh potatoes. Spread them in a single layer on a baking sheet first to crisp slightly, then transfer to your baking dish. You may need an extra 5-10 minutes of baking time to achieve the same crispy crust. The texture will be slightly different but still delicious.
What's the best way to reheat this dish if I made it ahead?
For best results, reheat in a 350°F oven for 10-15 minutes covered loosely with foil. Add 1 tablespoon water or beef broth to the dish before reheating to keep it moist. For a quick fix, use the microwave on 50% power in 1-minute intervals, stirring between each. Always add fresh garnishes after reheating to restore freshness.
Can I substitute corned beef with another protein?
For a similar flavor profile, try smoked sausage or diced ham. If using chicken, opt for rotisserie chicken to maintain moisture. Just reduce the baking time by 5 minutes since poultry cooks faster than beef. The dish will have a different taste but still be hearty and satisfying.
Why did my hash turn out soggy instead of crispy?
This usually happens when the potatoes weren't fully drained or the baking dish wasn't preheated. Next time, pat all ingredients completely dry and press the breadcrumb topping firmly. Also ensure your oven is fully preheated to 400°F before baking. Baking on the middle rack helps with even crispiness too.
How can I make this dish gluten-free?
Replace the flour and panko with gluten-free breadcrumbs (look for certified GF versions). Use 1/4 cup cornstarch or arrowroot powder mixed with 1/4 cup gluten-free flour for the coating. The texture will be slightly different but still crispy. Check all other ingredients for hidden gluten, especially the corned beef seasoning packet.