
Main Courses
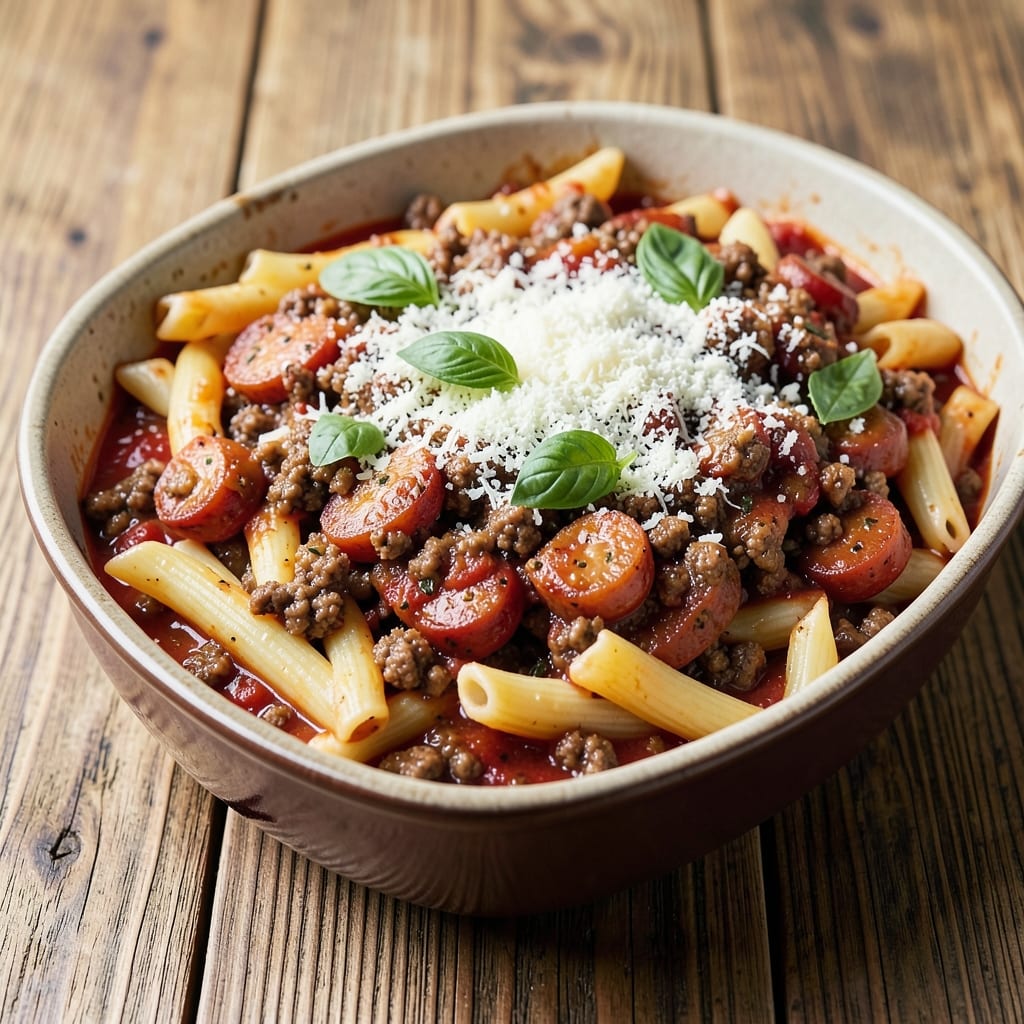
This baked ziti recipe with ground beef and Italian sausage delivers the ultimate comfort food experience—rich, meaty layers that taste like a homemade Italian feast. 💛 The secret lies in browning the meat properly for deep flavor, using al dente pasta, and building layers that create a crispy, golden top while keeping the center creamy. I've perfected this dish over years of testing, ensuring every bite is packed with savory sausage, tender beef, and melty cheese.
What sets this recipe apart is the balance of textures and flavors—crispy edges on the cheese, tender pasta, and perfectly seasoned meat that's neither dry nor greasy. The Italian sausage adds a spicy kick that pairs beautifully with the rich tomato sauce, while the ground beef keeps it hearty. This one-pan method makes it easy to assemble and bake, so you can focus on enjoying the process rather than cleanup.
By the time it comes out of the oven, you'll have a dish that's restaurant-quality but made at home—golden, bubbling, and impossible to resist. The layers of pasta, meat, and cheese create a satisfying bite every time, and the aroma alone will have everyone gathering around the table. It's the kind of meal that feels like a warm hug, perfect for family dinners or feeding a crowd.
Whether you're a seasoned home cook or just starting out, this recipe delivers foolproof results with simple techniques and a few key shortcuts. Let's get started on creating your next Italian masterpiece!
Ingredients for baked ziti recipe with ground beef and italian sausage
Meaty layers, crispy cheese, and rich tomato flavors—this is your ultimate comfort food lineup.
| Ingredient | Amount | Notes |
|---|---|---|
| Ziti Pasta 🍝 | 1 ½ lb | Uncooked, medium or ridged shape |
| Ground Beef 🥩 | 1 lb | 80/20 fat ratio preferred |
| Italian Sausage 🌭 | 1 lb | Sweet or spicy, casings removed |
| Yellow Onion 🧅 | 1 medium | Diced, about 1 cup |
| Garlic Cloves 🧄 | 4 cloves | Minced, fresh preferred |
| Canned Tomato Sauce 🍅 | 2 cups | San Marzano if available |
| Tomato Paste 🍅 | 2 tbsp | Squeeze tube preferred |
| Whole Milk 🥛 | 1 cup | Full-fat for creaminess |
| Shredded Mozzarella Cheese 🧀 | 2 cups | Part-skim or whole milk |
| Ricotta Cheese 🧀 | 1 ½ cups | Whole milk preferred |
| Parmesan Cheese 🧀 | ½ cup | Freshly grated, block preferred |
| Extra-Virgin Olive Oil 🫒 | 2 tbsp | For browning meat |
| Dried Oregano 🌿 | 1 tbsp | Italian blend preferred |
| Ground Black Pepper 🌶️ | ½ tsp | Freshly ground preferred |
| Salt 🧂 | 1 ½ tsp | Kosher or sea salt |
The meat makes or breaks this dish. Ground beef with 80/20 fat ratio stays juicy, while the Italian sausage adds that signature spicy kick. Costco or local butchers often have the best prices for bulk packages. Look for bright red, well-marbled beef—it's worth the extra penny. The sausage? Sweet or spicy works, but avoid chicken sausage—it's a game-changer for authentic flavor. Pre-diced onions save time, but if you're chopping yourself, medium yellows have the perfect balance of sweetness and bite. For the tomato sauce, San Marzano cans from Trader Joe's or Whole Foods elevate everything—sweeter, smoother, and more concentrated than regular brands.
No part-skim mozzarella? Whole milk mozzarella melts like a dream, but part-skim works in a pinch. Fresh ricotta is ideal, but drained well-packaged ricotta from the dairy section is perfectly fine. Running short on tomato paste? Extra tomato sauce plus 1 tsp sugar mimics the thickness. The oregano should be Italian blend—Penzeys or local Italian markets carry the best. For the pasta, barilla ziti is my go-to, but any medium or ridged shape works. The key is cooking it al dente—that slight bite keeps the layers from turning mushy. If you're vegetarian, swap beef for lentils or mushrooms, but the sausage is non-negotiable for that authentic flavor.
This reheats beautifully—just cover with foil and warm in the oven for 20 minutes at 375°F. Leftovers keep for 4-5 days in the fridge, but honestly, it's even better the second day as flavors meld. For make-ahead meals, assemble the casserole, cover tightly, and refrigerate for up to 24 hours before baking. The cheese layer freezes surprisingly well—portion into individual servings before freezing for easy reheats. To prevent a soggy top, broil for 2-3 minutes at the end of baking—just watch like a hawk to avoid burning.
Why You'll Love This Recipe
- One-Pot Magic: I swear by this recipe—just brown the beef and sausage, toss in the onions and garlic, then dump everything into one dish. No boiling pasta separately, no extra pots to wash. The ziti soaks up the meaty sauce right in the oven, and honestly? That’s where the real flavor happens.
- Meat Lover’s Dream: The combo of ground beef and spicy Italian sausage? Chef’s kiss. The sausage adds that herby, slightly smoky kick while the beef keeps it rich and hearty. I’ll be real: my picky-eater husband devours this faster than any other pasta, and he’s not usually a fan of “fancy” dishes.
- Weeknight & Leftovers: This is my go-to for busy nights—ready in under 40 minutes—but it’s also the dish I make for game day or when friends drop by. The leftovers? Even better the next day, if you can resist eating the whole pan fresh out of the oven. (Spoiler: you won’t.)
- Budget-Friendly Feast: Ground beef and sausage stretch far, and a single box of ziti feeds four for under $10. Between us, this is how I feed my family without breaking the bank, and no one complains—because it’s that good. Plus, the sauce freezes beautifully if you accidentally make too much. (Yes, even on a Tuesday night.)
Step-by-step instructions for baked ziti with meat-loaded layers
Here's how to build this hearty Italian classic—layered, cheesy, and packed with flavor.
🍳 Step 1: Brown the Meat and Sauté Aromatics
Heat a large Dutch oven or deep oven-safe skillet over medium-high heat. Add the 2 tablespoons extra-virgin olive oil and swirl to coat. Crumble the 1 pound ground beef and 1 pound Italian sausage into the pan, breaking it into small, even pieces. Cook for 6-8 minutes, stirring occasionally, until the meat loses its raw color and begins to brown.
Push the meat to one side of the pan and add the 1 medium diced yellow onion. Cook for 3-4 minutes until softened. Add the 4 minced garlic cloves and cook for 30 seconds until fragrant—don't let it burn. Season the meat mixture with 1 tablespoon dried oregano, 0.5 teaspoon ground black pepper, and 1.5 teaspoons salt, stirring to combine. This step builds the rich, savory base for your sauce.
🍳 Step 2: Build the Sauce and Cook the Pasta
Reduce heat to medium and stir in the 2 cups canned tomato sauce and 2 tablespoons tomato paste. Let the sauce simmer for 5 minutes to thicken slightly. Meanwhile, bring a large pot of salted water to a boil and cook the 1.5 pounds ziti pasta according to package directions until al dente—about 1 minute less than recommended. Drain and set aside, reserving 1 cup pasta water.
Here's the thing—don't rinse the pasta. The starch on the noodles helps the sauce cling beautifully. The sauce should be thick enough to coat the back of a spoon but still loose enough to create a silky sauce when combined with the pasta.
🥘 Step 3: Assemble the Cheesy Layers
Preheat your oven to 375°F. Spread half of the cooked ziti pasta in the bottom of your Dutch oven, creating an even layer. Top with half of the meat sauce, then sprinkle with half of the 1.5 cups ricotta cheese and half of the 2 cups shredded mozzarella cheese. Repeat with the remaining pasta, sauce, ricotta, and mozzarella, finishing with the remaining cheese.
Gently press down on the top layer with a spatula to ensure good contact between layers. This prevents air pockets that could lead to uneven cooking. The ricotta adds creaminess, while the mozzarella creates that signature gooey texture we all love.
🔥 Step 4: Bake Until Bubbly and Golden
Cover the Dutch oven with a tight-fitting lid or foil and bake for 25 minutes. Remove the lid and sprinkle the 0.5 cup freshly grated Parmesan cheese evenly over the top. Return to the oven and bake for another 10-15 minutes until the top is golden brown and bubbly.
You'll know it's done when the cheese is deeply browned and the edges are slightly crispy. If the top browns too quickly, tent it loosely with foil for the last few minutes. The internal temperature should reach 165°F in the center.
⏰ Step 5: Rest and Serve
Remove from the oven and let the baked ziti rest for 10 minutes before serving. This resting period allows the layers to set and makes it easier to slice through the cheesy goodness. The sauce should have thickened beautifully, coating every strand of pasta with rich, meaty flavor.
Use a large spatula to slice through the center and serve directly from the Dutch oven. Each bite should deliver tender pasta, savory meat, and melty cheese in perfect harmony. Pair with a simple green salad and crusty bread for a complete Italian feast.
Pro Tips For Making Baked Ziti Recipe With Ground Beef And Italian Sausage
- CRACK THE SAUSAGE CASINGS: Remove the casings from the Italian sausage and crumble it by hand—it browns faster and distributes more evenly than sliced links. (Yes, even if it looks like raw meat, that’s the point.)
- SWEAT THE ONIONS LOW: Cook the onions and garlic at a true simmer, not a sizzle, for 10 minutes before adding meat. This softens them properly and keeps them from turning bitter—no one wants mushy onion chunks in their ziti.
- DON’T OVERMIX THE SAUCE: Stir the meat sauce just until combined, then let it sit for 2 minutes off the heat. Overworking it makes the sauce gluey, and that’s the last thing you want clinging to your pasta in the oven.
- BUILD THE LAYERS TIGHT: Press the ziti into the baking dish in a single layer, then top with sauce and cheese—no gaps. Loose pasta just slides around and burns at the edges, and no one wants crispy ziti on the sides and raw in the middle.
Make-ahead tips for this baked ziti recipe with ground beef and italian sausage
Prep Ahead Like a Pro
Assemble the entire casserole the night before and refrigerate it uncovered for 12-24 hours. The flavors meld beautifully overnight, and you'll save 30 minutes of active prep time. I swear by this method—it's how I feed my family on busy weeknights. Just
Freezer-Friendly Layers
Build the casserole in a freezer-safe dish, cover tightly with plastic wrap and foil, and freeze for up to 3 months. When ready to bake, thaw in the fridge overnight, then bake as directed—just add 10-15 extra minutes covered if coming straight from frozen. I portion mine into individual servings before freezing for easy reheats at work. 🥶
Cheese Hack for Make-Ahead
If you're prepping ahead, sprinkle the Parmesan cheese only after the final 10 minutes of baking. This prevents it from turning bitter in the fridge. For extra insurance, store the assembled casserole without the final cheese layer, then add it fresh after baking. Trust me, this simple trick makes all the difference. 🧀
Pasta Prep Shortcut
Cook the pasta 1 minute less than package instructions and toss it with 1 tablespoon olive oil to prevent sticking. Store in an airtight container in the fridge for up to 2 days. When ready to assemble, just reheat the pasta with a splash of pasta water to restore its al dente texture. This saves 15 minutes of last-minute cooking. 🍝
Sauce Make-Ahead
Prepare the meat sauce up to 3 days ahead and store it in the fridge. The flavors deepen over time, and you'll have one less thing to do on baking day. I double the recipe and freeze half for future meals. When reheating, warm it gently on the stove with a splash of water to prevent drying out. 🍅
Baking Day Timeline
Plan your baking day like this: 30 minutes to assemble from fridge (if prepped ahead), 50 minutes baking time, and 10 minutes resting. Set a timer for the final 10 minutes uncovered so you don't miss the golden browning. Pro tip: Use an oven thermometer to ensure your oven is at 375°F—many ovens run 25°F hot or cold. ⏰
Nutrition facts
Frequently asked questions
Can I use chicken sausage instead of Italian sausage?
While chicken sausage works in a pinch, it won't give you that authentic Italian flavor. Italian sausage (pork-based) has a deeper, richer taste that pairs perfectly with the tomato sauce and beef. If you must substitute, try mild Italian sausage made with chicken, but expect a slightly different flavor profile.
How do I prevent a soggy top layer?
For that perfect crispy top, bake uncovered for the final 10-15 minutes and avoid overmixing the ricotta. Press down firmly when layering to eliminate air pockets. If it browns too quickly, tent loosely with foil. Pro tip: Use a mix of part-skim and whole milk mozzarella for better browning.
What's the best way to reheat leftovers?
Cover with foil and warm in a 350°F oven for 20-25 minutes until bubbly. For microwave reheating, sprinkle with a little water or pasta water first to restore moisture. Leftovers actually taste better the next day as flavors meld—just avoid reheating more than once for best texture.
Can I make this gluten-free?
Swap regular ziti for gluten-free pasta and use gluten-free breadcrumbs (if adding any) on top. For extra insurance, check all cheese labels for gluten-free certification. The flavor will be just as rich—just watch your portion sizes as gluten-free pasta tends to be denser.
Why does my sauce get watery when baking?
This usually happens when the pasta releases too much starch or the sauce wasn't reduced enough. Next time, simmer your sauce longer before assembling, and consider adding a splash of tomato paste to thicken it. Also ensure your pasta is fully drained but not rinsed—those starches help bind the sauce!