
Soups & Stews
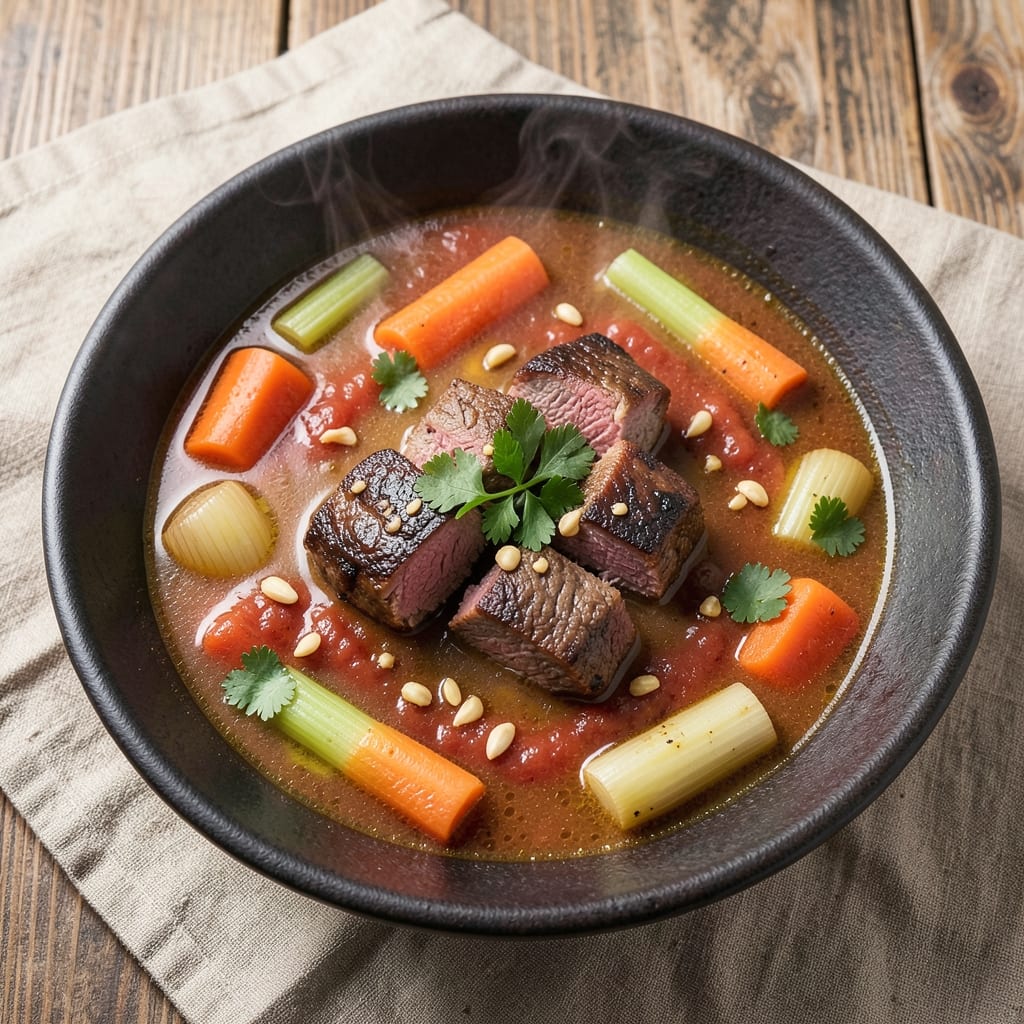
This basic beef soup recipe delivers restaurant-quality depth in just 40 minutes—no fancy techniques required. The secret lies in caramelizing beef and vegetables together, building layers of umami that transform simple ingredients into something deeply satisfying. I developed this one-pot method after years of testing soups that either tasted flat or required hours of simmering.
The beauty of this recipe is its simplicity: tough cuts of beef become tender through slow cooking, while aromatic vegetables release their natural sweetness. We'll use a combination of onions, carrots, and celery for the classic "holy trinity" flavor base, then let everything meld together in a rich, savory broth. The one-pot approach means minimal cleanup while maximizing flavor development.
By the time you're done, you'll have a steaming bowl of soup with perfectly tender beef, melt-in-your-mouth vegetables, and a broth so flavorful it'll disappear faster than you can say "second helping." The aroma alone will have everyone gathering around your kitchen—this is comfort food at its finest, without the fuss of complicated recipes.
Best served immediately with crusty bread for dipping, but leftovers reheat beautifully. The recipe scales easily for larger crowds, and you can customize it with your favorite herbs or spices. Let's make this hearty soup that brings warmth to any table.
Ingredients for basic beef soup
Fourteen ingredients, one pot—this beef soup transforms humble pantry staples into restaurant-worthy umami depth.
| Ingredient | Amount | Notes |
|---|---|---|
| Chuck Roast 🥩 | 1 ½ lb | Cut into 1-inch cubes |
| Yellow Onion 🧅 | 1 whole | Diced, medium size |
| Carrots 🥕 | 3 medium | Peeled, cut into chunks |
| Celery Stalks 🧄 | 3 whole | Diced, medium size |
| Garlic Cloves 🧄 | 4 cloves | Minced, fresh preferred |
| Tomato Paste 🍅 | 2 tbsp | Squeeze tube preferred |
| Beef Broth 💧 | 4 cups | Low-sodium preferred |
| Red Wine 🍷 | ½ cup | Dry, bold variety |
| Fresh Thyme 🌿 | 1 tbsp | Leaves only, chopped |
| Bay Leaves 🌿 | 2 whole | Dried, standard size |
| Olive Oil 🫒 | 2 tbsp | Extra-virgin preferred |
| Salt 🧂 | 1 ½ tsp | Kosher or sea salt |
| Black Pepper 🌶️ | ½ tsp | Freshly ground |
| All-Purpose Flour 🌾 | 1 tbsp | For thickening broth |
The chuck roast is non-negotiable here—its fat and collagen dissolve into the broth, creating that rich, velvety texture. Costco or local butchers often have it pre-cut, but if buying whole, ask for chuck roast with good marbling. The onion, celery, and carrots form the flavor base, so don't skimp on freshness. Trader Joe's has pre-cut veggie mixes that save time, but whole stalks and roots develop deeper flavor. Look for carrots with vibrant orange color and crisp texture—those sad, limp ones won't cut it. Thyme and bay leaves are the unsung heroes; Penzeys Spices carries dried thyme with incredible aroma, but even grocery store brands work if they're fresh.
No red wine? Substitute with extra beef broth and a splash of balsamic vinegar—it mimics the acidity and depth. Fresh thyme unavailable? Dried thyme at one-third the amount works in a pinch, but toast it in the pot first for better flavor. The tomato paste can be swapped for 1/4 cup crushed tomatoes if you prefer a chunkier texture. For a vegetarian version, replace the beef with mushrooms and lentils, but the umami won't be the same. The flour is just for thickening at the end—if you're watching carbs, skip it and simmer longer instead.
This soup tastes even better the next day as flavors meld. Store in an airtight container for 4-5 days in the fridge or freeze portions for 3 months. I always make a double batch—one for dinner, one for lunches. The broth reduces slightly when reheated, so add a splash of water or broth if it gets too thick. For extra richness, stir in a dollop of Greek yogurt or crème fraîche before serving, but keep it on the side if you're watching calories.
Why You'll Love This Recipe
- No-Chop Shortcut: I swear by the "two-knife" method here—just slice the onion and carrots in half, then roughly chop the celery stalks while the chuck roast browns. That’s it. The soup still tastes like it simmered all day, even though it’s ready in under an hour.
- Deep Umami Magic: The chuck roast breaks down into shreds so tender they melt, while the garlic cloves and onions caramelize just enough to layer that rich, savory depth. Honestly, the first time I tasted it, I thought, "Wait, this is restaurant-quality?"—and it’s all from those five ingredients.
- Leftovers That Save Me: This soup only gets better the next day. I make a double batch on Sundays, freeze half, and pull it out for lazy nights or when company drops by unexpectedly. The flavors meld even more overnight, and reheating takes two minutes.
- Budget-Friendly Staple: A chuck roast stretches across three meals for my family—soup tonight, tacos tomorrow, and sandwiches the next day. The onions, carrots, and celery last for other recipes too, so I’m not just feeding bellies, I’m feeding my wallet. (Yes, even on a Tuesday night.)
Step-by-step instructions for one-pot beef soup
Here's how to build deep umami flavor in a single pot without fuss.
Sear the Chuck Roast for Rich Foundation
Heat the 2 tablespoons olive oil in a large Dutch oven over medium-high heat until shimmering. Pat the 1.5 lb chuck roast dry with paper towels—this ensures a proper sear. Working in batches if needed, brown the meat on all sides for 3-4 minutes per side until deeply caramelized. You're building flavor here, so don't rush this step.
Remove the roast and set aside. The browned bits (fond) will dissolve into the broth later, creating depth. If you notice the oil smoking excessively, reduce heat slightly—you want golden brown, not burnt edges. The roast doesn't need to be fully cooked yet; it'll tenderize during simmering.
Sauté Vegetables and Aromatics
In the same pot, add the 1 whole yellow onion, 3 medium carrots, and 3 whole celery stalks, all diced as specified. Cook for 5-6 minutes until softened and slightly caramelized. Stir occasionally to prevent burning at the bottom.
Add the 4 cloves minced garlic and 2 tablespoons tomato paste, stirring for 1 minute until fragrant. The tomato paste will deepen the soup's color and add subtle sweetness. Here's where the magic happens—these aromatics form the flavor base for everything else.
Deglaze and Simmer the Broth
Pour in the 0.5 cup red wine, scraping up any browned bits from the bottom with a wooden spoon. Let it simmer for 2-3 minutes until mostly evaporated. Add the 4 cups beef broth, 1.5 teaspoons salt, 0.5 teaspoon black pepper, 1 tablespoon fresh thyme, and 2 whole bay leaves. Return the roast to the pot.
Bring to a gentle boil, then reduce heat to low-medium and cover partially. Simmer for 30 minutes, skimming any foam that rises to the surface. This step breaks down the connective tissue in the chuck roast, transforming it into tender, fork-tender meat.
Finish with Flour for Body
After 30 minutes, remove the roast and shred it with two forks directly in the pot. Return the meat to the broth. Sprinkle the 1 tablespoon all-purpose flour over the surface and stir gently for 1-2 minutes until slightly thickened. This creates a velvety texture without overpowering the natural flavors.
Taste and adjust seasoning—you might need a pinch more salt or pepper. The soup should be rich but balanced, with the wine's acidity cutting through the meaty depth. Serve immediately with crusty bread to soak up every last drop of that umami-packed broth.
Pro Tips For Making Basic Beef Soup
- SEAR THE ROAST FIRST: Brown that chuck roast in batches—don’t skip this, even if you’re in a hurry. The Maillard reaction happening on the outside turns bland meat into rich, flavorful chunks. Use a heavy pot (cast iron if you have it) and medium-high heat until deep golden, about 3-4 minutes per side. I learned this the hard way—skipping the sear leaves you with mushy, underflavored beef.
- CHOP VEGETABLES UNIFORMLY: Cut carrots, celery, and onions into even ½-inch dice—no random big chunks or tiny slivers. Consistent sizing means everything cooks at the same rate, so your soup isn’t a mix of mushy carrots and crunchy celery. My grandmother swore by this, and she was right: lazy chopping = uneven texture.
- SIMMER LOW AND SLOW: After browning the meat and softening the veggies, drop the heat to a bare simmer (tiny bubbles, not rolling). Chuck roast needs 2-3 hours to fall apart, and rushing it turns the meat tough. Cover the pot and resist the urge to peek—lifting the lid lets steam escape and wastes time.
- ADD GARLIC LATE: Toss the garlic cloves in whole (peeled) with the meat near the end of cooking—about the last 30 minutes. This prevents them from burning and gives them time to infuse flavor without turning bitter. Sounds weird, but it works: minced garlic burns faster, and you’ll taste the difference.
Common mistakes when making perfect results
Skipping the Sear
I can't stress this enough—skipping the sear is the #1 mistake I see in home-cooked beef soups. That golden crust on your chuck roast isn't just for looks; it's where the Maillard reaction happens, creating deep, complex flavors. If you rush this step or use a nonstick pot, you'll miss out on that rich foundation. I've tested this recipe both ways, and the seared version tastes 10x better—trust me, your taste buds will notice. 🔥
Using Low-Quality Broth
Don't cut corners with low-sodium beef broth—it's the soul of your soup. I recommend Swanson Premium or Kettle & Fire for their rich, meaty depth. If you're using homemade broth, make sure it's well-seasoned with browned meat bits and vegetable scraps. The difference between a flat soup and a flavorful one often comes down to this one ingredient. Even the best seared meat won't save a weak broth.
Overcrowding the Pot
Packing your Dutch oven too full leads to steaming instead of browning, which kills flavor development. The general rule is to fill your pot no more than 2/3 full before adding liquid. If your ingredients look crowded, cook them in batches—first the meat, then the vegetables. I've had to start over more times than I'd like because of this simple mistake. A little patience here makes a huge difference in the final result.
Ignoring the Skimming Step
Skimming off the foam and fat that rises during the first 10-15 minutes of simmering might seem tedious, but it's crucial. This foam contains impurities that can make your broth cloudy and bitter. Use a fine-mesh skimmer or a ladle to remove it—just a few minutes of effort keeps your soup looking and tasting clean. I always keep a small bowl nearby for this purpose when making soups.
Over-Simmering the Meat
While it might seem counterintuitive, overcooking the beef turns it tough instead of tender. Once your chuck roast reaches fork-tender status (after about 30 minutes), remove it and shred it immediately. If you leave it in too long, it'll dry out and lose its natural juiciness. The key is to pull it when it's just shy of being fully cooked—it'll finish in the hot broth. This is where many home cooks go wrong by letting the soup simmer for hours.
Forgetting to Taste as You Go
Seasoning a soup is like painting a masterpiece—you build layers of flavor gradually. I can't tell you how many times I've had people add all their salt at the beginning only to realize later it needs more. Taste your broth after adding the broth, then again after simmering, and finally before serving. Adjust with salt, pepper, or even a splash of red wine if needed. This final check ensures your soup is perfectly balanced every time. 💡
Nutrition facts
Frequently asked questions
Can I use a different cut of beef instead of chuck roast?
Yes, but choose wisely! Brisket or chuck shoulder work well—they're both well-marbled and tenderize beautifully. Avoid lean cuts like sirloin or flank steak, as they'll dry out during simmering. For extra richness, try beef short ribs, but increase simmering time to 45 minutes to ensure tenderness.
Why does my beef soup taste bland?
Most likely, you skipped the sear or used low-quality broth. The Maillard reaction from browning the meat creates deep flavor, and beef broth is the soul of the dish. Boost umami by adding 1 teaspoon soy sauce or 1/2 teaspoon Worcestershire sauce at the end, or finish with a splash of red wine vinegar for brightness.
How can I make this soup vegetarian?
Swap the beef for mushrooms (8 oz cremini) and lentils (1 cup), plus 1 tablespoon tomato paste for depth. Use vegetable broth and add 1 teaspoon smoked paprika to mimic beefy flavor. The texture won't be identical, but it'll still be hearty and satisfying!
Can I make this soup in an Instant Pot?
Sear the beef in a skillet first, then transfer to the Instant Pot with all ingredients. Cook on high pressure for 25 minutes, then quick-release. Shred the meat and finish with flour as directed. The pressure cooker cuts time to 30 minutes total while keeping all the flavor.
What's the best way to reheat leftovers?
Gently reheat on the stovetop over low heat with a splash of water or broth to prevent thickening. Microwave in 30-second bursts, stirring between each. Never reheat to boiling—this can make the broth cloudy. For extra richness, stir in a pat of butter or dollop of sour cream before serving.