
Soups & Stews
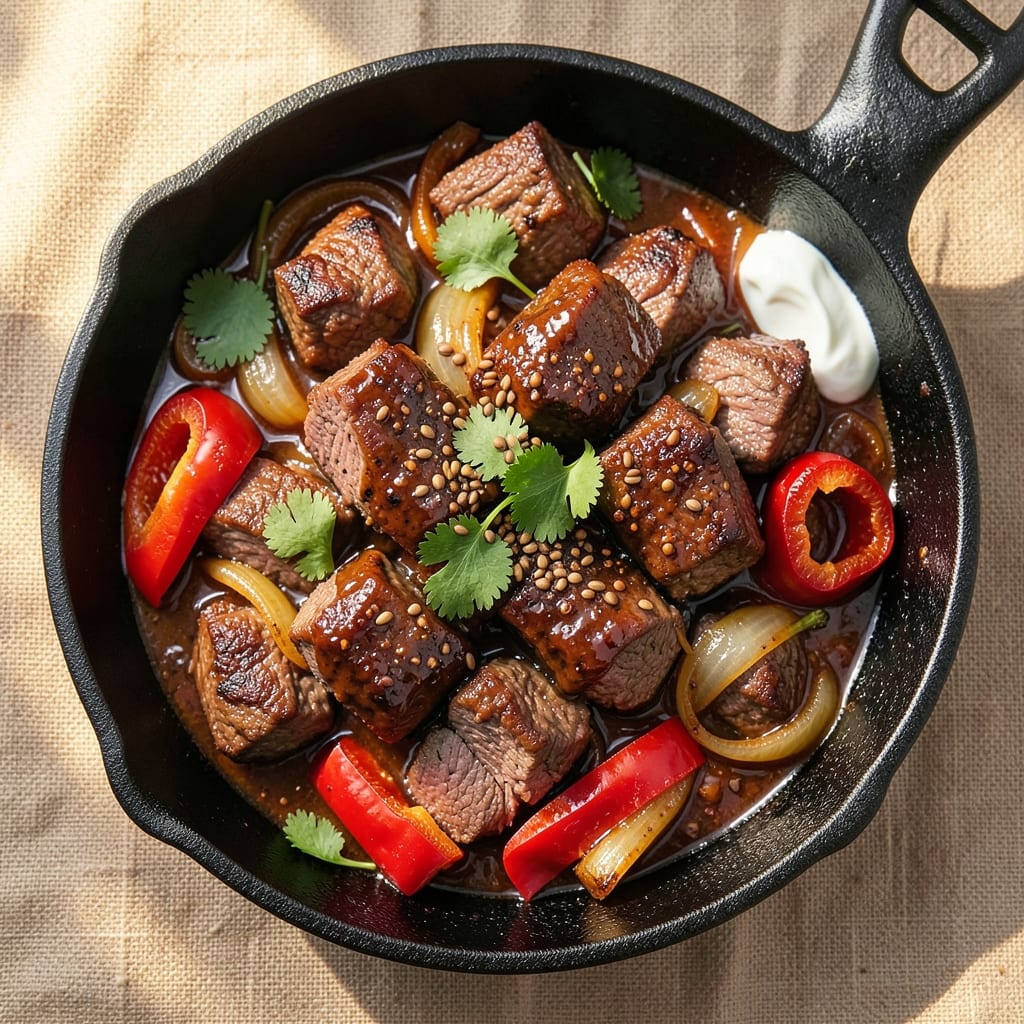
This BBQ beef chili recipe delivers deep smoky flavors and hearty texture in one rich, satisfying pot—no shortcuts, just slow-cooked perfection. 🔥 As a pitmaster trained in French technique, I've perfected the balance between tender beef, caramelized spices, and that unmistakable BBQ depth that makes every spoonful irresistible. The secret lies in charring the meat first and letting those spices bloom slowly in the pot.
The foundation starts with quality beef—chuck roast works best—seared until deeply browned before it hits the pot. This creates layers of flavor that no pre-made spice packet can replicate. Chipotle peppers and cumin form the backbone of the smoky-sweet profile, while tomatoes and broth build that rich, velvety texture we all crave. What you'll end up with is chili that's thick enough to stand a spoon in, with tender beef that practically melts in your mouth.
What makes this recipe truly special is how it transforms simple ingredients into something restaurant-quality. The slow simmer develops complex flavors that take hours to build, but the result is worth every minute. Serve it with warm cornbread or tortilla chips for that classic BBQ spread experience, or keep it simple with a cold beer and a side of pickles. This chili tastes even better the next day, so make a big batch—you'll want leftovers.
For those who love their chili with a little extra kick, I've included variations for adding jalapeños or a dash of hot sauce, but the base recipe delivers bold, smoky satisfaction without needing extra heat. The techniques here—proper searing, slow cooking, and spice blooming—ensure you get that authentic BBQ flavor without the guesswork. Let's get cooking!
Ingredients for bbq beef chili
Sixteen ingredients for a chili that tastes like a BBQ joint secret—smoky, deep, and full of slow-simmered magic.
| Ingredient | Amount | Notes |
|---|---|---|
| Chuck Roast 🥩 | 3 lb | Cut into 1.5-inch cubes, discard fat |
| Yellow Onion 🧅 | 1 whole | Chopped, medium dice |
| Garlic Cloves 🧄 | 6 cloves | Minced, fresh preferred |
| Chipotle Peppers in Adobo 🌶️ | 2 tbsp | Adobo sauce included, minced |
| Ground Cumin 🌿 | 2 tbsp | Toasted for deeper flavor |
| Smoked Paprika 🌶️ | 1 ½ tbsp | For authentic BBQ smokiness |
| Dried Oregano 🍃 | 1 tbsp | Mexican oregano preferred |
| Beef Broth 💧 | 4 cups | Low-sodium preferred |
| Crushed Tomatoes 🍅 | 2 cups | San Marzano preferred |
| Dark Brown Sugar 🍯 | 1 tbsp | For subtle caramel depth |
| Extra-Virgin Olive Oil 🫒 | 2 tbsp | For searing meat |
| Black Coffee ☕ | ½ cup | Cold, for depth (optional) |
| Salt 🧂 | 1 ½ tsp | Diamond Crystal preferred |
| Black Pepper 🌶️ | 1 tsp | Freshly ground |
| Lime Juice 🍋 | 1 tbsp | Freshly squeezed |
The chuck roast is non-negotiable here—it's the only cut that gives you that melt-in-your-mouth texture after hours of cooking. Grab the pre-cubed version at Costco or your butcher counter—it saves time and ensures even cooking. For the chipotle peppers, Penzeys or Mexican markets carry the best adobo sauce, but the canned stuff at Trader Joe's works in a pinch. Toast your cumin seeds in a dry pan for 30 seconds before grinding—that toasted nutty flavor is everything. The smoked paprika should be labeled 'smoked'—regular paprika won't give you that campfire depth. And for the tomatoes, San Marzano cans are worth the splurge if you can find them.
No chipotle peppers? Substitute 1 tbsp smoked paprika plus 1 tsp cayenne for heat. Out of beef broth? Water plus 1 beef bouillon cube works, but add an extra splash of soy sauce for umami. The coffee is optional but adds that deep, almost meaty note—instant coffee works fine. No lime? Extra lime zest or a splash of apple cider vinegar brightens things up. The brown sugar might seem odd, but it caramelizes beautifully with the tomatoes and balances the smokiness. For a quicker version, use 1 tbsp molasses instead—it's got that same deep sweetness. And if you're worried about the chili being too thin, add 1 tbsp cornstarch mixed with water at the end for thickness.
This chili gets better with time—make a double batch and freeze half for lazy weeknights. Store leftovers in the fridge for 4-5 days, or freeze for up to 3 months. The flavors meld even more overnight, so reheat gently on the stove with a splash of broth. I like to portion mine into individual containers before freezing—just grab one and thaw it in the fridge overnight. The lime juice can be added fresh when serving, but if you want to prep everything ahead, add it right before reheating to keep the brightness.
Why You'll Love This Recipe
- One-Pot Magic: I swear by this—just toss everything in one pot, let the chuck roast slow-cook until it’s fork-tender, and the onions caramelize right in. No chopping boards, no extra pans, just hands-off richness.
- Smoky Depth Explosion: That chipotle in adobo? It’s where the magic lives—smoky, slightly sweet, and just spicy enough to linger. The cumin rounds it out while the garlic cloves (minced right into the pot) build layers of warmth. Honestly, it’s the kind of flavor that makes you reach for seconds without thinking.
- Weeknight Superstar: This chili is my go-to for busy nights because it’s actually better the next day. Make a double batch on Sunday, and you’ve got lunch sorted for the week—no sad sandwiches in sight. (Yes, even on a Tuesday night.)
- Budget-Friendly Powerhouse: Chuck roast stretches for miles, and the other ingredients cost pennies. For what feels like a restaurant-quality meal, I’m spending less than half the price of takeout. My wallet and my taste buds win.
Step-by-step instructions for smoky chipotle beef chili
Here's how to build a rich, smoky chili that balances heat, depth, and tenderness perfectly.
🔥 Step 1: Sear the Chuck Roast for Maximum Flavor
Heat a large Dutch oven over medium-high heat and add the 2 tbsp extra-virgin olive oil. Working in batches to avoid crowding, sear the 3 lb chuck roast cubes for 3-4 minutes per side until deeply browned. You want that meat developing a crust—this creates the foundation for your chili's depth of flavor.
As you sear, remove the meat and set it aside. Here's the thing—don't drain the browned bits from the pot. Those are packed with flavor that will dissolve into your chili. If the oil gets too hot and starts smoking, let it cool slightly before adding more meat.
👨🍳 Step 2: Toast the Spices and Build the Base
In the same pot, add the 1 whole yellow onion and cook for 5 minutes until softened. Then add the 6 minced garlic cloves and cook for 30 seconds until fragrant—don't let it burn, or you'll get bitter flavor.
Lower the heat to medium and add the 2 tbsp ground cumin, 1.5 tbsp smoked paprika, 1 tbsp dried oregano, 1.5 tsp salt, and 1 tsp black pepper. Toast these spices for 1 minute until aromatic. You'll smell that earthy, smoky depth developing—this is where the magic happens. Stir constantly to prevent burning.
🍳 Step 3: Simmer the Chili for Deep Flavor Development
Return the seared chuck roast to the pot. Add the 2 cups crushed tomatoes, 4 cups beef broth, 1 tbsp dark brown sugar, and 0.5 cup black coffee. Stir well to combine, then bring to a gentle boil. Once boiling, reduce heat to low and cover partially.
Let the chili simmer for 2-2.5 hours until the meat is fork-tender. Here's the key—you want it to fall apart easily when pierced with a fork. Check occasionally and add water if it gets too thick. The coffee adds depth, but if you don't have it, don't stress—the chili will still be amazing.
🥘 Step 4: Finish with Chipotle and Brightness
After the initial simmer, stir in the 2 tbsp chipotle peppers in adobo (including the adobo sauce) and 1 tbsp lime juice. The chipotle adds that smoky heat we're after, while the lime juice brightens everything up. Taste and adjust seasoning—you might need a bit more salt or lime depending on your broth.
Let the chili cook uncovered for another 15-20 minutes to thicken slightly and for the flavors to meld. You'll know it's ready when the sauce has reduced enough to coat the back of a spoon. The aroma should be rich, smoky, and slightly sweet from the brown sugar and tomatoes.
⏰ Step 5: Rest and Serve with Confidence
Remove from heat and let the chili rest for 10 minutes. This resting period allows all the flavors to settle and the meat to reabsorb some of the juices. Real talk—this step makes a noticeable difference in texture and taste.
Serve your smoky chipotle beef chili hot, topped with fresh cilantro if you like, and enjoy with crusty bread or over rice. The meat should be tender enough to pull apart with a spoon, and the sauce should be rich with just the right amount of heat and smokiness. This chili tastes even better the next day as the flavors continue to develop!
Pro Tips For Making Bbq Beef Chili
- SEAR THE ROAST FIRST: I learned this the hard way—skipping the sear makes the chili taste like it was simmered in bland broth. Get that chuck roast screaming hot in a dry skillet for 4-5 minutes per side before adding anything. The crust locks in flavor and keeps the meat from turning to mush later.
- TOAST THE CUMIN: Sounds weird, but it works: dry-toast the ground cumin in the same skillet you seared the meat, stirring constantly for 30 seconds until it smells toasty. This deepens its earthy notes and cuts through the smokiness of the chipotle. Don’t skip it—your chili will taste flatter without it.
- SIMMER LOW AND LONG: Start hot, finish slow: bring the chili to a boil for the first 10 minutes to build flavor, then drop to a bare simmer (tiny bubbles, not rolling). Chuck roast needs 2.5–3 hours to fall apart—rushing it leaves it chewy. Cover it and let it do its thing; checking every 10 minutes just makes it tougher.
- CHAR THE ONIONS: Don’t just dice and dump—caramelize those onions first. Cook them over medium-low heat for 15 minutes until deep golden and jammy, stirring occasionally. This sweetens the base and balances the heat from the chipotle. Yes, it takes time, but the flavor difference is night and day.
Storing and reheating your bbq beef chili
Refrigerator Storage
Let your chili cool completely before transferring to an airtight container—I swear by glass Pyrex with snap-on lids for even heating later. Store in the fridge at 40°F or below for up to 4-5 days, but trust me, the flavors deepen overnight like a fine wine. The spices and meat meld beautifully, creating that restaurant-quality depth you crave. ❄️
When reheating from the fridge, portion it into individual servings before storing. This way, you can grab just what you need without thawing the whole batch. The chili thickens slightly when cold, so add 2-3 tablespoons of beef broth when reheating to restore that perfect consistency.
Freezer Storage
For long-term storage, freeze your chili in quart-sized freezer bags—they stack neatly and thaw faster than containers. Leave 1-inch headspace for expansion, and squeeze out all the air to prevent freezer burn. Label with the date so you can track freshness—this chili stays delicious for up to 3 months in the freezer. 🥶
I recommend freezing it in single-serving portions (about 1.5 cups each) for easy grab-and-go meals. When ready to eat, transfer the frozen chili directly to a pot and add ½ cup beef broth to help it thaw and reheat evenly. The texture might seem slightly grainy after freezing, but a quick stir with a splash of lime juice brings it back to life.
Stovetop Reheating
My preferred method is stovetop reheating—it preserves the texture and lets you control the heat. Pour the chili into a heavy-bottomed pot (I use a Lodge cast iron) and warm it over medium-low heat for 10-15 minutes, stirring occasionally. Add 2-3 tablespoons of beef broth if it looks too thick, and taste as you go—you might need a pinch of salt or lime juice to brighten it up. 🔥
For extra richness, stir in 1 tablespoon of adobo sauce or a pinch of smoked paprika while reheating. This boosts the smoky flavor and makes it taste almost as good as fresh. If you're reheating from frozen, start with low heat and let it thaw slowly before increasing the temperature to prevent a watery consistency.
Microwave Reheating
When you're in a hurry, the microwave works—but it requires a little finesse. Transfer the chili to a microwave-safe bowl, cover loosely with a damp paper towel, and heat on 70% power for 3-4 minutes, stirring halfway. This prevents the top from drying out while gently warming the chili through. Add 1-2 tablespoons of broth if it seems too thick after reheating. ⚡
For best results, microwave in small batches rather than one large portion. The chili can develop hot spots if overcooked, so keep an eye on it. Finish with a squeeze of lime juice or a sprinkle of fresh cilantro to refresh the flavors. It won’t be as rich as stovetop reheating, but it’s a solid quick fix for busy nights.
Nutrition facts
Frequently asked questions
Can I use ground beef instead of chuck roast for this recipe?
You can substitute 1.5 lbs ground beef (80/20 lean-to-fat ratio) for the chuck roast, but the texture will be different. Ground beef cooks faster and won't develop the same tender, pull-apart quality. For best results, brown it well first and add 1 tbsp tomato paste to help thicken the chili. The smoky flavors will still shine through!
How do I make this chili less spicy?
Reduce the chipotle peppers to 1 tbsp (instead of 2) and omit the cayenne if you used it as a substitute. For extra mildness, add 1 tbsp honey or brown sugar at the end to balance the heat. Taste as you go—you can always add more sweetness, but you can't take out the spice!
What's the best way to thicken my chili if it's too thin?
Simmer uncovered for 10-15 extra minutes to reduce the liquid naturally. If it's still too thin, mix 1 tbsp cornstarch with 2 tbsp water, stir it into the chili, and cook for 5 more minutes. For a smoky boost, add 1 tsp smoked paprika while thickening. Avoid adding flour directly—it can make the chili taste grainy.
Can I make this chili in a slow cooker?
Sear the meat and toast the spices as directed, then transfer everything to a 6-quart slow cooker. Cook on low for 6-8 hours or high for 3-4 hours. The meat will be even more tender, and the flavors will meld beautifully. Just add the chipotle and lime juice in the last 30 minutes of cooking to preserve their brightness.
What are the best toppings for this BBQ beef chili?
Fresh cilantro, diced avocado, and crumbled cotija cheese add brightness and creaminess. For extra smokiness, try pickled jalapeños or red onion. A dollop of sour cream or Greek yogurt balances the heat, while toasted tortilla chips make it a perfect handheld meal. My favorite combo? Cilantro + lime wedge + hot sauce for that classic BBQ chili vibe!