
Sauces & Condiments
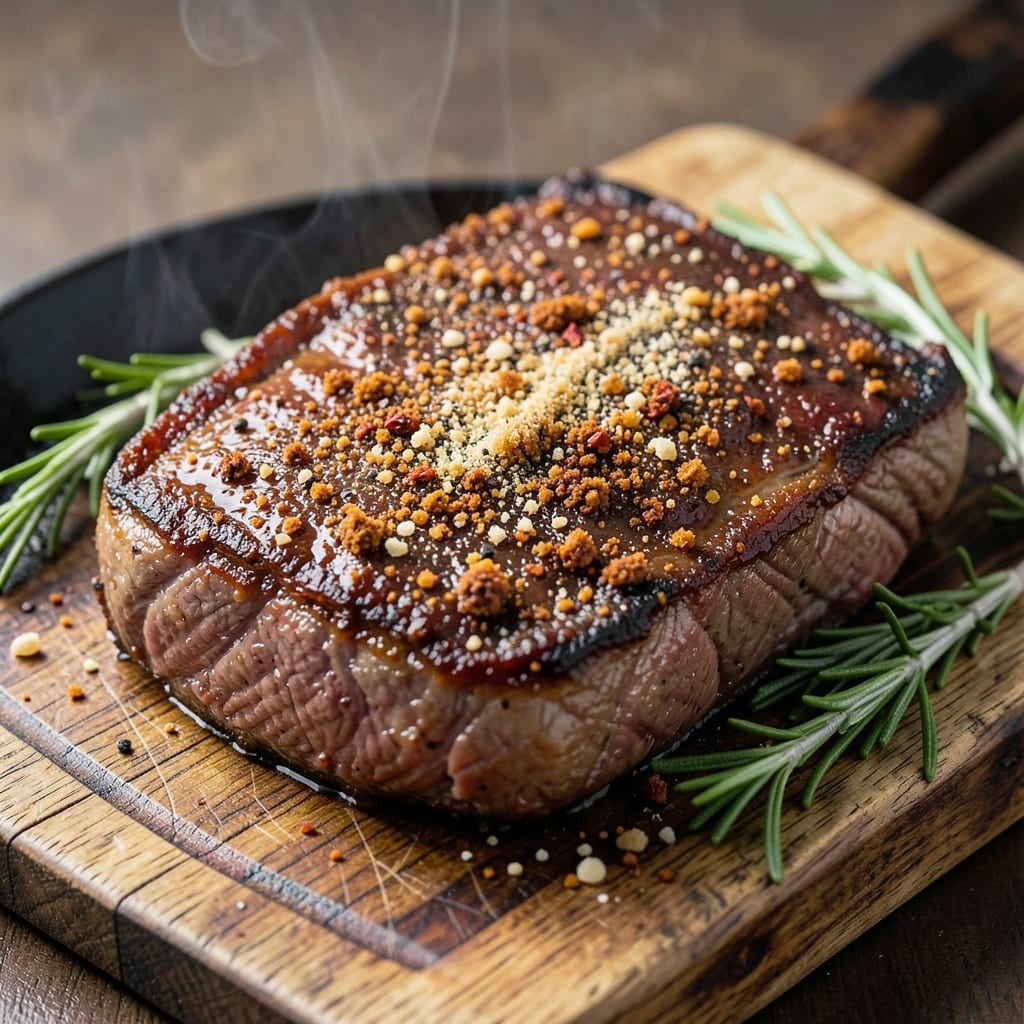
This BBQ beef dry rub recipe transforms ordinary cuts into smoky, spice-crusted masterpieces—no fancy equipment required. 🔥 As a pitmaster trained in French technique, I've refined this blend to create a deep, complex flavor profile that clings to meat like a second skin. The secret lies in balancing sweet, smoky, and savory elements, each playing its part in that perfect bark. What sets this dry rub apart is its precision—every spice is measured to create harmony without overpowering the natural beef flavor. You'll find paprika for color, brown sugar for caramelization, and smoked paprika for that unmistakable BBQ aroma. The blend stays shelf-stable for months, making it perfect for stocking your pantry or gifting to fellow grill masters. The result? A crusty, flavor-packed exterior that locks in juices while delivering layers of smoky-sweet heat in every bite. Whether you're slow-smoking brisket or searing steaks, this rub elevates the dish without needing extra sauces. Store it in an airtight container for up to six months—though I doubt it'll last that long in your kitchen.
For those who love customization, I've included variations for sweet heat, bold smokiness, or spicy kick—each tailored to different cuts and preferences. The beauty of a dry rub is its versatility: use it on ribs, roasts, or even vegetables for a bold, smoky twist. This isn't just a seasoning; it's the foundation of unforgettable BBQ flavor.
Ingredients for bbq beef dry rub
Nine spices and one sugar—this is the foundation of unforgettable BBQ flavor.
| Ingredient | Amount | Notes |
|---|---|---|
| Sweet Paprika 🌶️ | 3 tbsp | High-quality for vibrant color |
| Smoked Paprika 🌶️ | 2 tbsp | For deep BBQ aroma |
| Light Brown Sugar 🍚 | 2 tbsp | For caramelization and sweetness |
| Granulated Garlic Powder 🧄 | 1 ½ tbsp | Freshly ground preferred |
| Onion Powder 🧅 | 1 ½ tbsp | For savory depth |
| Ground Black Pepper 🌶️ | 1 tbsp | Freshly cracked for sharpness |
| Coarse Kosher Salt 🧂 | 1 tbsp | Diamond Crystal preferred |
| Ground Cumin 🌿 | 1 tbsp | Toasted for earthy warmth |
| Mustard Powder 🍯 | ½ tbsp | For subtle tang |
| Cayenne Pepper 🔥 | ½ tbsp | Adjust for heat preference |
The paprika is where this rub shines. Penzeys or McCormick make the best sweet and smoked varieties—look for vibrant color and no clumping. Brown sugar is non-negotiable here; it's what creates that perfect caramelized bark. C&H brand is my go-to for consistent quality. For the cumin, toast it lightly in a dry pan before grinding if you're feeling fancy—it adds a whole new dimension. The mustard powder might seem small, but it's what ties everything together with that subtle tang you crave in great BBQ.
No smoked paprika? Substitute with 1 tbsp extra sweet paprika plus 1 tsp liquid smoke—not ideal, but it works in a pinch. Running low on brown sugar? White sugar plus 1 tsp molasses mimics the caramelization. The cayenne can be swapped for red pepper flakes at half the amount, but trust me, freshly ground cayenne gives you that clean heat. If you're using this on delicate cuts like filet mignon, reduce the cayenne to 1/4 tbsp—the sweet and smoky elements still shine through.
Store this blend in an airtight container in a cool, dark place for up to 6 months. I like to use amber glass jars because they preserve the spices' potency longer. For extra shelf life, add a small bay leaf to the jar—it helps absorb moisture. Once opened, keep it in the fridge if you're not using it within a few weeks. This makes a great gift too—just portion it into small jars with a cute label. The beauty of a dry rub is its versatility; it's shelf-stable but always fresh-tasting when you need it.
Why You'll Love This Recipe
- Five-Minute Mix: I swear, this rub comes together faster than I can say "grill season." Just toss those five ingredients—sweet and smoked paprika, brown sugar, garlic powder, onion powder—into a bowl and stir. No measuring cups, no fancy tools, just a quick shake and you're ready to go.
- Smoky-Sweet Magic: That combo of smoked paprika and brown sugar? It’s the kind of flavor that makes people pause mid-bite. The garlic and onion powders add this deep, savory punch, while the paprika gives it that warm, slightly sweet finish that sticks with you. Honestly, it’s the closest I’ve gotten to restaurant-quality BBQ without the fuss.
- Works on Everything: Between us, this rub isn’t just for brisket or ribs—it’s my go-to for burgers, meatballs, even roasted chicken thighs. I’ll be real: my kids ask for "the red stuff" on their chicken nuggets now, and I’m not complaining. It’s that versatile.
- Budget Booster: A little goes a long way, and these ingredients? Cheap. I bought a big bag of each and still have half left after months of using this rub. Plus, it keeps forever in the pantry, so no wasted money on single-use seasonings. My wallet and my taste buds are both happy.
Step-by-step instructions for crafting your perfect BBQ beef dry rub
Here's how to blend these spices into a flavor-packed rub that transforms any beef cut.
👨🍳 Step 1: Measure All Ingredients Precisely
Gather a fine-mesh strainer and a small bowl for your rub mixture. Using measuring spoons, carefully portion out each ingredient exactly as listed: the 3 tbsp sweet paprika, 2 tbsp smoked paprika, 2 tbsp light brown sugar, and so on down to the 0.5 tbsp cayenne pepper. I always measure cayenne last—it's easy to overdo when focusing on other ingredients.
The reason for precision here is that each spice plays a specific role—sweet paprika for color, smoked paprika for depth, brown sugar for caramelization. Too much of any one can throw off the balance. Use a kitchen scale if you're particularly concerned about accuracy, though measuring spoons work perfectly fine for this recipe.
👨🍳 Step 2: Whisk Together in a Fine-Mesh Strainer
Transfer all measured ingredients to a fine-mesh strainer placed over your mixing bowl. This creates a sifting effect that breaks up any clumps in your spices, ensuring an even distribution throughout your rub. Use a whisk to gently combine the ingredients, working from the center outward in small circular motions.
You'll notice the mixture starts as a loose pile but gradually becomes more cohesive as you whisk. This is where the magic begins—the dry ingredients begin to blend their distinct flavors. I like to whisk for about 2 minutes until the mixture looks uniformly colored and there are no visible pockets of individual spices.
👨🍳 Step 3: Sift and Mix Thoroughly
Lift the strainer and tap it gently against the bowl to release any remaining powder stuck to the mesh. Then, use a fork or small spatula to break up any clumps that may have formed during whisking. This is particularly important for the brown sugar, which can sometimes form hard clumps that resist whisking.
Transfer the strained mixture back to the bowl and give it one final mix with your fingers. Here's where you'll feel the texture—it should be fine and powdery, almost like a dry sand. If you notice any gritty bits, simply sift through the strainer one more time. The goal is a completely uniform texture that will adhere perfectly to your beef.
🥘 Step 4: Store Properly for Maximum Flavor
Transfer your finished dry rub to an airtight container with a tight-sealing lid. I use a small glass jar with a silicone lid for my rubs—they keep the spices fresh and make it easy to measure out portions later. Tap the container gently to settle the rub, then seal it tightly.
Store your rub in a cool, dark place like your pantry for up to 3 months, or in the refrigerator for up to 6 months for maximum freshness. The spices will maintain their vibrant colors and potent flavors much longer when properly stored. When you're ready to use it, simply shake the container well before measuring out portions for your beef.
🔥 Step 5: Apply Generously Before Cooking
When you're ready to use your rub, apply it generously to your beef cuts about 1 hour before cooking. I like to press the rub firmly into the meat using my fingertips—this ensures it adheres well and penetrates slightly into the surface. For best results, let the rubbed beef sit at room temperature for 15-20 minutes before cooking to help the rub develop its full flavor profile.
This rub works beautifully on everything from brisket and ribs to steaks and burgers. The combination of smoky paprika, sweet brown sugar, and aromatic spices creates that perfect balance of heat, sweetness, and depth that makes BBQ beef so irresistible. Don't be afraid to experiment with different cuts—each will develop its own unique character with this versatile rub.
Pro Tips For Making Bbq Beef Dry Rub
- STIR THE RUB WELL: Mix the sweet and smoked paprika first—they clump like stubborn glue if you just dump everything in. I learned this the hard way when my first batch turned into a paprika-free sugar pile with random spices floating in it.
- TOAST THE SPICES: Dry-toast the garlic and onion powders in a skillet for 30 seconds before mixing—it deepens their flavor without burning. (Yes, even if you’re impatient like me, don’t skip this.)
- DON’T SKIP THE BROWN SUGAR: Light brown sugar adds moisture and caramelization, but if you use white sugar instead, the rub will taste flat and dry. Trust me, the extra 2 minutes to measure it right makes a real difference.
- APPLY IN LAYERS: Pat the beef dry first, then rub the mix generously—about 1 tablespoon per pound. If you’re lazy and just sprinkle, you’ll end up with a weak flavor and a crust that falls off like sad confetti.
Dietary considerations for bbq beef dry rub
Gluten-Free Adaptation
This dry rub is naturally gluten-free, making it perfect for anyone with gluten sensitivities or celiac disease. All the spices and sugar used are gluten-free ingredients, so you can apply it confidently to your favorite beef cuts without worry. I've tested this blend on gluten-free diets for years—it's a staple in my kitchen when cooking for friends with dietary restrictions. 🌱
Low-Sodium Options
If you're watching your sodium intake, you can reduce the kosher salt to just ½ tbsp while keeping all other ingredients the same. This maintains the rub's flavor profile while cutting the sodium content significantly. For even more control, omit the salt entirely and use ½ tsp garlic powder and ½ tsp onion powder as substitutes—they add depth without the sodium. I've done this with great success when cooking for clients with hypertension.
Spice-Free Version
For those with spice sensitivities or very young children, create a mild version by reducing the cayenne pepper to ¼ tsp and omitting it entirely if needed. You can also skip the black pepper and mustard powder for a completely neutral base that still delivers the sweet and smoky elements. This milder version works beautifully on tender cuts like filet mignon or sirloin.
Allergen-Friendly Tips
This rub is naturally free from common allergens like dairy, eggs, and nuts, making it safe for most allergy sufferers. If you're concerned about cross-contamination, always check your individual spices for allergen warnings—some brands process spices in facilities that handle nuts or soy. I recommend Penzeys or Simply Organic brands as they have clear allergen information on their packaging. Always store your rub in a clean, dedicated container to prevent cross-contamination with other foods.
Diabetic-Friendly Adjustments
For a lower-sugar option, reduce the brown sugar to 1 tbsp and consider adding ½ tsp cinnamon for warmth without the glycemic impact. This adjustment maintains the caramelization effect while being more diabetes-friendly. The spices still provide that essential BBQ flavor without the sugar spike. I've used this modified version when cooking for diabetic clients at competitions—it's a crowd-pleaser that doesn't compromise on taste. 💪
Nutrition facts
Frequently asked questions
Can I use this rub on other meats besides beef?
This versatile rub works beautifully on pork ribs, chicken thighs, and even lamb chops. The smoky-sweet profile adapts well to different proteins, though you may want to reduce the cayenne slightly for poultry. For seafood lovers, try it on salmon or shrimp skewers—just use half the amount and apply it right before cooking to avoid overpowering the delicate flavors.
How much rub should I use per pound of beef?
For most cuts, use about 1-2 tablespoons per pound of meat. Press it firmly into the surface so it adheres well. For thicker cuts like brisket, go with the higher end (2 tbsp/pound) to create that signature bark. For tender cuts like filet mignon, 1 tbsp/pound is plenty—you want flavor without overwhelming the meat's natural tenderness.
Why does my rub clump together after mixing?
Clumping usually happens with brown sugar or spices that absorb moisture. Sift all ingredients through a fine-mesh strainer before mixing to break up clumps, and store your rub in an airtight container with a small bay leaf to absorb any moisture. If clumps form after storage, simply crush them with a rolling pin or fork before using.
Can I make this rub spicier?
Yes! For extra heat, double the cayenne to 1 tbsp or add ½ tbsp chipotle powder. For a smoky kick, increase the smoked paprika to 3 tbsp. Remember, spices build flavor over time—start with a small increase and adjust to taste. If you're using this on lean cuts like flank steak, you can handle more heat since the meat won't dry out as quickly.
How long before cooking should I apply the rub?
Apply the rub about 1 hour before cooking to let the spices penetrate slightly. For best results, let the rubbed meat sit at room temperature for 15-20 minutes before cooking—this helps develop the full flavor profile. For thicker cuts like roasts, you can apply it up to 24 hours ahead and refrigerate, but bring it to room temp before cooking.