
Main Courses
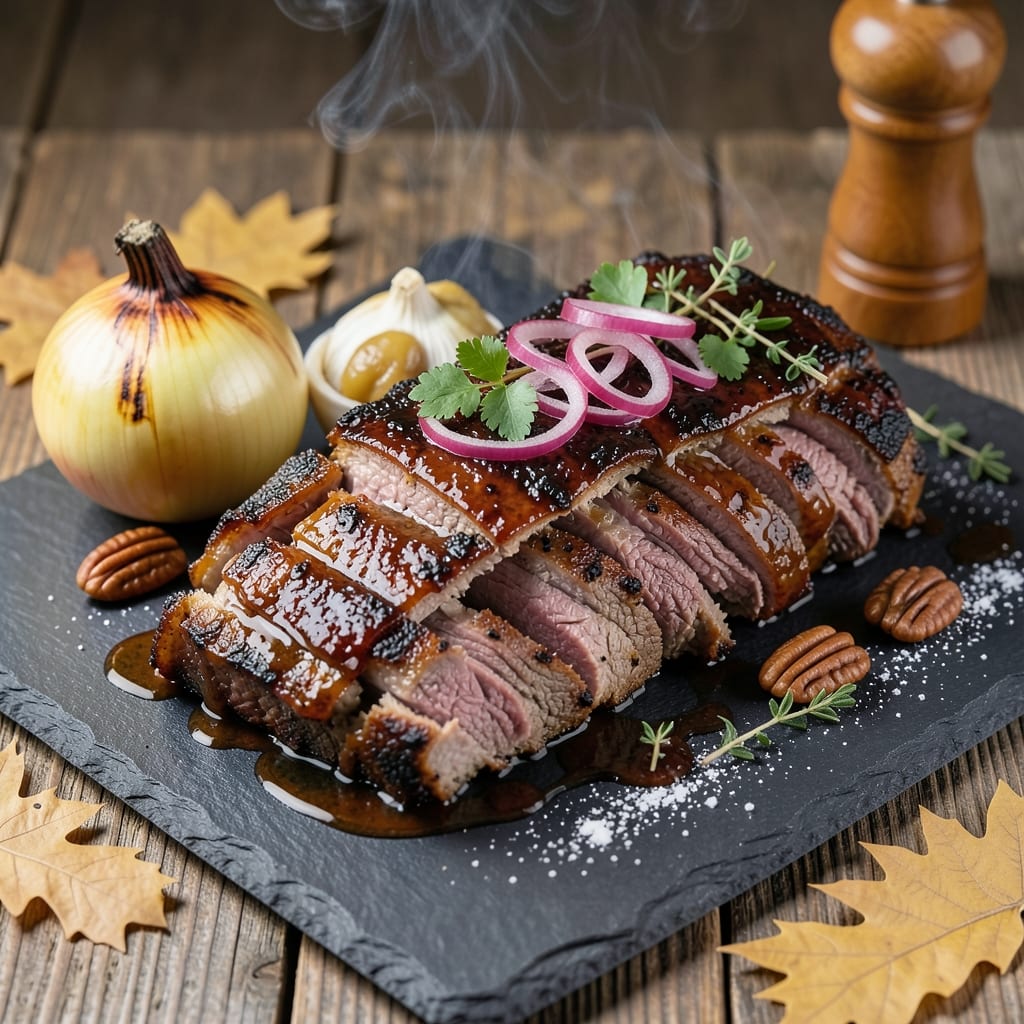
This BBQ pulled beef brisket recipe delivers restaurant-quality, smoke-infused chews that practically melt in your mouth after just 8 hours. The secret lies in low-and-slow cooking with a perfect blend of spices and wood smoke, transforming tough cuts into tender, fall-apart perfection. I've perfected this technique over years of pitmaster competitions, and it never fails to impress—whether you're feeding a crowd or treating yourself to a slow-cooked masterpiece.
What sets this recipe apart is the balance of simple ingredients and precision timing. A well-chosen dry rub creates a flavorful bark, while the slow smoke infusion ensures deep, smoky notes penetrate every fiber. The key is patience—letting the brisket rest after cooking is just as important as the cooking itself, guaranteeing that first bite is juicy and full of flavor. No fancy equipment needed, just a reliable heat source and a little time.
By the time you're done, you'll have fall-apart tender beef that shreds easily with a fork, ready to be piled high on buns or served as a hearty main dish. The aroma alone will have everyone gathering around the table, and the texture—juicy, smoky, and rich—will make this your new go-to recipe for gatherings or lazy Sundays. This is comfort food at its finest, elevated by the magic of slow cooking.
Serve with classic sides like crispy coleslaw, buttery cornbread, or pickled jalapeños for a full BBQ spread that feels like a celebration. The brisket's rich flavor pairs perfectly with tangy sauces or even just a sprinkle of fresh herbs. This isn't just a recipe—it's an experience that turns a simple meal into a memorable event. Let's get cooking!
Ingredients for bbq pulled beef brisket
Six pounds of brisket and a handful of spices transform into melt-in-your-mouth perfection.
| Ingredient | Amount | Notes |
|---|---|---|
| Beef Brisket 🥩 | 6 lb | Whole packer cut, trimmed of excess fat |
| Yellow Onion 🧅 | 2 whole | Sliced into 1/2-inch wedges |
| Garlic Cloves 🧄 | 8 cloves | Peeled, smashed for even flavor |
| Apple Cider Vinegar 🍎 | ¼ cup | For tenderizing and tang |
| Brown Sugar 🍯 | ½ cup | Dark variety preferred |
| Smoked Paprika 🌶️ | 2 tbsp | For deep smoky flavor |
| Ground Black Pepper 🌶️ | 1 ½ tbsp | Freshly cracked for heat |
| Diamond Crystal Kosher Salt 🧂 | 1 ½ tbsp | For seasoning and preservation |
| Mustard Powder 🌶️ | 1 tbsp | Adds depth to the rub |
| Chipotle Powder 🌶️ | 1 tbsp | For subtle smoky heat |
| Wood Chips (Hickory or Oak) 🌳 | 2 cups | Unsoaked for smoker |
| Beef Broth 🥫 | 1 ½ cups | Low-sodium preferred |
| BBQ Sauce 🍅 | 1 cup | Store-bought or homemade |
| Fresh Parsley 🌿 | ¼ cup | Chopped for garnish |
The beef brisket is the star—look for a whole packer cut with good marbling from Costco or your butcher. Trim excess fat to about 1/4-inch thickness, but leave some for flavor. Hickory or oak wood chips are essential for authentic smoke; I always buy them in bulk from Traeger's website—they stay fresh longer. The apple cider vinegar isn't just for tang; it tenderizes the meat during the long cook. For the brown sugar, grab the dark variety at Whole Foods—it caramelizes better, giving that perfect bark. Diamond Crystal kosher salt is key here; it dissolves better than table salt and enhances flavor without overpowering.
No smoked paprika? Substitute equal parts chili powder and a pinch of liquid smoke—though nothing beats the real thing. Running low on chipotle powder? Crush 2-3 chipotle peppers in adobo sauce for a fresh, smoky kick. For the BBQ sauce, I prefer Stubb's Original for its balance of sweet and tang, but any quality brand works. The beef broth should be low-sodium—Swanson's Organic is my go-to, but homemade beef stock is even better. If you're short on time, pre-cut onions and garlic from the grocery store's fresh section save prep time without sacrificing flavor. The mustard powder might seem minor, but it rounds out the rub beautifully—don't skip it.
Store leftover brisket in an airtight container in the fridge for up to 5 days, or freeze for 3 months. The meat continues to tenderize as it rests, so plan ahead. For serving, reheat slowly in the oven at 275°F with a splash of broth to keep it moist. The wood chips can be reused once or twice if stored in a sealed container. This recipe makes enough for two full meals—perfect for leftovers or feeding a crowd. Garnish with fresh parsley just before serving to brighten the dish.
Why You'll Love This Recipe
- One-Pot Magic: I swear by this recipe because it’s actually hands-off after the initial sear. Toss the brisket, onions, and garlic in a slow cooker with the vinegar and sugar, then walk away—it’s that simple. No babysitting, no stress, just melt-in-your-mouth results by dinner.
- Sweet-Savory Bomb: Between us, the apple cider vinegar and brown sugar combo is chef’s kiss—tangy enough to cut through the richness, sweet enough to make your taste buds dance. The brisket falls apart so easily, you’ll want to eat it with a spoon (and I have, no judgment).
- Meal Prep MVP: This recipe is my go-to for lazy Sundays or busy weeks. Cook a big batch, shred it, and you’ve got tacos, sandwiches, or loaded baked potatoes for days. Honestly, I’ve fed a crowd with leftovers and no one’s complained—yet.
- Budget-Friendly Feast: Brisket’s the secret weapon here—it’s cheaper than steak but feels like a celebration. A single cut stretches to feed four, and the onions/garlic/vinegar cost pennies. (Yes, even on a Tuesday night.) Plus, the slow cooker means no wasted energy. Win.
Step-by-step instructions for perfectly smoked pulled beef brisket
Mastering this technique transforms tough brisket into tender, smoky perfection in 8 hours.
Prepare the Brisket and Create the Dry Rub
Begin by trimming the 6 lb Beef Brisket to remove any excess fat, leaving about ¼-inch layer on the fat cap. This ensures proper smoke penetration while maintaining moisture. Place the brisket fat-side up on a wire rack set over a baking sheet.
In a small bowl, combine 0.5 cup Brown Sugar, 2 tbsp Smoked Paprika, 1.5 tbsp Ground Black Pepper, 1.5 tbsp Diamond Crystal Kosher Salt, 1 tbsp Mustard Powder, and 1 tbsp Chipotle Powder. Mix thoroughly until the spices are evenly distributed and the sugar is fully incorporated. Generously coat the brisket with this dry rub, pressing it into every crevice. Let it rest uncovered in the refrigerator for 1 hour to allow the rub to adhere and penetrate the meat.
Set Up the Smoker and Begin Cooking
Fill the smoker with 2 cups Wood Chips (Hickory or Oak) and preheat to 225°F. Maintain a steady temperature by avoiding frequent lid openings. Once the smoker reaches temperature and produces clean blue smoke (not thick white), place the brisket fat-side up on the smoker grate.
Smoke the brisket undisturbed for 6 hours, or until the internal temperature reaches 165-170°F. This is when you'll encounter "the stall," where the temperature plateaus as moisture evaporates. This is normal and expected—don't panic or adjust the heat. The brisket will eventually push through this phase.
Wrap and Finish the Cook
When the brisket reaches 165-170°F, remove it from the smoker and wrap it tightly in two layers of aluminum foil. This technique, known as the "Texas Crutch," helps push the brisket through the stall while maintaining moisture. Return the wrapped brisket to the smoker and continue cooking until the internal temperature reaches 200-205°F, typically taking an additional 4-6 hours.
During this phase, the brisket will become fork-tender and begin to pull apart easily. The internal temperature will rise naturally as the meat continues to cook in its own juices. This process ensures maximum tenderness and flavor infusion.
Rest and Shred the Brisket
Once the brisket reaches 200-205°F, remove it from the smoker and transfer it to a cutting board. Let it rest for 1 hour before shredding. This resting period allows the juices to redistribute throughout the meat, ensuring each bite is moist and flavorful.
After resting, use two forks to shred the brisket against the grain into ¼-inch thick strands. Discard any large pieces of fat or connective tissue. In a large bowl, combine the shredded brisket with 1.5 cups Beef Broth and 1 cup BBQ Sauce, tossing gently to coat evenly. Let the mixture sit for 10 minutes to allow the flavors to meld together.
Serve with Fresh Garnish
Transfer the pulled brisket to a serving dish and garnish with 0.25 cup Fresh Parsley, chopped finely. Serve immediately with classic barbecue sides like coleslaw, cornbread, or baked beans. The brisket should be tender, smoky, and infused with the rich flavors of the dry rub and BBQ sauce.
This method guarantees a brisket that falls apart with minimal effort, delivering restaurant-quality results at home. Each bite should be a perfect balance of smoky, sweet, and tangy flavors, with a texture that's irresistibly tender.
Pro Tips For Making Bbq Pulled Beef Brisket
- Trim the Fat Cap: Cut the thick fat layer on the brisket’s edge down to ¼-inch—it renders faster and keeps the meat from steaming in its own juices. I used to leave it thick, and the outside would turn greasy before the inside cooked through. ---
- Char the Onions First: Sear sliced onions in a dry skillet until deep brown and crispy before adding them to the brisket. Their caramelized sweetness cuts through the richness of the beef, and it takes half the time they’d need in the slow cooker. ---
- Don’t Rush the Vinegar: Add apple cider vinegar in the last 30 minutes of cooking—any earlier, and it’ll turn the sauce bitter. I learned this after a batch tasted sharp instead of tangy, and now I always time it. ---
- Wrap at 170°F: When the brisket hits 170°F internally, wrap it in butcher paper (not foil) and let it rest another hour. The paper lets moisture escape just enough to form a crust, while keeping the meat tender—no more dry, stringy pulls.
Common mistakes when making this dish
Overlooking the Stall
I’ve seen more briskets ruined by panic during the stall than any other mistake. When the internal temperature hits 165°F and plateaus, it’s normal—this is your meat releasing moisture. The fix? Patience. Don’t crank up the heat or open the smoker repeatedly. Instead, wrap the brisket in two layers of heavy-duty foil (I use Reynolds) and let it cook undisturbed. This is called the Texas Crutch, and it’s your secret weapon for pushing through the stall without drying out the meat. 🌡️
Skipping the Rest
After all that work, rushing to shred the brisket is a cardinal sin. That 1-hour rest isn’t optional—it’s when the juices redistribute, turning tough meat into melt-in-your-mouth perfection. I’ve seen briskets go from fork-tender to dry in minutes when skipped. Use this time to prep sides or set the table. Trust the process, and your brisket will thank you with every juicy bite.
Uneven Smoke Exposure
Placing the brisket fat-side up is crucial, but rotating it every 2 hours ensures even smoke penetration. I’ve had briskets with one side raw and the other overcooked because someone forgot to flip it. Use a meat thermometer (I swear by ThermoWorks Smoke) to check multiple spots—aim for 165°F in the thickest part before wrapping. Pro tip: If your smoker has hot spots, move the brisket to the cooler area halfway through cooking.
Wrong Wood Choice
Not all wood chips are created equal. Hickory and oak are the OGs of BBQ, but if you’re using mesquite, it can overpower the meat with a bitter, intense smoke. For a milder flavor, mix half hickory and half cherry. I once used all mesquite and ended up with brisket that tasted like a campfire—learn from my mistake! Keep wood chips in an airtight container to preserve freshness, and avoid pre-soaked chips for smoker use.
Over-Saucing Before Serving
Drowning your brisket in BBQ sauce before serving is a rookie move. The sauce should complement, not overpower, the smoky flavor. Instead, toss the shredded brisket with just enough sauce to coat—about 1 cup for 6 lbs. For extra tang, add a splash of apple cider vinegar or beef broth while reheating. Serve the sauce on the side so guests can customize their plates. Trust me, the brisket’s natural flavors shine when not smothered. 🍯
Ignoring the Fat Cap
The fat cap isn’t just for show—it’s your brisket’s built-in moisture barrier. Leaving a ¼-inch layer of fat ensures the meat stays juicy, while trimming it too aggressively can lead to dryness. I’ve seen briskets rendered into leather because someone went overboard with the knife. If you’re worried about excess fat, render it in a skillet after cooking and use it to make crispy fat cap fries—zero waste!
Nutrition facts
Frequently asked questions
Can I use a different cut of beef instead of brisket?
Brisket is ideal for this recipe because of its connective tissue, which breaks down beautifully during slow cooking. However, you could use chuck roast or short ribs as alternatives. These cuts will require similar low-and-slow cooking times but may have slightly different textures. Never substitute with tender cuts like sirloin—they'll dry out before becoming tender.
How do I know when the brisket is done?
Use a meat thermometer to check the internal temperature. The brisket is ready when it reaches 200-205°F in the thickest part. The probe should slide in easily, and the meat should pull apart with minimal resistance. Never rely on time alone—every smoker behaves differently, and factors like humidity can affect cooking speed.
What's the best way to reheat leftover pulled beef?
Reheat gently to preserve moisture. Place the brisket in a 275°F oven with a splash of beef broth in a covered dish for 1-2 hours until warmed through. Avoid microwaving—it turns the meat rubbery. For sandwiches, reheat just the beef and assemble fresh to keep the buns crispy.
Can I make this in an oven instead of a smoker?
Yes, but you'll need to improvise for smoke flavor. Place soaked wood chips on aluminum foil in a pan under the brisket rack, then cover the pan with foil. Cook at 250°F for 8-10 hours, checking occasionally to maintain temperature. The result won't be as smoky, but it'll still be tender. For better flavor, use a smoke gun or add a few drops of liquid smoke to the sauce.
How long can I store cooked brisket?
Store cooked brisket in an airtight container in the fridge for up to 5 days or freeze for 3 months. The meat continues to tenderize as it rests, so plan to eat it within these timeframes. For best quality, reheat only what you'll use immediately—freeze portions in 1-lb servings for easy thawing.