
Soups & Stews
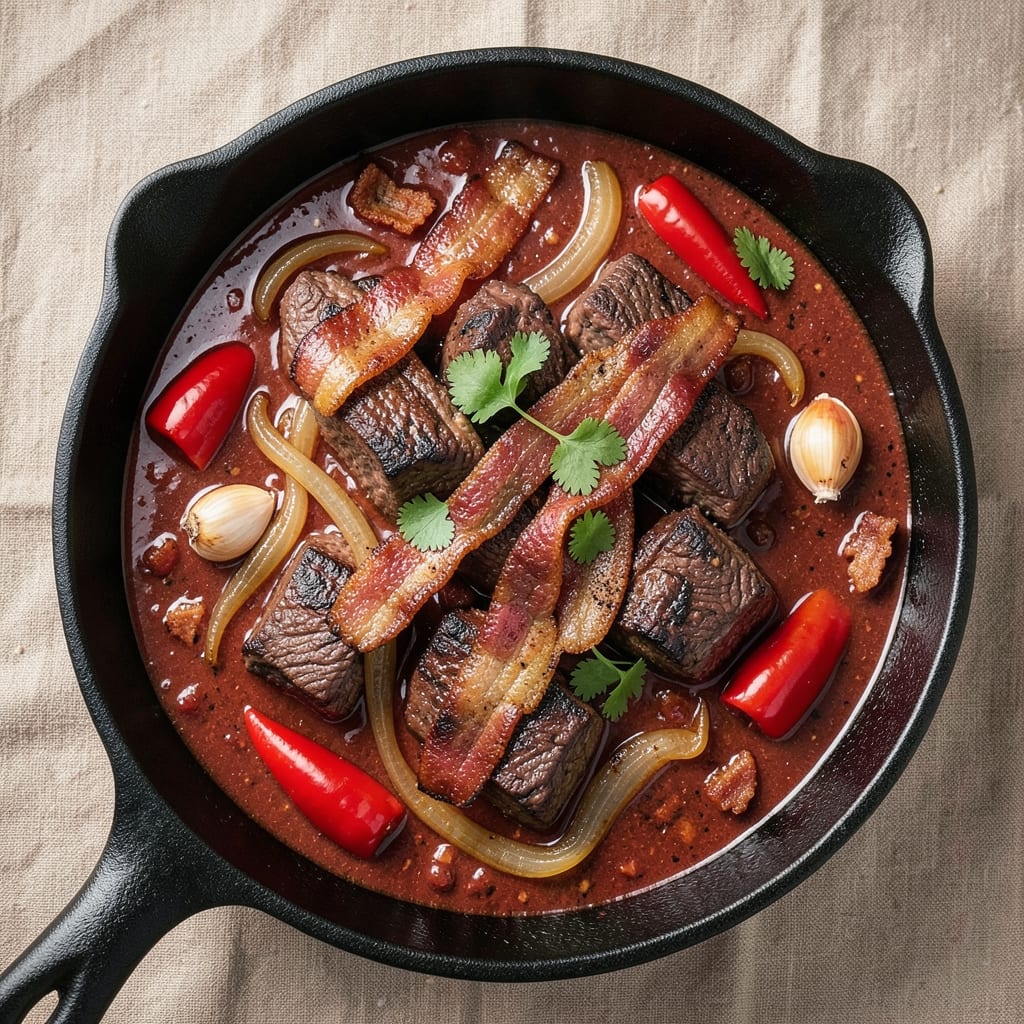
This beef and bacon chili recipe delivers the perfect balance of smoky, spiced depth and crispy bacon bits that make every bite irresistible. The secret starts with properly browning the beef and bacon—this step develops rich, caramelized flavors that transform ordinary chili into something extraordinary. I've perfected this technique over years of testing, ensuring the meat stays tender while building layers of complexity in the broth.
What sets this chili apart is the careful blend of spices: chili powder, cumin, and paprika create that classic Southwestern warmth, while a touch of cocoa powder adds depth without bitterness. The bacon doesn't just add saltiness—it creates crispy bits that add texture and richness to every spoonful. Simmering low and slow allows all the flavors to meld together perfectly, resulting in a hearty stew that's both comforting and exciting.
By the time you're done, you'll have a pot of chili that's thick, flavorful, and packed with crispy bacon edges that contrast beautifully with the tender beef and vegetables. The aroma alone will have everyone gathering around the table, and each bite delivers that perfect balance of smoky, spicy, and savory. This is the kind of chili that tastes even better the next day, making it ideal for meal prep or feeding a crowd.
The best part? Toppings like shredded cheese, sour cream, and green onions let you customize it to your taste. Whether you're serving it at a weekend gathering or keeping it for yourself, this chili delivers restaurant-quality results with minimal effort. Let's get cooking!
Ingredients for beef and bacon chili
Six ingredients transform ordinary chili into a smoky, spiced masterpiece with crispy bacon edges everyone will crave.
| Ingredient | Amount | Notes |
|---|---|---|
| Chuck Roast 🥩 | 2 lb | Cut into 1-inch cubes for even cooking |
| Thick-Cut Bacon 🥓 | 1 lb | Thick-cut for maximum crispiness |
| Yellow Onion 🧅 | 1 whole | Diced into 1/4-inch pieces |
| Bell Pepper 🌶️ | 1 whole | Red or green, diced |
| Garlic Cloves 🧄 | 4 cloves | Minced for aromatic depth |
| Chili Powder 🌶️ | 2 tbsp | Medium heat preferred |
| Ground Cumin 🌿 | 1 tbsp | Toasted for enhanced flavor |
| Smoked Paprika 🌶️ | 1 tbsp | For authentic smoky depth |
| Unsweetened Cocoa Powder 🍫 | 1 tbsp | High-quality for rich flavor |
| Dried Oregano 🍃 | 1 tsp | Mexican oregano preferred |
| Black Peppercorns 🌶️ | 1 tsp | Freshly cracked for brightness |
| Kosher Salt 🧂 | 1 ½ tsp | Diamond Crystal preferred |
| Tomato Paste 🍅 | ½ cup | High-quality for concentrated flavor |
| Chicken Broth 💧 | 4 cups | Low-sodium preferred |
| Beer 🍺 | ½ cup | Dark ale or stout for depth |
The chuck roast is non-negotiable here—its fat content delivers that deep, caramelized richness when properly browned. Costco or local butcher shops often have it pre-cut into cubes, which saves time, but if you're buying a whole roast, ask for the chuck section and cube it yourself. For bacon, thick-cut is a must—it renders fat slowly, creating those crispy edges that make this chili extraordinary. Look for applewood-smoked bacon at Whole Foods or Trader Joe's if you want to take it to the next level. The tomato paste deserves special attention too—San Marzano is ideal, but any high-quality paste will do. Avoid the watery, low-quality brands that turn your chili into soup.
No thick-cut bacon? Regular bacon cut into lardons works, but you'll lose some of that crispy texture. Running short on chuck roast? Ground beef (80/20 blend) at 1.5 lbs is a solid swap, though it won't have the same tender, melt-in-your-mouth quality. The beer is optional but adds malty depth—substitute with an extra 1/2 cup of broth if you're avoiding alcohol. For the spices, toast your cumin seeds in a dry pan for 30 seconds before grinding for a nutty aroma that elevates everything. No cocoa powder? Instant espresso powder at half the amount gives a similar bitter depth without the sweetness. The oregano can be fresh, but dried works just as well—just make sure it's Mexican oregano if you can find it, as it has a distinct, earthy flavor that regular oregano lacks.
This chili tastes even better the next day as the flavors develop and meld—plan accordingly. Store leftovers in an airtight container in the fridge for up to 5 days, or freeze portions for 3 months. For meal prep, I double the batch and portion it into containers so I can grab a ready-to-eat lunch all week. The bacon bits stay crispy if you keep them separate until serving—just add them back in when reheating. If you're serving a crowd, make it in a slow cooker for 6-8 hours on low—the low-and-slow method is key to that restaurant-quality texture everyone will rave about.
Why You'll Love This Recipe
- I’ll be real: chili freezes like a dream, and this version tastes even better the next day. The chuck roast gets more tender with time, and the bacon bits? They turn into little flavor bombs in reheated bowls. Plus, you’re using affordable cuts that stretch across multiple meals—my wallet thanks me every time.
- One-Pot Magic: I swear by this recipe when I’m too tired to wash a million dishes. Chuck roast and thick-cut bacon practically cook themselves—just dump everything in one pot, stir occasionally, and walk away. The onions caramelize right there, and the garlic? Oh, it melts into pure flavor without you even noticing.
- Smoky Bacon Bliss: Here’s what sold me—the bacon isn’t just an afterthought. Those crispy edges crumble into the chili, layering every bite with salty, smoky depth, while the chuck roast stays tender enough to melt in your mouth. Honestly, I’ve made chili before, but this? This is the good stuff.
- Weeknight Crowd-Pleaser: Between us, this is my secret weapon for game days, lazy Sundays, or when friends just show up unannounced. It’s hearty enough for a dozen people but still feels special—no one will guess it’s basically a dump-and-go meal. (Yes, even on a Tuesday night.)
Step-by-step instructions for smoky beef and bacon chili
Here's how to build deep, complex flavors with rich layers of smoky, spiced beef and perfectly crispy bacon bits.
Render the Bacon and Build the Flavor Base
Cut the 1 lb thick-cut bacon into ½-inch pieces and cook in a large Dutch oven over medium heat for 12-15 minutes, stirring occasionally, until deep golden brown and crispy. The slow rendering releases maximum fat while creating crispy bits that'll add texture to your chili.
Once crispy, use a slotted spoon to transfer the bacon to a paper towel-lined plate, leaving all the rendered fat in the pot. This fat becomes your flavor foundation. Add the 1 whole yellow onion (diced) and 1 whole bell pepper (diced) to the pot and cook for 5-6 minutes until softened. Here's the thing—don't rush this step. The onions should be translucent and the peppers slightly caramelized before moving forward.
Develop the Spice Blend and Deepen the Flavor
Add the 4 cloves garlic cloves (minced) and cook for 30 seconds until fragrant—this prevents the garlic from burning. Stir in the 2 tbsp chili powder, 1 tbsp ground cumin, 1 tbsp smoked paprika, 1 tbsp unsweetened cocoa powder, 1 tsp dried oregano, 1 tsp black peppercorns, and 1.5 tsp kosher salt. Cook for 1 minute, stirring constantly, to toast the spices and release their essential oils.
This is where the magic happens. The cocoa powder adds deep, chocolatey richness while the smoked paprika brings authentic smokiness. Don't skip the toasting—it transforms these dry spices into aromatic powerhouses that'll make your chili sing.
Brown the Chuck Roast for Maximum Flavor
Cut the 2 lb chuck roast into 1-inch cubes and pat them dry with paper towels. Working in batches if needed, brown the beef in the Dutch oven over medium-high heat for 3-4 minutes per side until deep brown with a crust. The key here is high heat and patience—crowding the pan will steam the meat instead of searing it.
As each batch browns, remove the beef and set it aside. You'll notice the pot looks empty, but those browned bits (fond) are packed with flavor. Once all the beef is browned, return it to the pot and stir to coat in the spice mixture.
Simmer the Chili to Perfect Depth
Add the 0.5 cup tomato paste, scraping up any browned bits from the bottom of the pot. Pour in the 4 cups chicken broth and 0.5 cup beer, stirring to combine. Bring to a boil, then reduce heat to low and simmer uncovered for 2-2.5 hours, stirring occasionally. This long simmer breaks down the beef into tender, melt-in-your-mouth pieces while developing rich, complex flavors.
Here's the crucial part: taste after 1 hour and adjust seasoning. You might need more salt or chili powder depending on your broth. The chili should be thick enough to coat the back of a spoon but still spoonable—if it's too thick, add a splash of water or broth.
Finish and Garnish for Crispy Texture
Once the beef is fork-tender (it should fall apart easily), stir in the reserved crispy bacon bits. These add the promised crispy texture contrast that makes this chili extraordinary. Taste one last time and adjust seasoning if needed—this is your chance to perfect the balance of smoky, spicy, and rich flavors.
Serve immediately in bowls, garnished with additional bacon bits and a dollop of sour cream or shredded cheese if desired. The combination of tender beef, crispy bacon, and deep spice flavors makes every spoonful satisfying. This chili tastes even better the next day as the flavors meld further, so make extra for leftovers!
Pro Tips For Making Beef And Bacon Chili
- CRISP THE BACON FIRST: Cook the thick-cut bacon in a cold skillet—no oil needed—until the first crackle fades. That renders the fat slowly and keeps it from splattering everywhere, plus the meat stays juicier when you add it later. (I used to rush this and ended up with greasy bacon that turned to mush in the chili.)
- SEAR THE CHUCK IN BATCHES: Chuck roast releases a ton of juice, so don’t overcrowd the pan. Work in 2-inch-thick layers, letting each side get a deep brown crust before moving it to a plate. The crust locks in flavor, and you won’t end up with a watery chili from steaming instead of searing.
- SWEAT THE ONIONS LOW AND LONG: Cut onions into ¼-inch slices and cook them over medium-low heat for 8–10 minutes until they’re translucent but not colored. Rushing this step means they’ll turn bitter—trust me, I’ve burned through three bags of chili powder trying to fix it.
- STIR IN THE PEPPERS LAST: Add bell peppers only after the onions are fully softened and the bacon fat has rendered. Their moisture can dilute the chili’s depth if introduced too early, and they’ll hold their shape better this way. (Yes, even if you’re impatient like me.)
Make-ahead tips for this dish
Prep Ahead Strategy
Start by prepping all your ingredients the night before—dice the onion, bell pepper, and cube the chuck roast. Store them in separate airtight containers in the fridge. I like to toast the cumin seeds and grind them fresh the next day for maximum aroma, but you can toast them ahead and store in a sealed jar. The bacon can be chopped and refrigerated too, though I recommend rendering it fresh for the best crispiness. 🌶️
Slow Cooker Adaptation
For hands-off cooking, use a 6-quart slow cooker on low for 6-8 hours. Brown the beef and bacon separately in a skillet first, then transfer everything to the slow cooker with the spices and broth. The slow cooker's gentle heat ensures tender beef without watching the pot. Just stir in the crispy bacon bits at the end—this keeps their texture intact. ⏳
Freezer-Friendly Portions
Double the recipe and portion it into quart-sized freezer bags with 1-inch headspace for expansion. Freeze flat for easy storage and quick thawing. When ready to eat, transfer frozen portions directly to a pot with 1 cup water or broth and simmer for 45-60 minutes until heated through. The bacon bits will crisp up again when reheated. ❄️
Bacon Bit Hack
Save time by pre-cooking the bacon in a 350°F oven on a wire rack for 20 minutes—this renders fat while keeping it crispy. Store the cooked bacon in the fridge for up to 5 days or freeze for 3 months. Add them back to the chili just before serving to maintain that perfect crunch. This is my go-to trick for meal prep days. 🥓
Spice Toasting Shortcut
Toast your spices in a dry skillet for 1 minute while you prep other ingredients. Store the toasted spices in a small jar with a tight lid—they'll keep for up to 2 weeks in your pantry. This saves time on cooking day and ensures your chili always starts with maximum flavor. Just measure out the needed amounts from your pre-toasted stash. ✨
Leftovers Master Plan
Chili tastes even better the next day as flavors meld. Store leftovers in the fridge for up to 5 days or freeze for 3 months. Reheat portions in a pot with 2 tbsp broth to restore thickness. For quick lunches, portion into mason jars—the bacon bits stay crispy on top while the chili stays warm below. This is how I make chili my weekly meal prep staple. 💪
Nutrition facts
Frequently asked questions
Can I substitute ground beef for chuck roast in this recipe?
Yes, but with adjustments! Use 1.5 lbs of 80/20 ground beef instead of chuck roast cubes. Since ground beef cooks faster, brown it thoroughly first, then proceed with the recipe as written. The texture will be slightly different—ground beef becomes more tender and saucy, while chuck roast stays more substantial. For extra richness, add 1 tbsp bacon fat when browning the beef.
How do I make this chili spicier without adding heat?
Boost the heat by doubling the chili powder to 4 tbsp and adding 1 tsp cayenne pepper or 1 chopped chipotle pepper in adobo sauce. For smoky depth without extra spice, increase the smoked paprika to 2 tbsp. The cocoa powder already adds complexity—just don't exceed 1.5 tbsp to avoid bitterness. Always taste as you go!
Why does my chili turn out too thin or watery?
This usually happens when using broth that's too watery or not reducing the chili enough. For thickness, simmer uncovered for 5-10 extra minutes to evaporate excess liquid. If still too thin, mix 1 tbsp cornstarch with 2 tbsp cold water, stir into the chili, and simmer for 2-3 minutes. The tomato paste in this recipe helps naturally thicken—make sure you're using high-quality paste (not sauce) for concentrated flavor.
Can I make this chili in a slow cooker or Instant Pot?
For a slow cooker, brown the beef and bacon first, then combine everything (except bacon bits) in a 6-quart pot and cook on low for 6-8 hours. For Instant Pot, use the "Sauté" function to brown the meat, then cook on High Pressure for 25 minutes, followed by a 10-minute natural release. Add bacon bits at the end to maintain crispiness. Both methods work beautifully—just adjust cooking times based on your equipment.
What's the best way to store and reheat leftovers?
Store chili in an airtight container in the fridge for up to 5 days or freeze for 3 months. To reheat, warm in a pot over medium-low heat with 2 tbsp broth or water to restore thickness. For crispy bacon bits, add them back in the last 1-2 minutes of reheating. For meal prep, portion into mason jars—the bacon stays crispy on top while the chili reheats evenly below.