
Main Courses
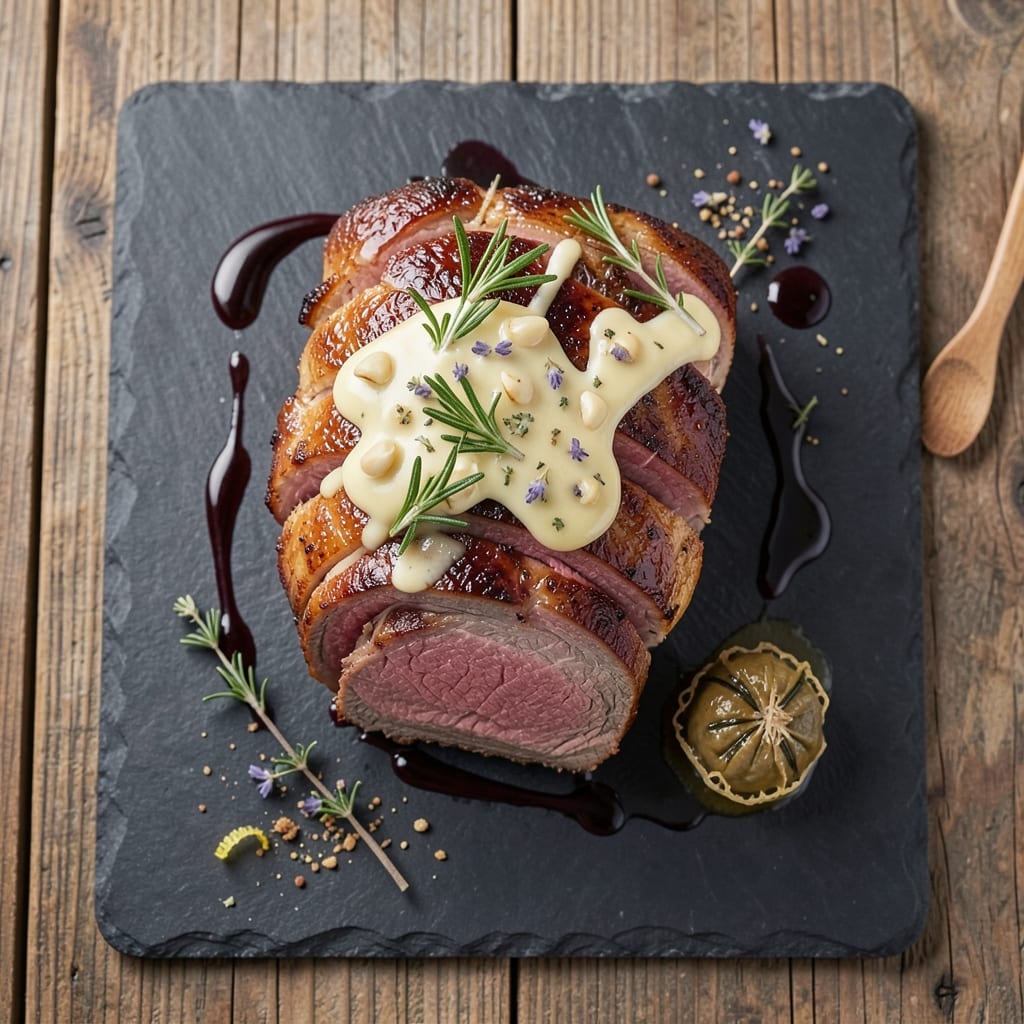
This oven roasted beef tenderloin recipe delivers the perfect balance of herb-crusted edges and juicy pink centers—a showstopper for special occasions that doesn’t require a sous vide machine. After years of perfecting my technique (and one too many overcooked attempts), I’ve cracked the code for restaurant-quality results at home. The secret? A high-heat sear followed by precise oven control to lock in moisture while building flavor.
What makes this recipe foolproof is the two-stage cooking method: first searing the beef in a screaming-hot pan to create a flavorful crust, then finishing in the oven until the internal temperature reaches 125°F for medium-rare perfection. The herb crust—made with fresh rosemary, thyme, and garlic—adds aromatic depth without overpowering the beef’s natural richness. I’ve tested this with tenderloins ranging from 2 to 4 pounds, so it scales beautifully for crowds or intimate dinners.
By the time you carve into this tenderloin, you’ll be rewarded with fork-tender meat that’s still pink in the center, surrounded by a crisp, golden crust. The juices will run clear, not bloody, and every slice will hold its shape—no dry, stringy surprises here. This is the kind of dish that makes guests ask for the recipe (and secretly wonder if you hired a chef). Pair it with roasted garlic mashed potatoes or a bold red wine reduction for the full experience.
Confession: I used to shy away from tenderloin because I feared ruining it. But this method—simple, precise, and repeatable—has made it a weekly staple in my home. The key is patience: letting the beef rest for 15 minutes before slicing ensures those juices stay where they belong. Trust me, once you master this, you’ll never buy pre-cooked beef again.
Ingredients for oven roasted beef tenderloin
The perfect tenderloin starts with these twelve ingredients—where quality meets precision for restaurant-worthy results.
| Ingredient | Amount | Notes |
|---|---|---|
| Beef Tenderloin 🥩 | 2 lb | Center-cut, trimmed of fat |
| Fresh Rosemary 🌿 | ½ oz | Finely chopped, organic preferred |
| Fresh Thyme 🌿 | ¼ oz | Leaves only, stems removed |
| Garlic Cloves 🧄 | 6 cloves | Minced, peeled |
| Extra-Virgin Olive Oil 🫒 | ¼ cup | For crust and searing |
| Kosher Salt 🧂 | 1 ½ tsp | Diamond Crystal preferred |
| Freshly Ground Black Pepper 🌶️ | 1 tsp | Coarsely cracked |
| Unsalted Butter 🧈 | 2 tbsp | For crust, softened |
| All-Purpose Flour 🌾 | 1 tbsp | For dusting |
| Red Wine 🍷 | ½ cup | Bold dry variety like Cabernet |
| Fresh Parsley 🌿 | ¼ cup | Chopped, for garnish |
| Balsamic Vinegar 🍶 | 1 tbsp | For pan deglazing |
The beef is non-negotiable here. Center-cut tenderloin from a trusted butcher—like D'Artagnan or your local high-end grocer—has the best marbling and tenderness. I always ask for it to be trimmed of silver skin and fat caps, which can interfere with even cooking. For the herbs, farmers market freshness makes all the difference—rosemary should smell piney and thyme should be vibrant. If you're using dried herbs, reduce to one-third the amount, but honestly, fresh is worth the splurge. The garlic? Roasted garlic adds sweetness, but fresh minced gives that bold punch we want here.
No red wine? Beef stock with a splash of balsamic works in a pinch, though the acidity won't be as bright. Substituting dried herbs? Penzeys brand is my go-to for quality—just measure carefully. For the crust, if you're short on butter, olive oil works too, though butter gives that rich, golden finish. The flour is just for dusting to prevent sticking, so don't stress about brands. And if you're cooking for a crowd, scale up the wine and herbs proportionally—this recipe holds beautifully when doubled or tripled. The key is keeping that herb-to-beef ratio consistent.
This beef deserves patience. Let it sit at room temperature for 30-45 minutes before cooking to ensure even doneness. The herb crust keeps for 2 days in the fridge if prepped ahead, but the beef itself should cook fresh. For leftovers, slice thinly and reheat gently in a skillet with a splash of beef broth—never microwave, or you'll lose that perfect texture. The crust components (herbs, butter, oil) can be prepped 1 day ahead and stored in the fridge, saving you last-minute stress on cook day.
Why You'll Love This Recipe
- One-Pan Magic: I swear by this for nights when I’d rather not scrub pots—just toss the tenderloin on a sheet pan with rosemary, thyme, and garlic, drizzle with olive oil, and let the oven do the work. Minimal chopping, zero fuss, and that’s my kind of dinner.
- Herb-Crusted Perfection: The rosemary and thyme cling to the beef like a fragrant hug, while the garlic infuses every bite with warmth. It’s not just flavor—it’s that flavor, the kind that makes people pause mid-bite and ask, “What’s in this?”
- Leftovers That Shine: This roast is so tender it practically falls apart, making it ideal for sandwiches or salads later. I’ll be real: I’ve reheated slices twice and still craved more—proof it’s worth cooking extra.
- Weeknight Hero: No fancy techniques, no stress—just season, sear, and roast. It’s my go-to for dinner parties (looks impressive) and lazy Sundays (zero effort). The olive oil keeps it juicy, and the herbs make it feel special without the work.
Step-by-step instructions for oven roasted beef tenderloin
Here's how to achieve a perfect herb-crusted exterior with a juicy pink center every time.
Prepare the Herb Butter Crust
In a small bowl, combine the 2 tablespoons unsalted butter with the 0.5 ounces fresh rosemary and 0.25 ounces fresh thyme. I use a fork to mash the herbs into the butter until you have a chunky paste. Add the 6 cloves minced garlic and mix well. This herb butter will create that beautiful crust while keeping the interior tender.
Transfer the herb butter to a piece of plastic wrap and shape it into a log about 1-inch thick. Twist the plastic wrap to seal it tightly and refrigerate for 30 minutes until firm. This chilling step ensures the butter stays in place when you apply it to the tenderloin later.
Season and Sear the Beef
Preheat your oven to 400°F and position a rack in the middle position. Pat the 2-pound beef tenderloin completely dry with paper towels—this is crucial for that perfect crust. Season it generously with 1.5 teaspoons kosher salt and 1 teaspoon freshly ground black pepper, pressing the seasoning into the meat.
Heat 0.25 cup extra-virgin olive oil in a large oven-safe skillet over medium-high heat until shimmering. Add the tenderloin and sear on all sides for about 2-3 minutes per side until deeply browned. This initial searing locks in juices and creates flavor foundation. Remove the skillet from heat and let it cool slightly on a wire rack.
Create the Herb Crust
Unwrap the chilled herb butter log and slice it into 4 thin slices about ¼-inch thick. Press these slices firmly onto the seared tenderloin, covering all sides completely. The butter should adhere well to the hot surface of the meat. Sprinkle the 1 tablespoon all-purpose flour evenly over the butter-coated tenderloin.
Return the skillet to the oven and transfer it to the preheated oven. Roast for 20-25 minutes until the internal temperature reaches 130°F on a meat thermometer. This is the perfect temperature for medium-rare—you'll finish cooking it off the heat. The crust should be golden brown and crispy, while the interior remains tender and pink.
Rest and Create the Pan Sauce
Remove the tenderloin from the oven and transfer it to a cutting board. Let it rest for 10-15 minutes before slicing—this resting period is essential for redistributing the juices throughout the meat. While it rests, place the skillet with any accumulated juices on the stovetop over medium heat.
Add the 0.5 cup red wine and scrape up all the browned bits from the bottom of the pan with a wooden spoon. This deglazing step captures all the flavor. Simmer for 3-4 minutes until the wine reduces by half. Stir in the 1 tablespoon balsamic vinegar and cook for another 1 minute until the sauce thickens slightly. The sauce should coat the back of a spoon.
Slice and Serve
Slice the rested tenderloin into 1-inch thick medallions against the grain. The grain direction will be visible as faint lines on the meat. Arrange the slices on a warm serving platter and spoon the pan sauce generously over the top. Garnish with the 0.25 cup chopped fresh parsley for a pop of color and freshness.
Serve immediately with roasted vegetables or a simple salad. Each slice should be perfectly tender with a juicy pink center, surrounded by a flavorful herb crust. The pan sauce adds depth of flavor that ties everything together beautifully. This method guarantees a restaurant-quality beef tenderloin right in your own kitchen.
Pro Tips For Making Oven Roasted Beef Tenderloin
- Dry the Meat First: The tenderloin’s surface needs to grab that crust, not steam. Pat it thoroughly with paper towels—even if it feels obsessive—because moisture is the enemy of a golden sear. I learned this the hard way when my first batch came out sad and pale.
- Use a Meat Thermometer: Skip the guesswork. Tenderloin hits perfect medium-rare at 130°F (135°F for medium). Oven temps fluctuate, and visual cues lie—especially with thick cuts. Bury the probe in the thickest part and pull it before it creeps toward 135°F, or you’ll end up with leather.
- Don’t Overcrowd the Pan: If you’re searing first, give the tenderloin space. A crowded pan steams the meat instead of browning it. Work in batches if needed—yes, even if you’re impatient like me—and let the oil recover its heat between rounds.
- Sear in Cold Oil: Pour that olive oil over the tenderloin after it’s in the pan, then turn the heat to medium-high. Cold oil spreads evenly, coats the meat, and prevents flare-ups from hot oil hitting raw beef. Sounds weird, but it works—and your kitchen won’t smell like a fire hazard.
Pro cooking tips for this recipe
Perfect Sear Technique
Start by heating your skillet until it's smoking hot—this is non-negotiable for that deep, flavorful crust. I use a 12-inch cast iron skillet from Lodge because it retains heat like a dream. Add the ¼ cup olive oil and let it shimmer for 1-2 minutes before adding the beef. The oil should be hot enough to sizzle immediately when the beef touches it. This high-heat sear creates the Maillard reaction that gives your crust its rich, caramelized flavor. 🔥
Temperature Control
Your oven should be preheated to 400°F and maintained at that temperature throughout cooking. I recommend using an oven thermometer to verify accuracy—many home ovens run 25°F hotter or cooler than set. For a 2-pound tenderloin, the internal temperature should reach 130°F for medium-rare. Use a meat thermometer inserted into the thickest part of the meat—don't rely on visual cues alone, as beef color varies.
Butter Crust Secrets
The herb butter crust is where the magic happens, so handle it carefully. After chilling the butter log, slice it ¼-inch thick and press it firmly onto the seared beef. The butter should melt slightly but stay in place—this creates that golden, crispy exterior. For extra insurance, dust with 1 tablespoon flour before roasting. This helps the crust adhere better and adds a subtle texture contrast. I've found that European-style butter (like Plugrá) works best for this technique.
Resting Matters
Never skip the 10-15 minute rest before slicing—this is where most home cooks go wrong. The resting period allows juices to redistribute throughout the meat, preventing them from pooling on your plate. I often set a timer and use this time to prepare my pan sauce. Pro tip: Place the rested beef on a warm plate or cutting board to maintain its temperature while you finish the sauce. 💡
Pan Sauce Perfection
Deglazing the pan with ½ cup red wine captures all those precious browned bits that contain intense flavor. I like to use a bold Cabernet Sauvignon for this recipe—its tannins complement the beef beautifully. Reduce the wine by half before adding 1 tablespoon balsamic vinegar, which adds a touch of tangy brightness. The sauce should coat the back of a spoon and have a velvety consistency. This sauce elevates your tenderloin from good to spectacular.
Equipment Essentials
Beyond the basics, I recommend these tools for professional results: a high-quality meat thermometer (I use the ThermoWorks Thermapen), a wire cooling rack to prevent soggy crusts, and a sharp carving knife (like the Victorinox Fibrox**). These small investments make a big difference in your final dish. And remember, your skillet must be hot enough to sear—if it's not smoking, it's not ready. 💪
Nutrition facts
Frequently asked questions
What's the best internal temperature for medium-rare beef tenderloin?
For that perfect juicy pink center, aim for 125-130°F internal temperature. This ensures tender meat that's still slightly cool in the middle. Always use a meat thermometer—visual cues can be misleading, especially with thicker cuts. The thermometer should go into the thickest part of the meat, avoiding any fat or bone.
Can I cook a larger tenderloin (3-4 pounds) with this method?
For a 3-pound tenderloin, increase the oven time by about 10-15 minutes (target 130°F internal). Scale the herb butter proportionally—double the recipe for a 4-pound cut. The key is maintaining the same herb-to-beef ratio. Just be patient with the resting time, which may need 20 minutes for larger cuts to redistribute juices properly.
What if my tenderloin comes out dry?
Dry beef usually means it was overcooked or didn't rest long enough. Always use a thermometer and remove it from the oven when it reaches 125-130°F for medium-rare. The resting period (10-15 minutes) is crucial—never skip it! If you accidentally overcook, try slicing thinly and reheating gently in a skillet with beef broth to restore moisture.
Can I make this ahead of time?
You can prep the herb butter crust 1 day ahead and store it in the fridge. The beef itself should cook fresh, but you can slice it up to 2 days ahead and refrigerate. For serving, gently reheat slices in a skillet with a splash of beef broth (never microwave). The pan sauce is best made fresh, but you can prep the wine reduction ahead and reheat it separately.
What sides pair best with this dish?
For a complete meal, try creamy roasted garlic mashed potatoes, sautéed asparagus with lemon zest, or a crisp arugula salad with shaved parmesan. The rich beef pairs beautifully with earthy root vegetables (like carrots or parsnips) or a bold red wine reduction. For a lighter option, a farro salad with roasted peppers adds fresh contrast to the tenderloin's richness.