
Main Courses
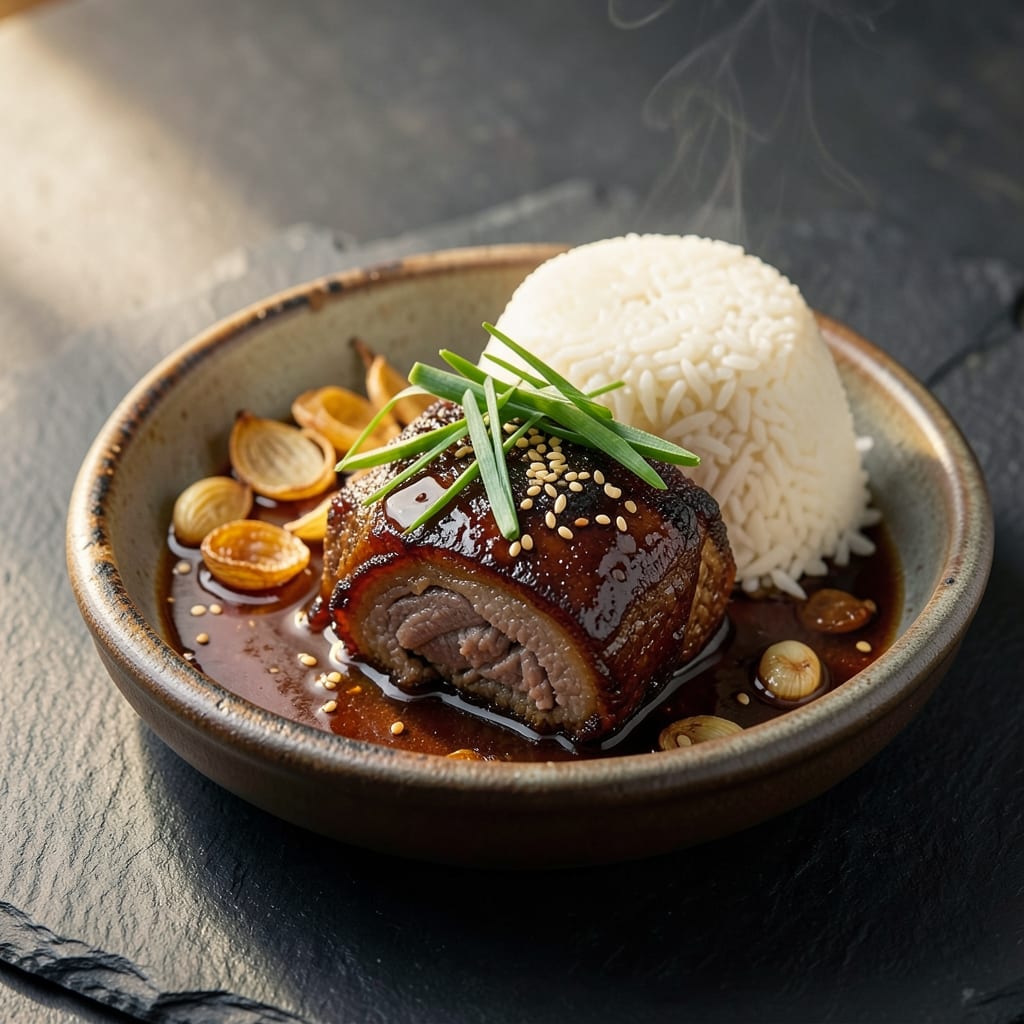
This Asian-style beef cheek recipe transforms tough cuts into melt-in-your-mouth perfection through slow braising—a technique that unlocks deep umami flavors and a silky texture. The secret lies in marinating the beef overnight with soy sauce, ginger, and garlic, then simmering it low and slow until fork-tender. I developed this recipe after years of perfecting braised dishes, and it consistently delivers restaurant-quality results at home with minimal effort.
The process begins with a simple marinade that tenderizes the beef while infusing it with aromatic flavors. After browning the beef for a rich foundation, we cover it with a blend of soy sauce, mirin, and broth, letting it braise for hours until the meat becomes effortlessly shreddable. This method ensures every bite is packed with flavor and texture, making it ideal for feeding a crowd or meal prepping for the week.
By the end, you'll have a dish that's rich, savory, and deeply satisfying—perfect for serving over steamed rice or noodles. The slow cooking transforms tough beef cheek into tender, flavorful morsels that pair beautifully with pickled vegetables or a simple green salad. This recipe balances traditional techniques with approachable steps, ensuring even home cooks can achieve professional results.
The beauty of this dish lies in its versatility. Use it as a filling for bao buns, a topping for ramen, or a standalone main course. The braising liquid also makes a delicious sauce for drizzling over other dishes. With just a few ingredients and patience, you'll create a meal that feels like a celebration every time.
Ingredients for asian style beef cheek
The right ingredients transform tough beef cheek into restaurant-quality melt-in-your-mouth perfection.
| Ingredient | Amount | Notes |
|---|---|---|
| Beef Cheek 🥩 | 3 lb | Tough cut for braising, trimmed of fat |
| Soy Sauce 🍶 | ½ cup | High-quality, preferably Japanese |
| Mirin 🍶 | ¼ cup | Sweet rice wine, not mirin substitute |
| Beef Broth 🍲 | 2 cups | Homemade or high-quality store-bought |
| Garlic Cloves 🧄 | 8 cloves | Minced for marinade and braising |
| Fresh Ginger 🌿 | ½ cup | Grated, peeled, for marinade |
| Sesame Oil 🫒 | 1 tbsp | Toasted, for finishing |
| Brown Sugar 🍯 | ¼ cup | Light or dark, packed |
| Honey 🍯 | 1 tbsp | For balancing sweetness |
| Star Anise 🌟 | 2 whole | Whole pods for infusion |
| Bay Leaves 🌿 | 2 whole | Fresh or dried |
| Black Peppercorns 🌶️ | 1 tsp | Crushed, for depth |
| Vegetable Oil 🫒 | 2 tbsp | High smoke point for searing |
| Green Onions 🧅 | ¼ cup | Sliced, for garnish |
Beef cheek is the star here—look for thick-cut, well-marbled pieces at specialty butchers or the meat counter. Costco or Whole Foods often carry pre-cut beef cheek, but if buying whole, ask for the cheek portion from the cow's head. The fat cap should be intact, as it renders down during braising to create a silky sauce. If your grocery store doesn't carry beef cheek, beef shank works as a substitute, though the texture will be slightly different. For the soy sauce, Japanese brands like Kikkoman or Yamasa deliver the deepest umami flavor—avoid the cheaper American versions, which can taste flat. Mirin should be genuine, not the sweetened 'mirin substitute' found in some stores. Trader Joe's carries a decent option, but specialty Asian markets have better selections. Star anise and bay leaves add aromatic depth—buy them whole for better flavor control.
No mirin? Substitute 1 tbsp honey plus 1 tbsp water for the same sweetness level, though the texture will differ slightly. Running low on soy sauce? Coconut aminos work in a pinch, though the flavor profile shifts. Fresh ginger loses potency quickly, so buy it when you need it—peel and grate it fresh for the marinade, then freeze any leftovers in an ice cube tray. The brown sugar can be swapped for white sugar if needed, but light brown adds subtle molasses notes. For the broth, homemade beef broth is ideal, but a high-quality store-bought version like Pacific Foods or Imagine works too. If you're avoiding beef broth entirely, mushroom broth provides a vegetarian-friendly alternative with a rich umami base. The sesame oil should be toasted—look for it labeled as 'toasted' in the international aisle of most grocery stores.
Beef cheek keeps well in the fridge for 3-4 days before cooking, though it's best used within 24 hours of purchase for peak tenderness. Once braised, the leftovers reheat beautifully—simmer gently with a splash of broth to restore moisture. Store in an airtight container for 4-5 days in the fridge or 3 months in the freezer. For meal prep, portion into individual containers with a spoonful of the braising liquid—it makes an excellent cold salad topping or ramen additive. The braising liquid itself is a treasure: strain and reduce it to make a silky sauce for noodles or drizzle over rice. If you're making this for a crowd, double the batch—the extra effort yields double the rewards.
Why You'll Love This Recipe
- One-Pot Magic: I swear by this—just toss the beef cheek, garlic, and broth in one pot, and let it simmer. The mirin and soy sauce do all the heavy lifting while I clean up in five minutes. (Yes, even on a Tuesday night.)
- Umami Bomb: That slow-cooked beef cheek? It practically melts in your mouth, rich and tender. The garlic cloves caramelize just enough to add a sweet, savory punch—no fancy spices needed, just pure, deep flavor.
- Leftovers That Shine: Between us, this dish tastes better the next day. I make a double batch, slice it thin for sandwiches, or toss it into ramen. The broth reduces into a glossy glaze—game over for boring lunches.
- Budget-Friendly Luxury: Beef cheek is cheaper than steak but feels like a splurge. A single cut feeds four, and the soy-mirin broth stretches for days. Honestly, it’s the kind of meal that makes grocery day worth it.
Step-by-step instructions for Asian style beef cheek
Transform tough beef cheek into melt-in-your-mouth perfection using this precise braising method.
Prepare the Beef Cheek for Maximum Flavor
Begin by trimming any excess fat from the 3 lb beef cheek using a sharp chef's knife. The goal is to remove surface fat while preserving the natural collagen-rich layers that will transform during braising. Pat the meat dry with paper towels—this ensures better browning and flavor development later.
In a large mixing bowl, combine the beef cheek with the 0.5 cup soy sauce, 0.25 cup mirin, 0.5 cup grated fresh ginger, 8 minced garlic cloves, 0.25 cup brown sugar, 1 tbsp honey, 2 whole star anise, 2 whole bay leaves, and 1 tsp crushed black peppercorns. Use your hands to massage the marinade into every crevice of the meat, ensuring even distribution. Cover and refrigerate for at least 4 hours, or preferably overnight—this extended marinating period breaks down fibers and infuses maximum flavor.
Sear for Depth of Flavor
Remove the beef cheek from the marinade (reserve the marinade) and heat 2 tbsp vegetable oil in a heavy Dutch oven over medium-high heat until shimmering. Working in batches if needed, sear the beef cheek on all sides until deeply browned—this should take about 6-8 minutes per side. The searing creates a flavorful crust that will develop into a rich fond at the bottom of your pot.
Once browned, remove the beef cheek and set it aside. Pour the reserved marinade into the same Dutch oven, scraping up all the browned bits from the bottom. Bring this mixture to a simmer over medium heat for 2-3 minutes to deepen the flavors before setting it aside temporarily.
Braise Until Fork-Tender
Return the seared beef cheek to the Dutch oven. Add 2 cups beef broth to the pot, ensuring the meat is completely submerged. Bring to a gentle simmer, then reduce heat to maintain a bare bubble at the surface—this low-and-slow approach is crucial for tenderizing the tough cut. Cover with a tight-fitting lid and transfer to a preheated 300°F oven.
Braise for 3 hours, then check the tenderness. The beef cheek should be fork-tender but not falling apart. If it's not quite there, continue braising for another 30-60 minute increments until it reaches this texture. The cooking liquid should reduce significantly, creating a thick, flavorful sauce that clings to the meat.
Finish with Umami Richness
Once the beef cheek is fork-tender, remove it from the braising liquid and set it aside. Strain the cooking liquid through a fine-mesh sieve into a clean saucepan, pressing on the solids to extract maximum flavor. Return the strained liquid to medium heat and reduce by half—this intensifies the sauce's depth. Stir in 1 tbsp sesame oil during the last minute of reduction.
Slice the beef cheek against the grain into ¼-inch thick slices. Return the slices to the reduced sauce and toss gently to coat. The final dish should feature tender, silky beef cheek swimming in a glossy, umami-rich sauce with perfect balance between sweet, salty, and savory notes.
Serve with Garnish
Transfer the beef cheek to a serving platter and drizzle generously with the reduced sauce. Garnish with 0.25 cup sliced green onions for fresh contrast. Serve immediately with steamed jasmine rice to soak up every last drop of that luxurious braising liquid. The result is a restaurant-quality dish that transforms an inexpensive cut into something truly extraordinary.
Pro Tips For Making Asian Style Beef Cheek
- Sear the Cheek Twice: After browning the first side, flip it and let it sit untouched for 3 full minutes—this builds a deep crust that won’t fall apart later. I learned this the hard way when my first batch turned out soggy; patience here makes all the difference.
- Trim the Garlic Right: Peel and smash the garlic cloves with the flat side of your knife before adding them to the pot—this releases more flavor without burning. I used to chop them, and the dish never had that same rich aroma.
- Deglaze with Mirin First: Pour the mirin into the hot pan before adding beef broth—this dissolves the fond faster and prevents a bitter taste. Sounds counterintuitive, but it cuts down on scraping and keeps the sauce silky.
- Simmer Low and Slow: Once the liquid reduces to half, drop the heat to the lowest setting and let it bubble gently for 2+ hours—this tenderizes the cheek without curdling the sauce. I used to rush it, and the texture was always off.
Flavor customization for this recipe
Sweet-Savory Balance
Adjust the sweetness level to your taste by modifying the brown sugar and honey ratio. For a more pronounced sweetness, increase the brown sugar to ⅓ cup and add 1 tbsp extra honey. If you prefer a tangier profile, replace 1 tbsp honey with 1 tbsp rice vinegar—this adds brightness while maintaining umami depth. I often test the marinade before braising by tasting a small spoonful to ensure the balance feels right. 🍯
Spicy Kick Options
Add heat with 1 tbsp gochujang (Korean chili paste) or 1 tsp chili flakes to the marinade for a Korean-inspired twist. For a Thai-inspired version, stir in 1 tbsp fish sauce and ½ tsp ground coriander after braising. If you love smoky heat, finish the dish with ½ tsp smoked paprika or a drizzle of sriracha-infused sesame oil. Always start with half the amount and adjust to taste. 🌶️
Umami Boosters
Elevate the depth of flavor by adding 1 tbsp oyster sauce or 1 tsp fish sauce to the braising liquid. For a vegetarian-friendly boost, substitute with 1 tbsp soy sauce + 1 tsp mushroom powder. I also love adding 2 slices of dried shiitake mushrooms to the braising liquid—they dissolve into the sauce, adding a rich, earthy umami. Remove them before serving if you prefer a cleaner presentation. 🍄
Herb Variations
Swap out the star anise and bay leaves for aromatic herbs like cilantro stems or thyme sprigs for a Vietnamese-inspired flavor. For a Japanese-inspired version, add 2 slices of fresh ginger and 1 piece of kombu to the braising liquid. The kombu adds a subtle oceanic depth that pairs beautifully with the beef. Remove it before serving, as it becomes quite tender. 🌿
Texture Adjustments
For extra tenderness, add 1 tbsp baking soda to the marinade—it breaks down the meat fibers even faster. If you prefer a firmer texture, reduce the braising time by 30 minutes and serve the beef slightly less tender. For a crispy finish, pan-sear the sliced beef in 1 tbsp neutral oil for 1-2 minutes before serving. This creates a delightful contrast between the silky interior and crispy exterior. 🔥
Regional Twists
Transform this into a Korean-style galbi by adding 1 tbsp pear puree to the marinade and finishing with a drizzle of ssamjang (Korean dipping sauce). For a Japanese-inspired version, use 1 tbsp sake instead of mirin and add ½ cup shiitake mushrooms to the braising liquid. A Thai-inspired take could include 1 tbsp coconut milk in the braising liquid and garnishing with cilantro and lime wedges. Each regional variation keeps the core technique while adapting flavors to local tastes. 🗺️
Nutrition facts
Frequently asked questions
Why does beef cheek need to marinate overnight?
The overnight marinade is key for breaking down the tough collagen fibers in beef cheek. The combination of soy sauce, ginger, and garlic penetrates deeply, while the acidity from mirin and honey tenderizes the meat. This step transforms what would be chewy beef into silky, melt-in-your-mouth perfection.
Can I substitute beef shank for beef cheek?
Yes, but expect slightly different results. Beef shank has less fat and marbling, so it may need 30-60 extra minutes of braising time. For best results, increase the soy sauce by 2 tbsp and add 1 tbsp honey to compensate for the leaner cut. The texture will be firmer but still delicious.
How do I know when the beef cheek is done?
The beef cheek is ready when it's fork-tender but not falling apart. Insert a fork—it should pierce easily with minimal resistance. The cooking liquid should reduce to a thick, glossy sauce. If it's not quite tender after 3 hours, continue braising in 30-minute increments until perfect.
Can I make this recipe in a slow cooker?
Brown the beef first, then transfer everything to a slow cooker and cook on low for 8 hours or high for 5-6 hours. The slow cooker method is even more hands-off, though you may need to add ½ cup extra broth to prevent drying. The texture will be slightly more tender than oven-braised.
What's the best way to reheat leftovers?
Reheat gently in a saucepan with a splash of beef broth over low heat until warmed through. Avoid microwaving, as it can make the beef tough. For extra flavor, add 1 tsp soy sauce and ½ tsp sesame oil while reheating. Leftovers keep well for 4-5 days in the fridge.