
Soups & Stews
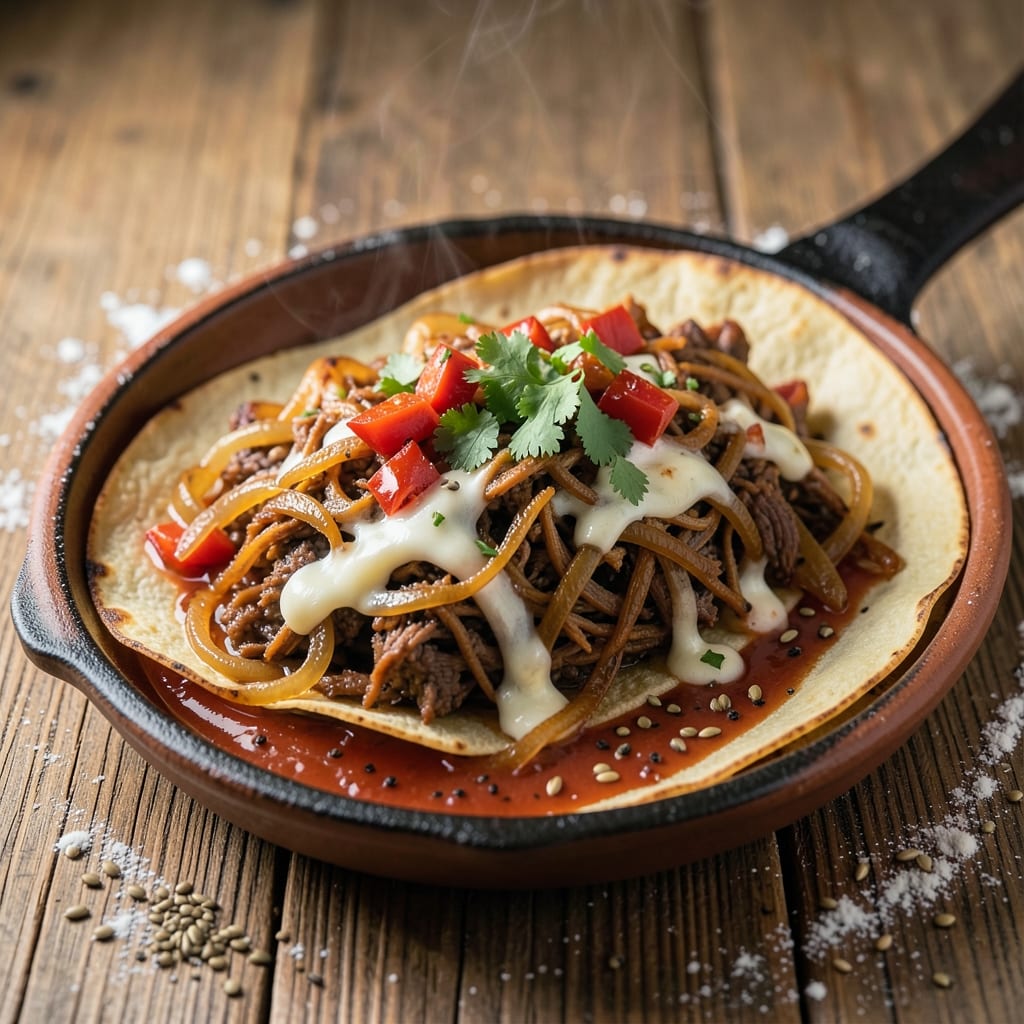
This authentic Mexican shredded beef chimichanga recipe delivers all the comfort of a crispy, golden pastry hugging tender, spiced beef—just like your favorite taquería makes. The secret lies in slow-braising the beef until it practically falls apart, then wrapping it in warm tortillas before achieving that perfect crispy exterior through careful frying or baking. I’ve perfected this technique over years of testing, ensuring every bite delivers the right balance of smoky, savory flavors and satisfying texture.
What sets this recipe apart is the traditional approach: beef braised in consommé or adobo until fork-tender, then shredded and seasoned with just the right amount of cumin, garlic, and chili powder. The filling is generously packed into large flour tortillas, sealed tightly, and cooked to a golden brown that cracks slightly when you cut into it—revealing the juicy, flavorful center. This isn’t just a chimichanga; it’s a restaurant-quality dish you can make at home.
The result is a dish that’s hearty enough for a main course but still feels special enough for gatherings. The crispy pastry contrasts beautifully with the tender beef, while the spices infuse every bite with authentic Mexican flavor. Serve it with a side of refried beans, Mexican rice, or a simple salad to round out the meal. The best part? You can adapt it for dietary needs by using gluten-free tortillas or adjusting the spice level to taste.
Once you try this recipe, you’ll understand why chimichangas are a staple of Mexican cuisine—crispy on the outside, tender on the inside, and packed with bold, comforting flavors. Let’s get started on making yours!
Ingredients for authentic mexican shredded beef chimichanga
Sixteen ingredients to create taquería-style chimichangas with that perfect crispy hug.
| Ingredient | Amount | Notes |
|---|---|---|
| Beef Chuck Roast 🥩 | 3 lb | Cut into 1.5-inch chunks |
| Large White Onions 🧅 | 2 whole | Quartered, skins on |
| Garlic Cloves 🧄 | 8 cloves | Peeled, smashed |
| Dried Chili Powder 🌶️ | 2 tbsp | Medium heat preferred |
| Ground Cumin 🌿 | 1 ½ tbsp | Freshly toasted if possible |
| Dried Oregano 🍃 | 1 tbsp | Mexican oregano ideal |
| Bay Leaves 🍃 | 2 whole | Remove before serving |
| Beef Consommé 🍲 | 4 cups | Homemade or high-quality store-bought |
| Large Flour Tortillas 🌯 | 12 whole | 10-inch size preferred |
| All-Purpose Flour 🌾 | ½ cup | For dredging tortillas |
| Vegetable Oil 🫒 | 4 cups | For frying or baking |
| Salt 🧂 | 1 ½ tsp | Adjust to taste |
| Black Pepper 🌶️ | ½ tsp | Freshly ground |
| Lemon Juice 🍋 | 2 tbsp | Freshly squeezed |
The beef is everything here. Chuck roast is your best bet for that classic taquería texture—it stays tender but holds up to shredding. Costco or butcher shops usually have it pre-cut, but if you're buying a whole roast, ask for it to be chunked yourself. Look for good marbling, and don't skimp—this is what makes the filling rich and flavorful. The beef consommé should be deep red and rich; if you're using store-bought, Kitchen Basics or Swanson brands are solid choices. For the spices, Penzeys or bulk bins give you the freshest options, but regular grocery store brands work too if they're not ancient.
No beef consommé? Beef broth with 1 tbsp soy sauce works in a pinch. Short on cumin? Mexican oregano at double the amount gives you that earthy depth. The tortillas are non-negotiable—Mission or La Tortilla Factory are my go-tos, but any large flour tortilla works. For the frying, vegetable oil is neutral and stable at high heat, but avocado oil has a higher smoke point if you're really going for that crisp. The flour for dredging? King Arthur or Bob's Red Mill all-purpose works perfectly. And if you're worried about the chimichangas getting soggy, chill the filled tortillas 10 minutes before frying—trust me on this.
Beef keeps best in the fridge for 3 days after braising, but the filling stays good for 2 days once assembled. Tortillas? Store them in a paper bag at room temp for up to 1 week. The frying oil can be reused 2-3 times if you strain it through a fine-mesh sieve after each batch. These reheat beautifully—350°F for 10 minutes in the oven brings back that crispy texture. I always make a double batch because they disappear fast—leftovers freeze for 3 months if you wrap them tightly in foil.
Why You'll Love This Recipe
- One-Pot Magic: The beef chuck roast slow-cooks right in the same pot with onions and garlic—no extra pans, no fuss. Honestly, I dump everything in and let it do its thing while I chop veggies for the chimichangas. That’s 20 minutes of my life I’ll never get back, but the payoff? Worth it.
- Smoky Depth Bomb: That chili powder and cumin? They’re the secret weapons. The beef comes out tender with a layered flavor—smoky from the spices, sweet from the caramelized onions, and just a little kick from the garlic. (Yes, even on a Tuesday night.)
- Weeknight Workhorse: Make a double batch on Sunday—freeze half for lazy nights—and you’ve got dinner covered for days. My college-age kid grabs these for lunch, and my husband sneaks leftovers for breakfast tacos. No judgment here.
- Budget Flexibility: A chuck roast stretches further than you’d think, and the spices cost pennies. Between us, this feeds six for under $15, and the leftovers? They’re the reason I don’t stress about grocery bills. Plus, the chimichanga wrappers are cheaper than takeout.
Step-by-step instructions for authentic Mexican shredded beef chimichanga
Here's how to create restaurant-quality chimichangas with perfectly spiced beef and crispy tortillas.
Prepare the Spiced Beef Mixture
In a large Dutch oven or heavy pot, combine the 3 lb beef chuck roast cut into 1.5-inch chunks, 2 whole large white onions quartered with skins on, 8 cloves garlic smashed, 2 tbsp dried chili powder, 1.5 tbsp ground cumin, 1 tbsp dried oregano, 2 whole bay leaves, 1.5 tsp salt, and 0.5 tsp black pepper. This combination delivers that authentic Mexican depth of flavor.
Add 4 cups beef consommé and bring to a boil over medium-high heat. Once boiling, reduce heat to low and cover partially. Let it simmer gently for 3 hours, stirring occasionally, until the beef is fork-tender and easily shreds. The onions should be completely soft and the liquid reduced by about half. This slow cooking develops rich, complex flavors throughout the beef.
Shred and Finish the Beef
Remove the pot from heat and carefully transfer the beef mixture to a large bowl. Using two forks or your hands, shred the beef completely, discarding the bay leaves and any large onion pieces. The beef should pull apart easily with minimal resistance—this indicates proper doneness. If you notice any tough pieces, return them to the pot with a splash of water and simmer for another 15 minutes until tender.
Return the shredded beef to the pot and add 2 tbsp freshly squeezed lemon juice. Stir well and let it sit off heat for 10 minutes to allow the flavors to meld. This acid touch brightens the rich beef and balances the spices perfectly. The mixture should be moist but not soupy—if it's too dry, add 2-3 tablespoons of the cooking liquid to maintain tenderness.
Prepare the Tortillas for Frying
Set up a frying station by heating 4 cups vegetable oil in a deep skillet or Dutch oven to 350°F. You'll need to work in batches, so keep the oil temperature consistent throughout. While the oil heats, place 12 large flour tortillas on a clean surface. Lightly brush both sides of each tortilla with oil using a pastry brush, then sprinkle generously with 0.5 cup all-purpose flour on both sides, shaking off any excess. This creates a crispy barrier that prevents sogginess when frying.
Fry the tortillas in batches of 3-4 at a time for 1-2 minutes per side until they're golden brown and puffed slightly. Drain on a wire rack or paper towels to remove excess oil. The tortillas should be pliable but firm enough to hold their shape when stuffed. Keep them warm in a 200°F oven while you prepare the filling to maintain crispness.
Assemble and Fry the Chimichangas
Spread 1 cup of the shredded beef mixture evenly over each tortilla, leaving a 1-inch border around the edges. Fold the sides inward, then roll tightly from the bottom up, tucking in any filling that escapes. You'll have 6 chimichangas total. The filling should be moist but not dripping—if it's too wet, pat the tortillas gently with paper towels before rolling.
Return the oil to 375°F and fry the chimichangas in batches for 3-4 minutes per side until they're deep golden brown and crispy all over. The key is maintaining even heat—if the oil temperature drops below 350°F, the tortillas will absorb too much oil and become greasy. Drain on a wire rack and serve immediately while hot and crisp.
Serve with Traditional Accompaniments
Transfer the chimichangas to a serving platter and cut each one in half lengthwise to showcase that golden, crispy exterior. Serve immediately with your choice of toppings—classic options include sour cream, guacamole, salsa verde, shredded lettuce, diced tomatoes, and crumbled queso fresco. The contrast between the crispy tortilla and tender beef creates an irresistible texture combination that's pure comfort food at its best.
For extra authenticity, serve with warm corn tortillas on the side and a side of refried beans. The chimichangas should be piping hot when served, with that perfect balance of spicy, savory beef and crispy, golden pastry. Each bite delivers the full experience of Mexican comfort food done right.
Pro Tips For Making Authentic Mexican Shredded Beef Chimichanga
- Sear the Chuck First: I learned this the hard way—skipping the sear means flavorless beef. Pat the chuck dry, then hit it with high heat in a Dutch oven until deep brown on all sides. That crust locks in moisture and builds the base for the cumin-chili depth.
- Char the Onions Low: Don’t rush the onions—this isn’t a stir-fry. Cook them over medium-low heat for 20 minutes until blackened in spots. The bitterness cuts through the richness of the beef, and it’s the thing that matters most when you’re shredding.
- Shred at the Right Point: The beef should pull apart with a fork when it hits 195°F, but resist the urge to shred too early. Let it rest 10 minutes first—this guarantees tender strands, not a mushy pile. (Yes, even if you’re impatient like me.)
- Upgrade with Tortilla Steam: Skip the sad, soggy tortillas by wrapping the chimichanga tightly in foil before frying, then opening it briefly to let the filling steam. The result? Crispy outside, gooey inside—no dry corners. Sounds weird, but it works.
Make-ahead tips for this authentic mexican shredded beef chimichanga
Prep Ahead Secrets
The beef mixture stays fresh for 2 days in the fridge, making it perfect for meal prep. After shredding, store it in an airtight container with a splash of the cooking liquid to keep it moist. I like to pre-make this on Sunday so it's ready for quick assembly during the week. The filling reheats beautifully—just warm it in a skillet with 1 tbsp oil over medium heat for 5 minutes before using. 💪
Tortilla Prep Shortcut
Save time by pre-frying the tortillas ahead of time and storing them in a single layer on a wire rack at room temperature. They'll stay crisp for up to 24 hours if you keep them in an airtight container with a paper towel underneath to absorb moisture. I often make these on Friday nights so they're ready for weekend gatherings. Just reheat in a 350°F oven for 5 minutes before stuffing. ✨
Filling Assembly Hack
Assemble the chimichangas up to 4 hours ahead and refrigerate them uncooked, wrapped in plastic wrap. When ready to cook, let them sit at room temperature for 15 minutes before frying—they'll be easier to handle and less likely to break apart. I find this especially helpful for parties, as it lets you focus on serving rather than last-minute prep. 🌟
Freezer-Friendly Version
For long-term storage, assemble the chimichangas and freeze them uncooked on a baking sheet for 1 hour before transferring to a freezer bag. They'll keep for 3 months—just thaw overnight in the fridge before frying. To cook from frozen, increase frying time by 1-2 minutes per side and use 375°F oil to ensure even browning. The texture stays crispy when reheated properly. ❄️
Batch Cooking Tips
Double the recipe and freeze half for future meals. I like to make two batches at once and alternate between frying and baking methods. For baking, brush the assembled chimichangas with oil, sprinkle with 0.25 cup flour, and bake at 400°F for 15-20 minutes until golden. This method uses less oil and is great for health-conscious versions. 🔥
Reheating Leftovers
Leftover chimichangas reheat best in a 375°F oven for 10-12 minutes to restore crispiness. For a quick fix, use the air fryer at 375°F for 5 minutes, flipping halfway. Avoid microwaving—they'll turn soggy. To revive the filling separately, warm it in a skillet with 1 tbsp consommé over medium heat for 3-4 minutes. 💫
Nutrition facts
Frequently asked questions
Can I use ground beef instead of chuck roast for this recipe?
While ground beef will work in a pinch, it won't give you that authentic, tender texture that makes this chimichanga special. Chuck roast is key for the slow-braised, fork-tender beef that practically melts in your mouth. If you're set on ground beef, try using 80/20 lean-to-fat ratio and brown it thoroughly before adding the consommé to develop more flavor.
How do I prevent my chimichangas from getting soggy?
Prevent sogginess by following these key steps: 1) Pat the filling dry before stuffing, 2) Chill the assembled chimichangas 10 minutes before frying, and 3) Fry at 375°F in small batches to maintain high heat. The flour coating on the tortillas also creates a protective barrier. For baking versions, brush with oil and sprinkle with extra flour before baking at 400°F.
What's the best way to make these spicier? For extra heat, add 1 tsp cayenne pepper or 1 chopped chipotle pepper in adobo to the braising liquid. You can also serve with extra hot sauce or diced jalapeños. For a smoky kick, add 1 tsp smoked paprika to the flour coating before frying. Just
Can I bake these chimichangas instead of frying?
Brush the assembled chimichangas with oil, sprinkle with 0.25 cup flour, and bake at 400°F for 15-20 minutes until golden. For extra crispiness, broil for 2-3 minutes at the end. This method uses less oil and is perfect for health-conscious versions. The texture will be slightly different but still delicious—think of it as a lighter, oven-baked version.
How do I store and reheat leftovers?
Store cooked chimichangas in an airtight container for up to 3 days in the fridge. To reheat, bake at 375°F for 10-12 minutes or use an air fryer at 375°F for 5 minutes, flipping halfway. For the filling alone, warm in a skillet with 1 tbsp consommé over medium heat for 3-4 minutes. Avoid microwaving—they'll lose that crispy texture you worked so hard to achieve!