
Soups & Stews
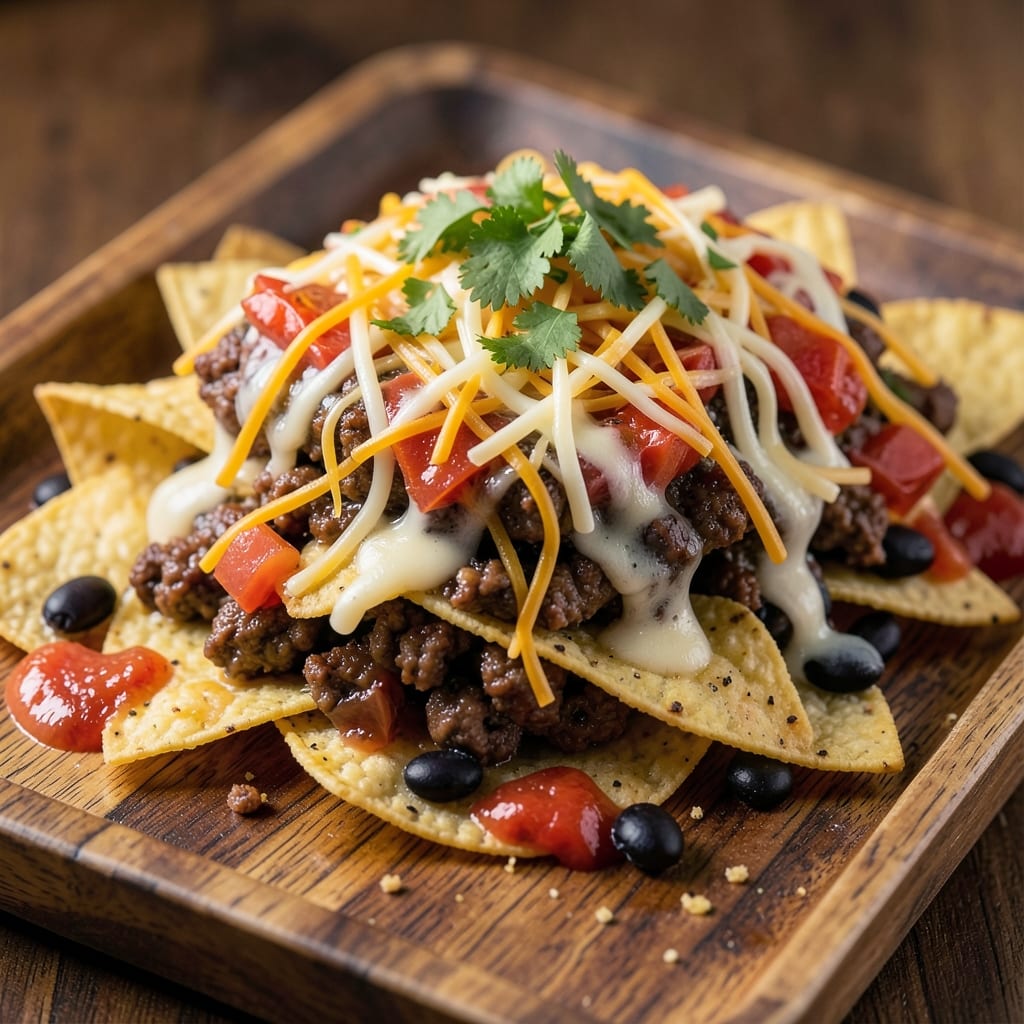
This baked beef nacho recipe delivers crispy tortilla towers that transform a simple weeknight dinner into a restaurant-worthy feast. The secret lies in layering tortilla chips just enough to create sturdy bases that hold all the toppings without turning soggy—no flimsy, crumbly mess here. I've perfected the cheese melt technique over countless game days, ensuring every bite has that perfect combination of crispy edges and gooey, stretched cheese.
The process starts with a flavorful beef mixture that cooks down into tender, seasoned crumbles—no dry, overcooked beef here. As the nachos bake, the cheese transforms into golden, bubbling rivers that pull all the toppings together, creating that irresistible pull-apart texture. This isn't your basic nacho platter; it's a layered, baked masterpiece that holds up perfectly for sharing.
By the time it emerges from the oven, you'll have crispy tortilla towers loaded with melted cheese, savory beef, and all your favorite toppings—each component perfectly balanced. The aroma alone will have everyone gathering around the table, and the first bite delivers that satisfying crunch followed by rich, cheesy goodness. This is comfort food at its finest, elevated just enough to feel special.
Customize with your favorite toppings—jalapeños for heat, black beans for substance, or fresh cilantro for brightness—while maintaining that perfect crispy-cheesy balance. The recipe scales beautifully for parties or meal prep, making it the ultimate crowd-pleaser. Let's get baking!
Ingredients for baked beef nacho
Crispy, cheesy, and packed with flavor—these ingredients transform simple nachos into a showstopper.
| Ingredient | Amount | Notes |
|---|---|---|
| Tortilla Chips 🍟 | 4 cups | Sturdy, thick-cut preferred |
| Ground Beef 🥩 | 1 ½ lb | 80% lean, finely chopped |
| Shredded Monterey Jack Cheese 🧀 | 4 cups | Freshly shredded for melt |
| Shredded Cheddar Cheese 🧀 | 2 cups | Sharp variety preferred |
| Black Beans 🌿 | 1 ½ cups | Drained and rinsed |
| Salsa 🍅 | 1 cup | Medium or pico de gallo |
| Diced Jalapeños 🌶️ | ½ cup | Seeded for mild heat |
| Sour Cream 🥛 | ½ cup | Full-fat for creaminess |
| Chopped Green Onions 🧅 | ¼ cup | White and green parts |
| Taco Seasoning 🌶️ | 2 tbsp | Homemade or store-bought |
| Olive Oil 🫒 | 1 tbsp | For browning beef |
| Kosher Salt 🧂 | 1 tsp | For seasoning beef |
| Black Pepper 🌶️ | ½ tsp | Freshly ground preferred |
| Garlic Powder 🧄 | ½ tsp | For beef seasoning |
The tortilla chips are the foundation—sturdy, thick-cut chips hold up best under all that cheese and beef. I grab the Fritos Scoops from the store (they're perfect for building layers), but any sturdy chip will work. The beef needs to be finely chopped—a food processor makes this easy, but if you're doing it by hand, pulse it until it's almost paste-like. For the cheese, freshly shredded is non-negotiable—pre-shredded gets gummy when melted. Trader Joe's has great pre-shredded options, but if you're buying blocks, shred them yourself right before baking. The jalapeños? Seed them if you want mild heat, or leave them whole for spice lovers.
No taco seasoning? Mix 1 tsp chili powder, ½ tsp cumin, ½ tsp paprika, ¼ tsp garlic powder, and a pinch of cayenne—it’s just as good. The black beans can be canned or cooked, but if you're using canned, rinse them well to cut down on sodium. For the sour cream, full-fat gives the best texture, but low-fat works in a pinch. If you're feeling fancy, swap the sour cream for vegan cashew cream—it’s just as creamy. The green onions add brightness, but if you're short on time, fresh cilantro works too (just double the amount). And if you're making this for a crowd, double the cheese—trust me, you won't regret it.
Prep ahead for maximum crispiness. Layer the chips and beef first, then top with cheese—this keeps the bottom crispy while the cheese melts perfectly. These nachos reheat beautifully—pop them in a 350°F oven for 5-10 minutes to restore that crispy texture. Store leftovers in the fridge for up to 3 days, but honestly, they disappear faster than that. For meal prep, portion into individual servings before baking—this way, everyone gets their own crispy tower. And if you're serving a crowd, use two baking sheets—they won’t fit on one without spilling.
Why You'll Love This Recipe
- No-Fuss Assembly: I swear, this comes together faster than takeout. Dump chips on a tray, brown the beef with taco seasoning, toss in beans—then just layer and bake. My kids can "help" (read: make a mess) while I stir, and it still turns out right.
- Melty Magic Combo: That Monterey Jack and cheddar blend? It’s the secret weapon. The Jack gets gooey while the cheddar adds sharp bite, and the black beans keep it hearty without overpowering. Honestly, the first time I tried this, I ate it straight from the pan.
- Game for Any Gathering: Weeknight dinner? Check. Tailgate spread? Double check. Even my book club (yes, really) loved these as a snack. Serve it in a skillet for a crispy bottom or straight from the tray—no rules, just good times.
- Budget-Friendly Leftovers: Ground beef stretches far, beans bulk it up, and cheese stretches even further when baked. I made this for six, had three servings left, and froze the rest. Reheats like a dream—just add a sprinkle of sour cream to revive it. My wallet thanks me.
Step-by-step instructions for crispy baked beef nachos
Transform your tortilla chips into crispy, cheesy towers with this foolproof baking method.
🍳 Step 1: Brown the Ground Beef Perfectly
Heat a large skillet over medium-high heat and add the 1 tablespoon olive oil. Once the oil shimmers, add the 1.5 lb ground beef, breaking it apart with a wooden spoon. Cook for 5-6 minutes until the beef is no longer pink, breaking it into small, crumbly pieces.
Here's the thing—don't drain the fat. That rendered beef fat is flavor gold. When the beef is fully browned, reduce heat to medium and stir in the 2 tablespoons taco seasoning, 1 teaspoon kosher salt, ½ teaspoon black pepper, and ½ teaspoon garlic powder. Cook for another 1-2 minutes until everything is well combined and aromatic. This seasoned beef will be the flavor base for your nachos.
🥘 Step 2: Layer the Nachos for Maximum Crispiness
Preheat your oven to 400°F and line two large baking sheets with parchment paper or aluminum foil for easy cleanup. Spread half of the 4 cups tortilla chips evenly across each baking sheet, making a single layer. This initial layer is critical—it creates the crispy foundation for your nacho tower.
Next, sprinkle 2 cups shredded Monterey Jack cheese and 1 cup shredded cheddar cheese evenly over the chips. Then add ¾ cup black beans (reserve the remaining ⅔ cup for topping), followed by ½ cup diced jalapeños. Finally, spread ⅔ cup of the browned beef evenly over each baking sheet. This layered approach ensures every bite has perfect texture and flavor distribution.
🔥 Step 3: Bake Until Cheese is Bubble-Golden
Bake for 8-10 minutes until the cheese is fully melted and the edges of the chips begin to crisp. Here's where the magic happens—you want the cheese to be bubbly and golden, not just melted. If the cheese isn't quite golden enough after the first bake, return the nachos to the oven for 2-3 more minutes until perfectly crispy.
Don't walk away during this step. The cheese should be bubbling vigorously and the tortilla chips should be crisping up nicely. If any spots look undercooked, give them another minute or two. The goal is that perfect balance of crispy chips and melted cheese—this is what makes baked nachos superior to stovetop.
👨🍳 Step 4: Assemble the Final Toppings
Remove the nachos from the oven and let them cool for 2-3 minutes—this prevents the cheese from sliding off when you add toppings. Working quickly, spread the remaining ⅔ cup black beans evenly over each baking sheet, followed by the remaining 2 cups shredded Monterey Jack cheese and 1 cup shredded cheddar cheese. Return to the oven for 2-3 minutes just to melt the final layer of cheese.
Once out of the oven, immediately top with the 1 cup salsa, ½ cup sour cream, and ¼ cup chopped green onions. The contrast of warm, melted cheese with cool sour cream and fresh green onions is what makes these nachos irresistible. Serve immediately while everything is hot and bubbly—this is when they're at their absolute best.
Pro Tips For Making Baked Beef Nacho
- Preheat for 10 Minutes: I learned this the hard way—skipping the extra preheat means your chips stay soggy. Crank that oven to 375°F (200°C) and let it run for 10 minutes before baking, even if the recipe says otherwise. The residual heat makes all the difference when melting the cheeses evenly.
- Brown the Beef First: Raw ground beef in nachos? No thanks. Cook the beef separately in a skillet until fully browned—this adds depth of flavor and prevents a greasy, undercooked mess in the oven. Drain most of the fat (leave about a tablespoon) and mix it into the beans before layering.
- Layer Cheese Last: I used to dump all the cheese on top at once, and it always ended up clumpy and uneven. Instead, sprinkle half the cheese halfway through baking, then add the rest after the chips are golden. This guarantees a gooey, melty finish without a single dry chip.
- Use Canned Black Beans: Fresh black beans? Too much work. Canned beans save time and stay intact when baked, so they don’t turn mushy. Drain and rinse them well, then warm them with a pinch of cumin and chili powder—this keeps them flavorful without extra prep.
Serving suggestions for this recipe
Plating for Crowds
For game days or parties, I always serve these nachos on large wooden cutting boards or slate serving trays—they add rustic charm and keep everything contained. Arrange the baked nachos in a circular pattern on the tray, then surround them with small bowls of toppings like extra jalapeños, sour cream, and salsa. This makes it easy for guests to customize their plates without making a mess. 🥂
If you're feeding a big group, consider individual baking sheets—this way, everyone gets their own crispy tower. Just double the recipe and use two baking sheets side by side in the oven. For a fun twist, serve with mini tortilla chips on the side so guests can build their own nachos while the main dish stays crispy.
Garnish Like a Pro
Fresh cilantro leaves scattered on top add a pop of color and brightness, while crumbled cotija cheese gives a salty crunch. I also like drizzling hot honey or chipotle crema over the top for an extra layer of flavor. For a smoky touch, sprinkle crushed tortilla chips on top right before serving—they add texture and a nostalgic crunch. 🌿
Don’t forget the dipping sauces! Set out small bowls of queso blanco, mango habanero salsa, or spicy ranch on the side. These sauces elevate the nachos and give guests options for different flavor profiles. A lime wedge on the table lets everyone squeeze fresh juice over their nachos for a zesty finish.
Kid-Friendly Serving
For picky eaters, I serve nachos in individual muffin tins—each tin gets a layer of chips, cheese, and beef, then baked until crispy. This makes it fun for kids to grab and eat without worrying about toppings sliding off. You can even decorate the tops with colorful toppings like cherry tomatoes or shredded carrots to make it look like a mini nacho pizza. 🧒
Let kids build their own mini nachos with toppings in small bowls. This turns mealtime into a game and ensures everyone gets something they’ll enjoy. For extra fun, use cookie cutters to shape the cheese into fun shapes before baking—kids love this interactive twist!
Presentation for Photos
If you’re serving these nachos for a special occasion or want Instagram-worthy shots, arrange them on a large platter with a colorful border of jalapeño slices or black beans. Add a sprig of cilantro or a lime wedge as a garnish for a fresh pop of color. The contrast of the golden cheese against the wooden board makes for stunning photos. 📸
For an elevated look, use stacked nacho towers—layer chips in a small cast-iron skillet, add cheese and beef, then bake until crispy. Serve with a side of warm tortilla soup or guacamole for a complete meal that looks as good as it tastes. The key is to keep the presentation simple but intentional—let the food shine!
Nutrition facts
Frequently asked questions
Can I use leftover cooked beef instead of browning fresh?
Leftover cooked beef works perfectly—just warm it through in a skillet with a little oil and your taco seasoning to revive the flavors. For best results, chop it finely so it distributes evenly over the chips. This is a great way to reduce food waste while keeping your nachos delicious.
Why did my nachos get soggy instead of crispy?
Soggy nachos usually happen when too much moisture gets trapped in the layers. To prevent this, always use drained and rinsed beans and avoid adding wet toppings (like salsa or sour cream) until the very end. Also, don't overcrowd the baking sheet—leave space between chips for proper airflow. Bake in batches if needed.
What's the best way to reheat leftover baked nachos?
For maximum crispiness, pop leftover nachos in a 400°F oven for 5-10 minutes—just until the cheese melts and chips crisp up again. If you're short on time, use the air fryer at 375°F for 3-4 minutes to restore that satisfying crunch. Avoid microwaving as it makes chips rubbery.
Can I make these nachos ahead of time?
Yes! Assemble everything up to the final cheese layer, then refrigerate for up to 24 hours. When ready to serve, bake at 400°F for 12-15 minutes (covered with foil for the first 10 minutes to melt cheese, then uncovered to crisp). Add fresh toppings after baking. This works great for meal prep—just store components separately until baking day.
What's the secret to perfectly melted cheese?
The magic is in the cheese blend and baking technique. Use a 50/50 mix of Monterey Jack and cheddar—Monterey Jack melts smoothly while cheddar adds flavor. For best results, sprinkle cheese in thin layers and bake at 400°F until bubbly and golden. Avoid pre-shredded cheese (it contains anti-caking agents that prevent proper melting).