
Main Courses
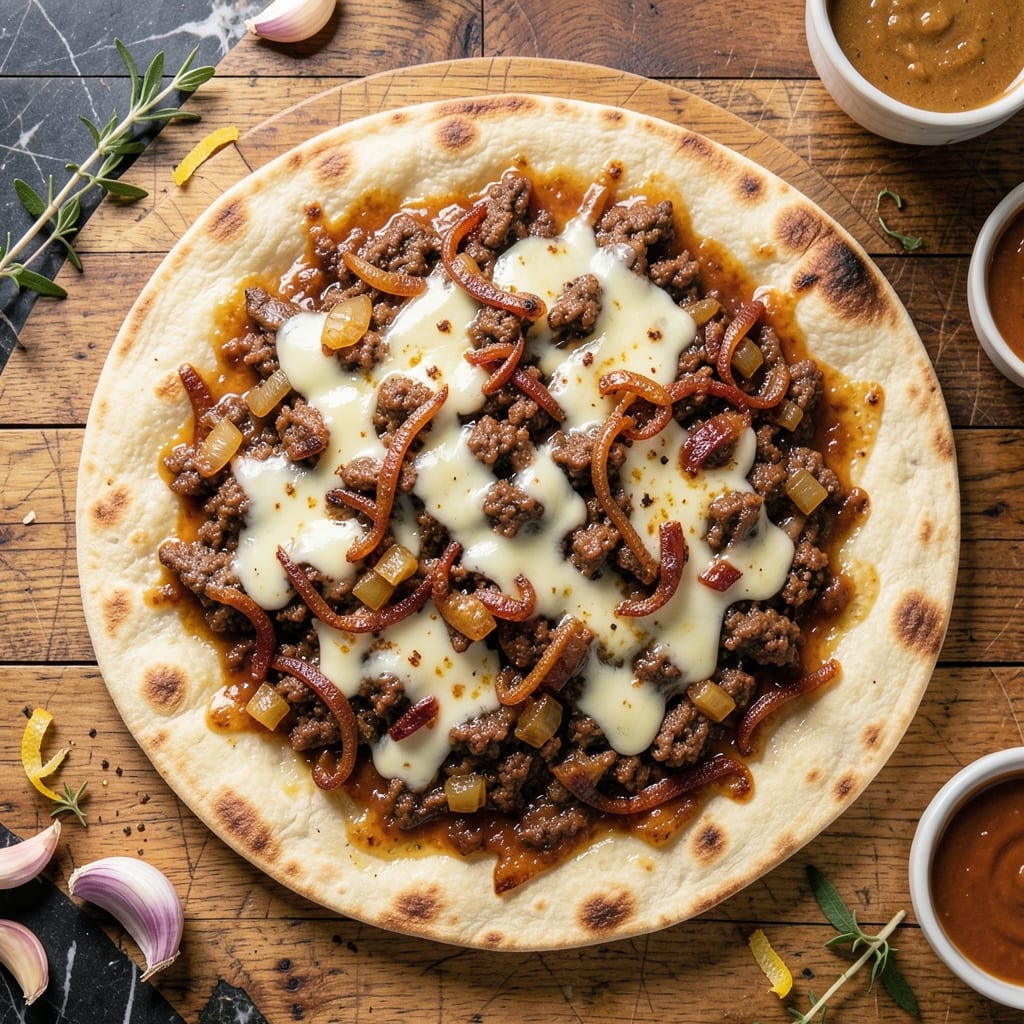
This baked beef quesadilla recipe delivers crispy tortilla crusts and rivers of melted cheese that'll transform your weeknight dinner. The secret lies in browning ground beef with a bold spice blend before layering it between tortillas and baking until golden. I developed this method after years of testing—no more soggy quesadillas or uneven cooking.
What sets this recipe apart is the combination of high-heat browning for the beef and precise baking temperatures to achieve that perfect crispy exterior. You'll need just 10 minutes of active prep followed by 10 minutes in the oven, making it ideal for busy evenings. The cheese melts into gooey perfection while the tortillas develop a satisfying crunch.
By the time you cut into your quesadilla, you'll find perfectly browned beef infused with savory spices, layers of melted cheese that pull into strings, and tortillas with a satisfying crispness. This recipe serves four and pairs beautifully with sour cream, salsa, or guacamole for dipping.
The technique is simple but yields restaurant-quality results—no flipping required, no greasy frying, just a foolproof method that delivers every time. Let's get cooking!
Ingredients for baked beef quesadilla
High-quality beef, crispy tortillas, and perfectly melted cheese create restaurant-style quesadillas without frying.
| Ingredient | Amount | Notes |
|---|---|---|
| Ground Beef (80/20) 🥩 | 1 lb | Lean-to-fat ratio for flavor and moisture |
| Large Flour Tortillas 🌯 | 4 whole | 10-inch diameter, high-quality flour |
| Shredded Monterey Jack Cheese 🧀 | 2 cups | Freshly shredded, not pre-shredded |
| Yellow Onion 🧅 | 1 whole | Medium size, finely diced |
| Garlic Cloves 🧄 | 2 cloves | Fresh, minced for beef mixture |
| Chili Powder 🌶️ | 1 tbsp | Medium heat, not mild |
| Ground Cumin 🌿 | 1 tsp | Toasted for deeper aroma |
| Smoked Paprika 🌶️ | ½ tsp | For smoky depth |
| Salt 🧂 | ½ tsp | Kosher or sea salt |
| Black Pepper 🌶️ | ¼ tsp | Freshly ground |
| Olive Oil 🫒 | 1 tbsp | For browning beef |
| Sour Cream 🥛 | ¼ cup | For serving, optional |
| Salsa 🍅 | ½ cup | For serving, optional |
| Guacamole 🥑 | ½ cup | For serving, optional |
The ground beef is the foundation—80/20 fat ratio ensures juicy results, not dry. Costco or local butchers often carry the best quality, but any supermarket ground beef works if it's fresh. For the tortillas, Mission or La Tortilla Factory brands deliver consistent crispiness when baked. Avoid pre-shredded cheese; the anti-caking agents prevent proper melting. Monterey Jack holds its shape while still becoming creamy—ideal for this technique. The onions and garlic should be freshly minced (not pre-chopped) to maximize flavor.
No chili powder? Substitute smoked paprika plus cayenne for heat. Running short on cumin? Dried oregano at half the amount works in a pinch. The tortillas can be swapped for corn tortillas, though they crisp differently. For a vegetarian option, replace the beef with spiced black beans or sautéed mushrooms. If you're short on time, pre-shredded cheese with cornstarch (like Kraft) works, though freshly shredded melts better. The olive oil is non-negotiable for browning—avocado oil works too if you prefer a neutral flavor.
Store prepped beef mixture in an airtight container for up to 2 days in the fridge. Tortillas keep well in a cool, dry place for about 1 week—freeze extras for 3 months. Once assembled, quesadillas can be baked immediately or refrigerated for 2 hours before baking. For leftovers, reheat in a 350°F oven for 5-7 minutes to restore crispiness. The cheese and toppings should be added fresh after baking to maintain texture.
Why You'll Love This Recipe
- One-Pan Magic: I swear by this trick—just brown the beef, toss everything on a sheet pan, and bake. No flipping, no mess, no stress. The onions caramelize right alongside the tortillas, and that melted cheese? It’s all contained in one easy cleanup.
- Cheesy Crispy Edge: That Monterey Jack gets just golden—crispy enough to hold up, creamy enough to melt into your mouth. The 80/20 beef adds richness without overpowering, and the garlic? It lingers in the best way, like a warm hug in every bite.
- Lunchbox Hero: Between us, this is my go-to for packed lunches. Cut into triangles, wrap in foil, and they stay fresh for days. My kids (and my husband) fight over them—proof it’s a winner for school lunches or office snacks.
- Budget Stretch: A pound of beef, a few tortillas, and some cheese feed four people for under $10. Honestly, it’s the kind of meal that makes grocery night feel like a victory. Plus, leftovers reheat like a dream—no dry edges, just gooey perfection.
Step-by-step instructions for baked beef quesadillas with crispy crusts
Master the art of oven-baked quesadillas for perfect crispiness without sticking or soggy centers.
👨🍳 Step 1: Prepare the Seasoned Beef Filling
Heat the 1 tablespoon olive oil in a large skillet over medium-high heat. Add the 1 whole yellow onion, finely diced, and cook for 5 minutes until softened and translucent. Push the onions to one side of the pan and add the 2 cloves garlic cloves, minced, cooking for 30 seconds until fragrant.
Add the 1 lb ground beef (80/20) to the pan, breaking it apart with a wooden spoon. Cook for 5-6 minutes until the beef loses its raw color and begins to brown. Drain excess fat if needed, leaving about 1 tablespoon in the pan for flavor.
Stir in the 1 tablespoon chili powder, 1 teaspoon ground cumin, 0.5 teaspoon smoked paprika, 0.5 teaspoon salt, and 0.25 teaspoon black pepper. Cook for another 2 minutes until the spices are toasted and the mixture is well combined. Remove from heat and let cool slightly for 5 minutes before assembling the quesadillas.
🥘 Step 2: Assemble the Quesadillas for Maximum Crispiness
Preheat your oven to 375°F and line a baking sheet with parchment paper. Place the 4 whole large flour tortillas on a clean surface. Divide the seasoned beef mixture evenly among the tortillas, spreading it in a ¼-inch thick layer, leaving a ½-inch border around the edges.
Sprinkle ½ cup shredded Monterey Jack cheese evenly over each tortilla, then fold them in half to create four neat quesadillas. Press down gently with a spatula to ensure the filling adheres to the tortillas. This step is critical for preventing cheese from leaking out during baking.
🔥 Step 3: Bake for Crispy Tortillas and Melted Cheese
Place the assembled quesadillas on the prepared baking sheet, seam-side down. Bake for 12-15 minutes until the tortillas are golden brown and the cheese has melted into rivers. Rotate the baking sheet halfway through for even browning.
For extra crispiness, I recommend broiling for 1-2 minutes at the end. Watch closely to prevent burning—you want the tortillas to be deep golden brown with a crisp texture, not charred. Remove from the oven and let rest for 2 minutes before serving.
🍽️ Step 4: Serve with Classic Toppings
Slice each quesadilla into 4 wedges and arrange on a serving platter. Serve immediately with the 0.25 cup sour cream, 0.5 cup salsa, and 0.5 cup guacamole on the side. The contrast of creamy sour cream, fresh guacamole, and tangy salsa complements the rich, spiced beef and crispy tortillas perfectly.
For an elevated presentation, drizzle any remaining melted cheese from the baking sheet over the top of the quesadillas. The cheese rivers add a restaurant-quality touch that guests will love. Enjoy while warm for the ultimate texture and flavor combination.
Pro Tips For Making Baked Beef Quesadilla
- Preheat Pan to Smoking: The oven’s job is to melt cheese and crisp tortillas, not cook the beef. Brown your ground beef in a skillet first—high heat, 3-4 minutes—until it’s fully cooked through and the fat renders. Then transfer it to the tortillas before baking; this keeps the filling warm while the cheese melts evenly.
- Sweat Onions Low and Slow: Chop onions into ¼-inch pieces and cook them in a dry pan on medium-low for 8-10 minutes, stirring occasionally. You want them soft and translucent, not browned—this prevents a bitter taste that’ll overpower the beef. Add minced garlic in the last 30 seconds, but don’t let it burn.
- Layer Cheese Like a Sandwich: Don’t just dump shredded cheese on top—it’ll slide off and pool at the bottom. Instead, spread a thin, even layer between the tortillas and beef, then fold the edges inward first. Press lightly before baking; this traps the filling and guarantees a clean bite every time.
- Bake Two at Once: Place quesadillas side by side on a baking sheet (no overlapping) and bake at 375°F (190°C) for 10-12 minutes. If your oven runs hot, check at 8 minutes—you want the cheese to be fully melted but the tortillas still slightly pliable, not rubbery. Stacking them will steam the bottoms and ruin the texture.
Flavor customization for this dish
Spice Level Control
Adjust the heat to your preference by tweaking the spice blend. For a mild version, reduce chili powder to ½ teaspoon and omit cayenne entirely. If you love heat, add ½ teaspoon cayenne or 1 teaspoon chipotle powder to the beef mixture. I often keep a small bowl of hot sauce on the side for those who want extra kick after baking. 🌶️
Cheese Variations
Swap Monterey Jack for Oaxaca cheese for a stringier, more authentic Mexican flavor. For a smoky twist, mix in ½ cup pepper jack with the Monterey Jack. If you're lactose intolerant, use dairy-free cheese shreds like Miyoko's—they melt surprisingly well when baked. Always shred your own cheese for best results.
Protein Swaps
Replace the beef with shredded rotisserie chicken for a lighter option—just season it with the same spice blend and sauté briefly. For vegetarians, try black beans (rinsed and drained) mixed with ½ cup corn kernels and the spices. I've also made these with sautéed mushrooms and spinach for an earthy, umami-rich filling.
Tortilla Alternatives
Use corn tortillas for a gluten-free option—they crisp differently but still work beautifully. For extra flakiness, try low-carb tortillas like Mission Carb Balance. If you're feeling adventurous, wrap the filling in collard green leaves for a Southern-style twist. Just brush the edges with olive oil before baking.
Topping Ideas
Add pickled red onions for brightness—they cut through the richness perfectly. A sprinkle of fresh cilantro or chopped scallions adds freshness. For a creamy finish, drizzle with avocado crema (blend avocado with sour cream and lime). Keep toppings simple so the crispy tortillas and melted cheese remain the stars. 🥑
Regional Twists
For a Texas-style version, add diced jalapeños and top with crumbled queso fresco. In New Mexico, swap the chili powder for green chile powder and serve with charro beans. If you're craving California flavors, add avocado slices and crumbled cotija cheese on top. Each regional variation brings its own unique character to the dish. 🗺️
Nutrition facts
Frequently asked questions
Why do my baked quesadillas turn out soggy instead of crispy?
The key is baking temperature and tortilla prep. Use 375°F and ensure tortillas are dry—don't overfill them or the cheese will leak, making them soggy. For extra crispiness, broil for 1-2 minutes at the end while watching closely. A ½-inch border of empty tortilla also prevents sogginess.
Can I make these quesadillas ahead of time?
Assemble them but don't bake—store in an airtight container in the fridge for up to 2 hours before baking. For leftovers, reheat at 350°F for 5-7 minutes to restore crispiness. Never freeze assembled quesadillas—they'll lose texture when thawed.
What's the best cheese for melting in baked quesadillas?
Monterey Jack melts beautifully with a creamy texture, but Oaxaca cheese creates those perfect cheese rivers for restaurant-style results. For extra flavor, mix in ½ cup pepper jack. Always use freshly shredded cheese—pre-shredded varieties contain anti-caking agents that prevent proper melting.
How do I prevent cheese from leaking out while baking?
Press the folded quesadillas gently with a spatula before baking to seal the filling. Use ½ cup cheese per quesadilla (not more) and leave a ½-inch border of empty tortilla around the edges. Bake seam-side down on parchment paper for easy cleanup and to catch any stray cheese.
Can I use corn tortillas instead of flour?
Yes! Corn tortillas work beautifully—they crisp differently but still achieve a satisfying texture. For best results, brush them lightly with olive oil before baking. They'll be less pliable than flour tortillas, so handle gently when assembling. The flavor pairs perfectly with the beef and spices for an authentic Mexican touch.