
Soups & Stews
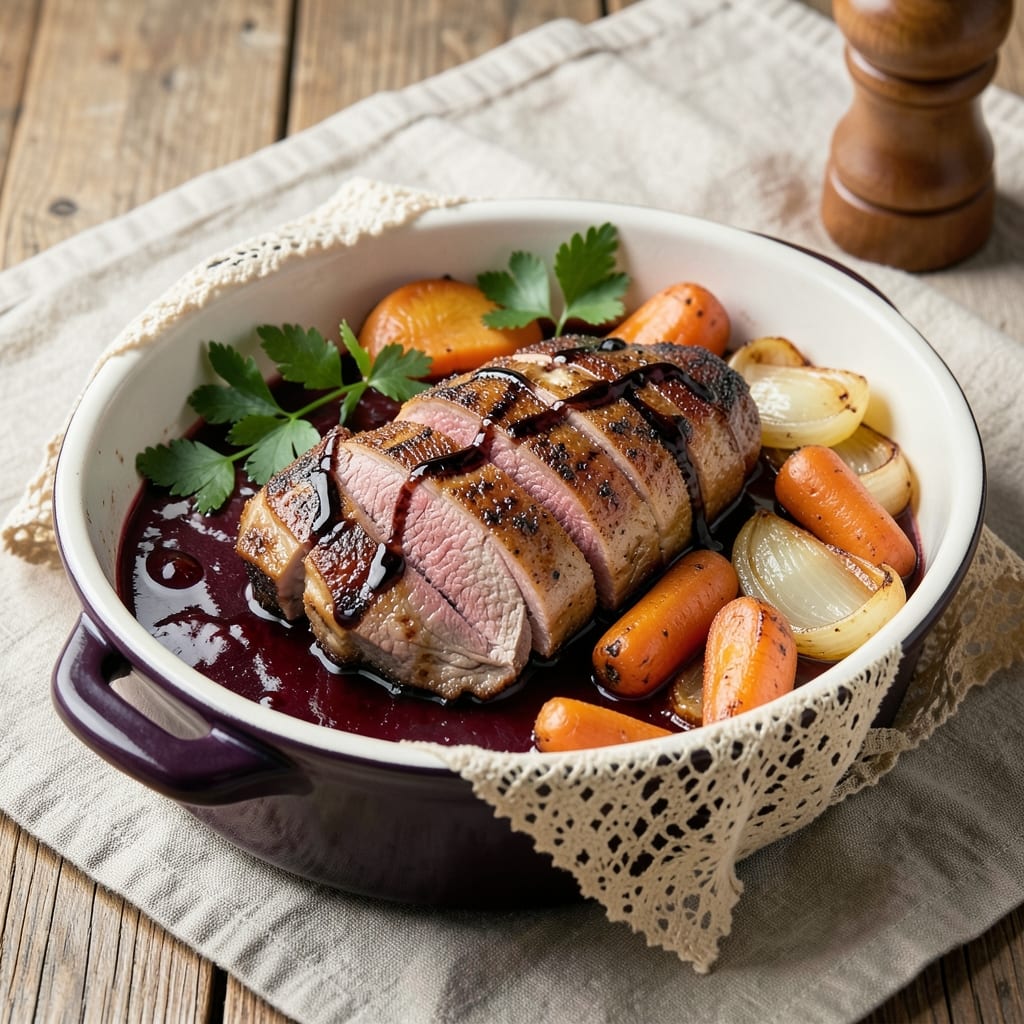
This balsamic braised beef recipe transforms tough cuts into melt-in-your-mouth perfection through slow simmering and deep umami development. The key lies in a carefully balanced braising liquid—balsamic vinegar, red wine, and aromatic vegetables—that infuses the meat with complex flavors over hours of gentle cooking. Professional chefs rely on this technique to achieve restaurant-quality tenderness at home, and the glossy, rich sauce elevates even the simplest side dishes.
The process begins with a proper sear to build flavor, followed by deglazing the pan to capture every browned bit. Then comes the slow braise—where patience pays off—as the beef becomes fork-tender and absorbs the deep, caramelized sauce. What makes this recipe stand out is the balsamic's ability to balance acidity and sweetness, creating a sauce that's both elegant and approachable for weeknight dinners.
By the time you plate this dish, you'll have perfectly tender beef with a glossy, velvety sauce that clings beautifully to each bite. The technique ensures even distribution of flavors throughout the meat, delivering that restaurant-quality experience without requiring advanced skills. Pair it with creamy mashed potatoes or crusty bread to soak up every last drop of that rich, umami-packed sauce.
This method works best with chuck roast or short ribs, but the principles apply to any tough cut that benefits from slow cooking. The beauty of braising is its flexibility—adjust cooking times based on your schedule, and the result will always be impressive. Let's get started on creating this deeply satisfying dish that's sure to become a family favorite.
Ingredients for balsamic braised beef
Fifteen ingredients transform tough beef into restaurant-quality melt-in-your-mouth perfection through slow simmering and umami development.
| Ingredient | Amount | Notes |
|---|---|---|
| Chuck Roast 🥩 | 3 lb | Trimmed of excess fat, cut into 2-inch cubes |
| Balsamic Vinegar 🍷 | ½ cup | Aged, dark variety for depth |
| Dry Red Wine 🍷 | 1 cup | Bold Cabernet Sauvignon or Merlot |
| Beef Broth 🥄 | 2 cups | Low-sodium, homemade preferred |
| Yellow Onion 🧅 | 1 whole | Peeled, cut into 1-inch chunks |
| Carrots 🥕 | 4 whole | Peeled, cut into 2-inch pieces |
| Garlic Cloves 🧄 | 6 cloves | Peeled, smashed lightly |
| Fresh Thyme 🌿 | 2 sprigs | Stems removed, leaves only |
| Tomato Paste 🍅 | 2 tbsp | Smooth, no added salt |
| Olive Oil 🫒 | 2 tbsp | Extra-virgin for high heat searing |
| Kosher Salt 🧂 | 1 ½ tsp | Diamond Crystal preferred |
| Ground Black Pepper 🌶️ | 1 tsp | Freshly cracked for intensity |
| All-Purpose Flour 🌾 | 2 tbsp | For dredging meat cubes |
| Fresh Bay Leaves 🌿 | 2 whole | Removed before serving |
| Fresh Parsley 🌿 | ¼ cup | Chopped, for garnish |
The chuck roast is the foundation—look for well-marbled cuts with visible fat for moisture during braising. Whole Foods or your local butcher typically carry the best quality, but any reputable grocery store's fresh meat section will have suitable options. If you can't find chuck, short ribs or brisket work beautifully. Trim excess fat to about 1/4-inch thickness—this renders during cooking but keeps the meat tender. The balsamic vinegar should be aged and dark, not the clear variety; Giovanni Rossi or Balsamicella are excellent choices for that authentic depth of flavor.
No red wine? Dry white wine or beef broth works in a pinch, though the umami profile will differ slightly. Fresh thyme is ideal, but dried thyme at one-third the amount suffices if you're short on herbs. The tomato paste can be substituted with 1/4 cup crushed tomatoes if needed, though it won't caramelize as beautifully. For the flour, all-purpose or bread flour both work—just avoid cake flour, which lacks the necessary protein structure. If you're using pre-minced garlic, reduce to 4 cloves since jarred garlic has more moisture content. The bay leaves add subtle earthiness; omit if you're sensitive to their flavor, but they're traditional for a reason.
This dish tastes even better the next day as flavors meld, so make a double batch if you're feeding a crowd. Store in an airtight container in the fridge for up to 5 days, or freeze for 3 months by portioning into individual containers. To reheat, warm gently on the stove with a splash of water or broth—never microwave, as it can make the sauce grainy. The sauce thickens as it cools, so add a splash of water or wine when reheating if it's too stiff. Garnish with fresh parsley just before serving to brighten the dish with a touch of freshness.
Why You'll Love This Recipe
- Rich Without Trying: That first sip of sauce is where it gets me every time. The balsamic and red wine cut through the beef broth’s depth, then caramelize into something almost sweet—like a fancy wine reduction, but with zero effort.
- Leftovers That Beg: Between us, this dish tastes better the next day. The beef gets fork-tender, the sauce thickens, and suddenly you’ve got a week’s worth of lunches that’ll have your coworkers asking for the recipe.
- Budget Beef Boost: A chuck roast is cheap, but this method makes it feel like a steakhouse cut. I’ve fed six people for under $20, and honestly? They’d never guess it wasn’t a $50 dinner.
Step-by-step instructions for balsamic braised beef
This method transforms tough chuck roast into fork-tender perfection through precise timing and technique.
🍳 Step 1: Sear the Beef for Maximum Flavor
Heat a heavy Dutch oven over medium-high heat until very hot. Add the 2 tablespoons olive oil and swirl to coat. Working in batches to avoid crowding, add the 3 lb chuck roast cubes and sear for 2-3 minutes per side until deeply browned. This step develops the rich Maillard reaction that forms the flavor foundation.
As you sear, you'll notice golden crusts forming on the meat. Don't rush this—those browned bits are pure flavor. Once all cubes are seared to golden brown, transfer them to a plate. The residual heat will keep them warm while you prepare the braising liquid.
👨🍳 Step 2: Build the Braising Liquid Layer by Layer
Return the Dutch oven to the heat and add the 1 whole yellow onion and 4 whole carrots, cutting them into the hot oil. Cook for 3-4 minutes until softened and slightly caramelized. Add the 6 cloves garlic cloves and 2 sprigs fresh thyme, stirring for 30 seconds until fragrant.
Pour in the 1 cup dry red wine and scrape up all the browned bits from the bottom of the pot with a wooden spoon. This deglazing step captures all that concentrated flavor. Let the wine simmer for 2-3 minutes until reduced by half. Stir in the 2 tablespoons tomato paste, 2 whole fresh bay leaves, and 1.5 teaspoons kosher salt.
🥘 Step 3: Combine and Braise Until Fork-Tender
Return the seared beef to the Dutch oven along with any accumulated juices. Pour in the 2 cups beef broth and 0.5 cup balsamic vinegar, stirring to combine. The liquid should come about halfway up the meat cubes. Bring to a gentle simmer, then cover tightly with a lid.
Transfer to a preheated 300°F oven and braise for 3-3.5 hours until the beef is fork-tender. The meat should easily pull apart with minimal resistance. If the liquid reduces too quickly, add a splash of water or broth to maintain proper braising level.
⏰ Step 4: Finish and Rest for Perfect Texture
Once the beef is tender, remove the Dutch oven from the oven and let it rest uncovered on the stovetop over low heat for 10-15 minutes. This allows the braising liquid to reduce slightly and develop a glossy, concentrated sauce. Remove and discard the fresh bay leaves before serving.
Taste the sauce and adjust seasoning with additional kosher salt or ground black pepper as needed. The final dish should have a deep, complex flavor with a perfect balance of sweetness from the balsamic and richness from the beef. Garnish with 0.25 cup chopped fresh parsley just before serving.
Pro Tips For Making Balsamic Braised Beef
- SEAR THE ROAST FIRST: High heat for 3-4 minutes per side until deep brown—this isn’t just for looks. The crust locks in flavor and prevents the meat from turning mushy later. I used to rush this, and the braise always tasted underwhelming.
- DEGLAZE WITH WINE IMMEDIATELY: As soon as you remove the roast, pour in that red wine right away while the pan is still hot. Let it bubble for 2-3 minutes to pull up all the browned bits—this is where half the flavor hides. Skipping this step means a thinner, less rich sauce.
- THICKEN THE SAUCE WITH ONIONS: Don’t just chop the onion—cook it until caramelized (10-12 minutes) before adding broth. The natural sugars break down and thicken the sauce as it braises, giving it that glossy, jammy texture without needing cornstarch.
- SIMMER COVERED, BUT NOT TOO TIGHT: Use a lid with a slight gap or loosely tented foil—this lets steam escape, keeping the liquid from turning into a watery mess. After 2 hours, check the liquid level and add a splash of broth if needed; the roast should be tender but not drowning.
Essential equipment for this recipe
Dutch Oven Essentials
The heart of this recipe is a heavy Dutch oven—I swear by Le Creuset or Lodge for their even heat distribution and durability. A 5-6 quart size works perfectly for this recipe, accommodating the beef and braising liquid without overflow. The tight-fitting lid is crucial for trapping steam during the braise, ensuring tender results. If you don’t own one, a deep oven-safe skillet or heavy pot with lid will do in a pinch, though heat control may be less precise. 🥘
Precision Thermometer
A meat thermometer is non-negotiable for perfect doneness. I use the ThermoWorks Smoke for its dual probes—one tracks the oven temp while the other monitors the beef’s internal temperature. Aim for 203°F for fork-tender chuck roast. The probe helps avoid overcooking, which can turn the meat dry. If you’re using short ribs, target 195°F for maximum tenderness. A budget-friendly option like OXO’s Bluetooth thermometer works well too. 🌡️
Wooden Spoons & Utensils
Invest in a heat-resistant wooden spoon (I love OXO Good Grips) for stirring and deglazing—it won’t scratch your Dutch oven like metal utensils. A sharp chef’s knife (like Wüsthof’s 8-inch) is essential for prepping onions, carrots, and garlic efficiently. Avoid plastic utensils—they melt under high heat. For measuring, a stainless steel liquid measuring cup ensures accuracy with the wine and broth. 🔪
Basting Tools
While not mandatory, a basting brush (like Silpat’s silicone brush) helps spread the braising liquid over the beef during cooking, ensuring even flavor infusion. If you’re short on time, a silicon spatula works too. For serving, a slotted spoon lets you easily transfer beef to plates while keeping the sauce behind. A ladle comes in handy for skimming excess fat from the sauce if desired. 🍲
Storage Containers
Leftovers deserve proper storage! Use glass airtight containers (like Pyrex) for fridge storage—glass preserves flavors better than plastic. For freezing, quart-sized freezer bags (with ZipLoc’s re-sealable design) save space and prevent freezer burn. Label containers with dates to track freshness. Reheat gently on the stovetop with a splash of broth to restore the sauce’s silky texture. ❄️
Nutrition facts
Frequently asked questions
Can I use a different cut of beef besides chuck roast?
This recipe works beautifully with short ribs or brisket, though cooking times will vary. Short ribs typically need 2.5-3 hours while brisket may require 4+ hours for optimal tenderness. The key is to monitor internal temperature—aim for 203°F for chuck/short ribs or 195°F for brisket.
What if I don't have red wine or balsamic vinegar?
No problem! For wine, use dry white wine or extra beef broth. For balsamic, substitute with apple cider vinegar or 1 tablespoon brown sugar + 1/2 tablespoon red wine vinegar. The dish will still be delicious, though the depth of flavor will differ slightly. The braising technique remains the same.
How do I know when the beef is done?
Use a meat thermometer for perfect results—chuck roast should reach 203°F for fork-tender texture. If you don't have one, cut into the thickest piece: the meat should separate easily with minimal resistance. For short ribs, aim for 195°F. Never rely on visual cues alone!
Can I make this in a slow cooker?
Yes! Sear the beef first, then transfer everything to a 6-quart slow cooker. Cook on low for 8 hours or high for 5 hours. The liquid may be thinner, so reduce it on the stovetop at the end. The slow cooker method is great for hands-off cooking but lacks the caramelization of oven braising.
Why did my sauce turn out too acidic?
This usually happens when the balsamic vinegar wasn't balanced with enough sweetness or richness. Try adding 1 tablespoon honey or brown sugar during the final 10 minutes of cooking. Alternatively, stir in 1/4 cup tomato paste to mellow the acidity. Taste as you go—adjust gradually!