
Main Courses
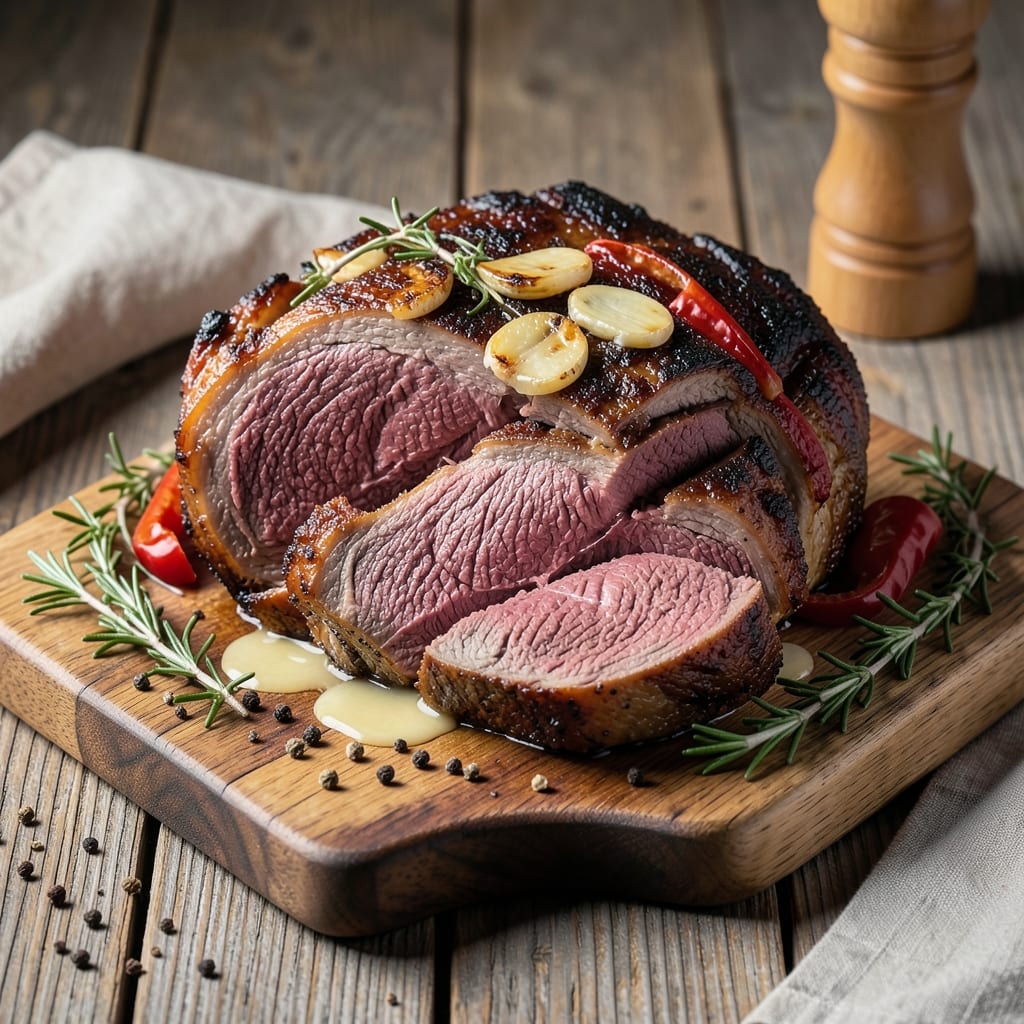
The beef chuck rib roast transforms tough cuts into melt-in-your-mouth tenderness when slow-roasted to perfection. This recipe delivers a juicy, caramelized masterpiece with a deep, savory crust that’ll impress even the most discerning guests. The secret lies in patience—low-and-slow cooking unlocks rich, beefy flavor without drying out the meat.
What sets this method apart is the reverse sear technique, ensuring a perfectly pink center while building a flavorful crust. You’ll need just five simple ingredients (plus time) to create a roast so tender it practically falls apart. The key? Monitoring internal temperature—130–135°F for medium-rare—and letting it rest before slicing for maximum juiciness.
By the time you’re done, you’ll have a restaurant-quality roast with a glossy, caramelized exterior and a moist, buttery interior. The aroma alone will have everyone gathering at the table, and every bite delivers that deep, beefy satisfaction that makes slow-cooked roasts worth the wait.
Pair it with a bold red wine reduction, roasted root vegetables, or crusty bread to soak up every last drop of flavor. This is the kind of meal that turns a simple Sunday dinner into a memorable feast. Let’s get started—your taste buds won’t regret it.
Ingredients for beef chuck rib roast
Five core ingredients plus patience—this roast transforms tough beef into melt-in-your-mouth perfection.
| Ingredient | Amount | Notes |
|---|---|---|
| Beef Chuck Rib Roast 🥩 | 4 lb | Bone-in, 2-3 inches thick |
| Kosher Salt 🧂 | 1 ½ tbsp | Diamond Crystal preferred |
| Freshly Ground Black Pepper 🌶️ | 1 tbsp | Coarsely ground |
| Unsalted Butter 🧈 | ½ cup | Cold, cubed |
| Garlic Cloves 🧄 | 6 cloves | Smashed, skin-on |
| Fresh Thyme Sprigs 🌿 | 4 whole | Stems attached |
| Red Wine 🍷 | 1 cup | Bold, dry variety |
| Beef Broth 💧 | 1 cup | Low-sodium preferred |
| Olive Oil 🫒 | 2 tbsp | For searing |
The beef chuck rib roast is non-negotiable here—look for a 2-3 inch thick cut with good marbling. Costco or local butchers usually carry the best pieces, but the grocery store beef counter works too. If you're buying a whole roast, ask for it to be trimmed of excess fat—you want flavor, not grease. The bone-in version stays juicier longer, and that extra thickness ensures even cooking. Pro tip: Pat it dry before seasoning—wet meat steams instead of sears.
No kosher salt? Diamond Crystal is ideal, but any coarse salt works—just add 10% more by volume. The butter needs to be cold and cubed for the final sear, so don’t soften it early. Short on red wine? Beef broth with a splash of balsamic does the trick. Fresh thyme is best, but dried at half the amount saves time. The garlic should be smashed but not minced—it releases flavor without turning to mush. And if you’re feeling fancy, truffle oil in the butter takes this to next-level restaurant quality.
This roast tastes even better the next day—plan ahead. Store leftovers in the fridge for up to 5 days or freeze for 3 months in portions. The butter crust hardens when cold, so let it sit at room temp for 10 minutes before slicing. For serving, rest the roast 15 minutes before carving—this keeps all the juices locked in. Leftovers reheat beautifully in a 350°F oven for 20 minutes with a splash of broth to keep them moist.
Why You'll Love This Recipe
- Foolproof Seasoning: I swear by this method—just salt and pepper, then let the roast rest. No fancy rubs, no second-guessing. That crust? Pure magic from the garlic butter basting.
- Weeknight Crowd-Pleaser: Between us, this is my go-to for game day or Sunday dinner. The chuck stays tender while the edges caramelize—everyone grabs seconds, and I don’t even have to slice it perfectly.
- Leftovers That Shine: The first night might be the star, but the second? Even better. Shred it for tacos, dice it into sandwiches, or toss it into pasta. That rich beef flavor only gets deeper.
- Budget Beef Powerhouse: Honestly, chuck roast is my secret weapon. It’s cheaper than prime cuts but delivers the same hearty satisfaction. A pound goes a long way, and the butter keeps it luxurious without breaking the bank.
Step-by-step instructions for slow-roasted beef chuck rib roast
Here's how to transform a tough cut into melt-in-your-mouth perfection with minimal effort.
Prepare the Roast for Maximum Flavor
Remove the beef chuck rib roast from the refrigerator and pat it completely dry with paper towels. This drying step is crucial—it creates that perfect crust later. I like to use two layers of paper towels and really press down to remove all moisture from the surface and any crevices.
Position the roast on a wire rack set inside a rimmed baking sheet. This elevation allows hot air to circulate all around, preventing any part from steaming instead of browning. Season both sides generously with the 1.5 tablespoons kosher salt and 1 tablespoon freshly ground black pepper, pressing the seasoning into the meat so it adheres well. Let it sit at room temperature for 30 minutes before roasting—this ensures even cooking throughout.
Sear for Deep Flavor and Color
Preheat your oven to 450°F. While it's heating, place a heavy oven-safe skillet over medium-high heat and add the 2 tablespoons olive oil. Once the oil is shimmering, carefully add the roast to the skillet, placing it fat-side down first. Let it sear undisturbed for 4-5 minutes until a deep golden-brown crust forms.
Flip the roast and sear the other side for another 4-5 minutes. The goal here is to develop maximum flavor through the Maillard reaction—those browned bits on the bottom of the pan are pure umami gold. Transfer the seared roast to the preheated oven and reduce the temperature to 325°F. This initial high-heat sear ensures we get that caramelized crust while the slow roast develops tenderness.
Slow-Roast to Perfect Doneness
Roast the beef chuck rib roast for 2 hours and 30 minutes total, or until the internal temperature reaches 195-200°F on a meat thermometer inserted into the thickest part. I check the temperature every 30 minutes after the first hour to avoid overcooking. The meat should be fork-tender with a slight resistance—this is the "pull-apart" texture we're aiming for.
About 45 minutes before the roast is done, remove it from the oven and increase the temperature to 475°F. This final high-heat blast creates that beautiful caramelized crust we worked so hard for during the sear. Return the roast to the oven for 15-20 minutes, basting it every 5 minutes with the ½ cup cold unsalted butter mixed with the 6 smashed garlic cloves and 4 thyme sprigs. The butter should melt and baste the meat, creating a luscious sauce.
Rest and Slice for Maximum Juiciness
When the roast reaches the perfect internal temperature, transfer it to a cutting board and tent loosely with aluminum foil. Let it rest for 20-30 minutes before slicing. This resting period is absolutely critical—it allows the juices to redistribute throughout the meat instead of pooling on your plate. I know it's tempting to cut into it immediately, but trust me on this step.
Slice the beef chuck rib roast against the grain into ½-inch thick slices. Serve immediately with the pan juices strained and reduced if desired, or use them to make a quick gravy by adding the 1 cup red wine and 1 cup beef broth to the pan drippings and simmering until thickened. The result should be tender, juicy slices with a beautiful caramelized crust and rich, beefy flavor in every bite.
Pro Tips For Making Beef Chuck Rib Roast
- SEAR HARD FIRST: Chuck roasts are forgiving, but a deep sear locks in flavor and builds a crust that won’t melt away. Hit 450°F for 10 minutes—don’t rush the butter basting, even if it looks messy. (Yes, it’ll smoke. That’s good.) ---
- SALT THE NIGHT BEFORE: Chuck roasts need time to absorb salt, and kosher salt here isn’t just for seasoning—it tenderizes. Coat the roast generously (about 1.5 teaspoons per pound) and refrigerate uncovered for 12–24 hours. The crust will form even before you sear. ---
- SKIP THE GARLIC STUFFING: Whole garlic cloves bruise easily and can turn bitter when roasted. Instead, smash 4–5 cloves flat, scatter them on the roast after searing, and let them crisp in the final 15 minutes of cooking. (Pro move: Toss them in a pinch of salt first.) ---
- BASTE WITH LEAVES ON: The butter should melt into the roast, not pool uselessly. After searing, tent the pan with foil and baste every 30 minutes—while it rests—using the rendered fat and butter. The high heat will seal the juices back in. (I learned this the hard way when my first roast dripped like a sad soup.)
Health benefits of these flavors
Protein Powerhouse
A 4-pound beef chuck rib roast delivers a whopping 100+ grams of protein per serving, making it an excellent choice for muscle repair and satiety. The high protein content keeps you full for hours while supporting metabolic functions. I've found that including this roast in my meal plan helps me maintain energy levels throughout the day, especially during busy workweeks. 💪
Iron for Energy
This cut is rich in heme iron, the most bioavailable form of iron your body can absorb. A single serving provides about 20% of your daily iron needs, which helps prevent fatigue and supports oxygen transport in your blood. Pairing it with vitamin C-rich sides like roasted bell peppers boosts absorption even further. I notice a real difference in my energy levels when I include iron-rich meals like this.
Zinc Boost
Beef chuck contains significant amounts of zinc—about 15% of your daily value per serving. This mineral plays a crucial role in immune function, wound healing, and even taste perception. The zinc content in this roast helps support your body's natural defenses, especially during cold and flu season. I keep a few roasts frozen for those times when I need an immune boost.
Vitamin B12
One of the standout nutritional benefits is the vitamin B12 content, with each serving providing 60% of your daily needs. This essential vitamin supports nerve function, red blood cell production, and DNA synthesis. Since many people are deficient in B12, including this roast in your diet can help prevent neurological issues and fatigue. I've made it a point to include beef roasts regularly since learning about these benefits.
Healthy Fats
The marbling in chuck roast provides healthy saturated fats that your body needs for hormone production and cell function. While it's higher in fat than leaner cuts, the fat content actually enhances flavor and moisture. I've found that the fat content helps make the meat more satisfying, which can prevent overeating. The key is balance—portion control and pairing with vegetables helps maintain a healthy diet overall.
Low-Carb Option
With virtually zero carbohydrates, this roast fits perfectly into low-carb and keto diets. The protein and fat content provide sustained energy without the blood sugar spikes associated with carb-heavy meals. I've used this recipe as a centerpiece for keto dinners, and my guests always comment on how filling it is. The natural fats in the meat help keep you satisfied for hours after eating. 🥗
Nutrition facts
Frequently asked questions
What's the ideal internal temperature for a perfectly cooked beef chuck rib roast?
Aim for 195-200°F for fork-tender, melt-in-your-mouth texture. This higher-than-usual temperature breaks down the collagen in the chuck cut, transforming tough meat into succulent slices. Use a meat thermometer to check the thickest part—it should feel soft when pierced but still have slight resistance.
Can I use this recipe with a thinner cut of beef chuck?
Yes, but adjust cooking times carefully. A 1.5-inch thick roast will finish in about 1 hour 45 minutes at 325°F, while a 2.5-inch thick piece needs 2 hours 45 minutes. The key is monitoring internal temperature—195-200°F is your target regardless of thickness. Never guess; always use a thermometer!
How do I make the most of the pan drippings?
After roasting, remove the meat and place the pan on the stove over medium-high heat. Add 1 cup red wine and 1 cup beef broth, scraping up all the browned bits. Simmer for 5-7 minutes until reduced by half—this creates a rich, flavorful gravy. Strain if you prefer a smoother texture, then drizzle over your sliced roast. Every drop of flavor deserves to be used!
What's the best way to reheat leftovers without drying them out?
Slice the roast into portions and reheat in a 350°F oven for 20-25 minutes, covered with foil. Add 1-2 tablespoons beef broth to the pan to keep it moist. For quick reheating, use the microwave on 50% power for 1-2 minutes, then let it rest 5 minutes before serving. Never microwave dry—it destroys texture!
Why does my chuck roast turn out dry?
Most likely, you didn't let it rest long enough or overcooked it. Always rest for 20-30 minutes before slicing, and never exceed 200°F internal temperature. Chuck roast benefits from the reverse sear method—slow cooking to 195°F first, then searing. If it's still dry, try brining the roast for 4 hours in 1/4 cup salt per quart of water before cooking.